Create Menu for Brands
Brands on the Shop Page
When Product(s) are created, the Brands they belong to are also added during that time. Therefore, when the Customers select a Product Category on the Shop, they will see the all the Brands on the left side under that specific Category. The example screenshot indicates the Brands under the selected Category:
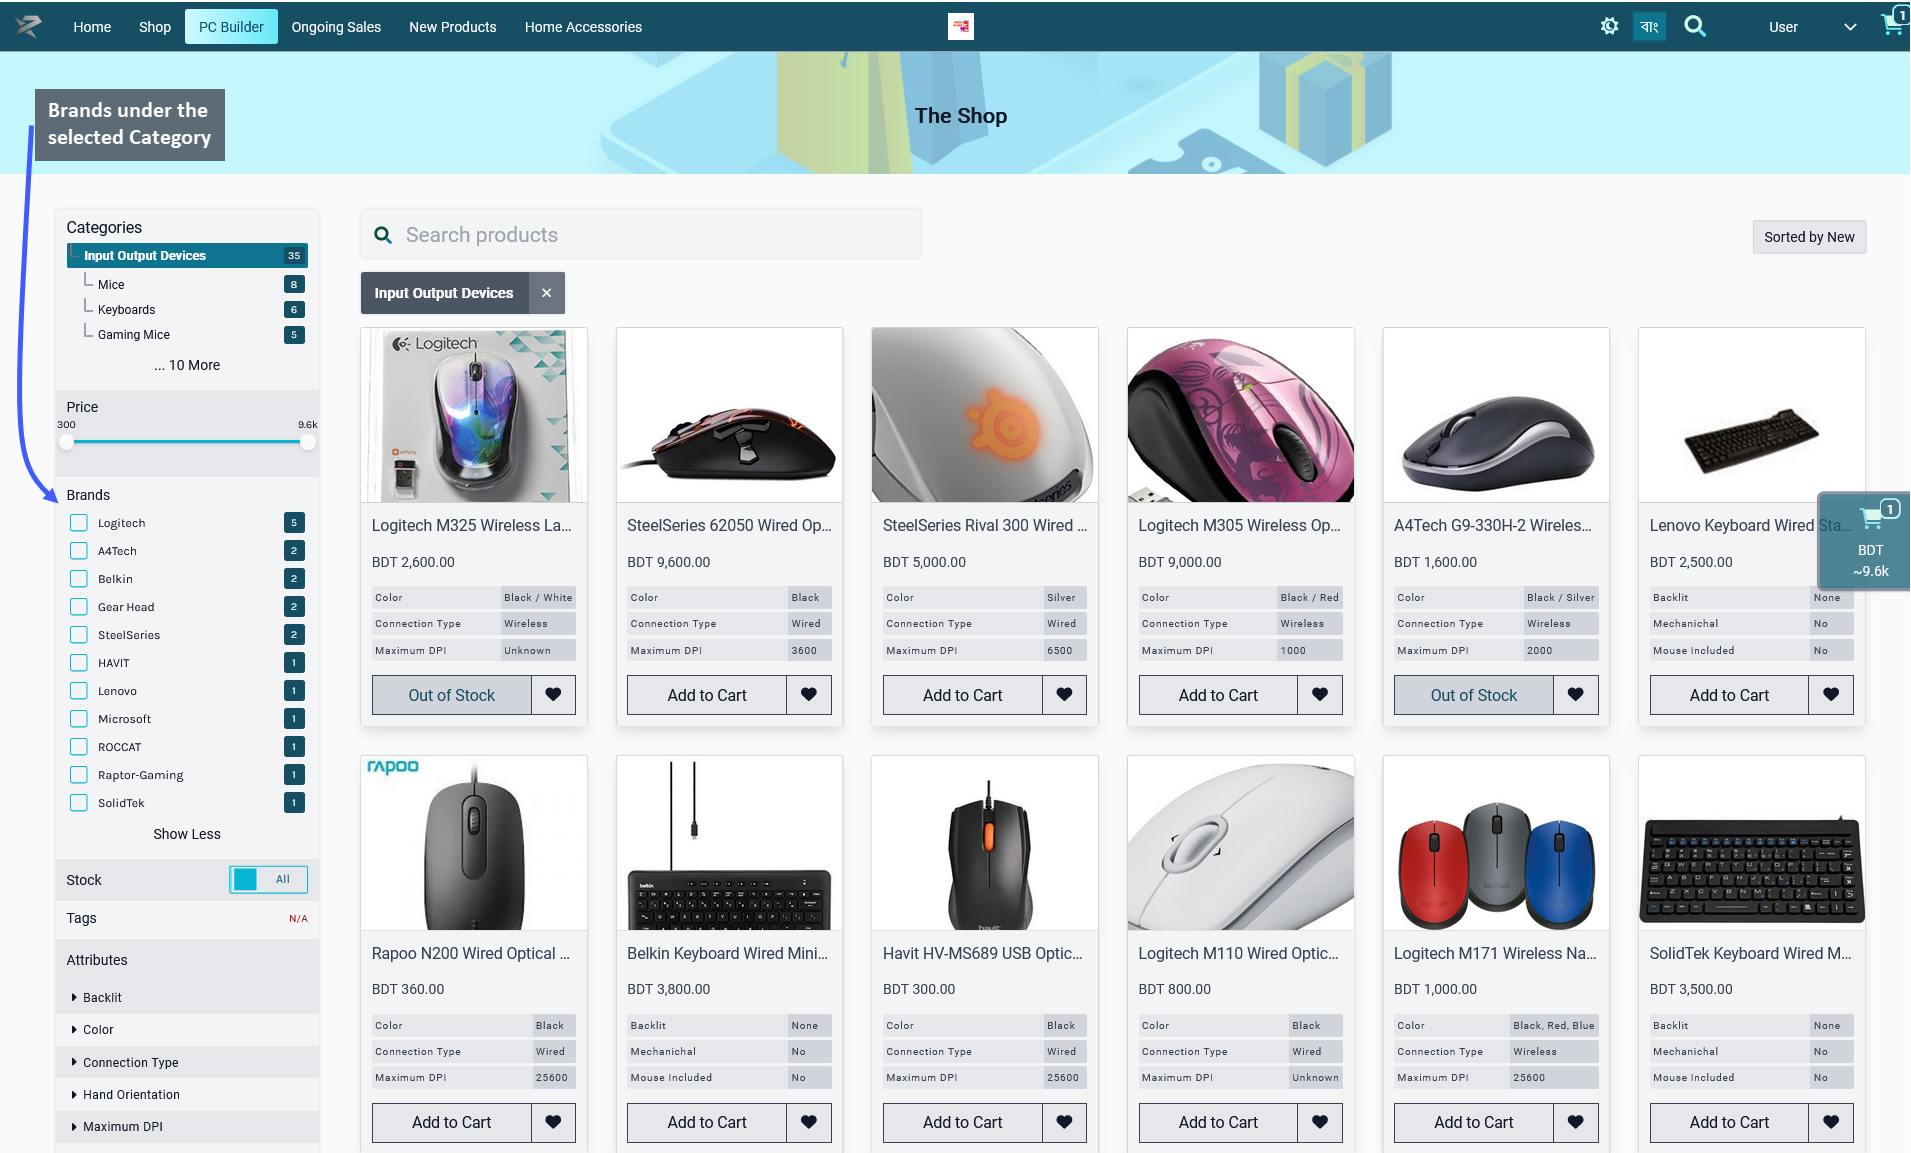
Image: When a specific Product Category is selected, the Brands it includes will show underneath it.
If a specific Brand is selected, then only Products under that Brand will show. For example, in the screenshot below, it can be seen that selecting the Logitech Brand has filtered out the Products of that Brand only.
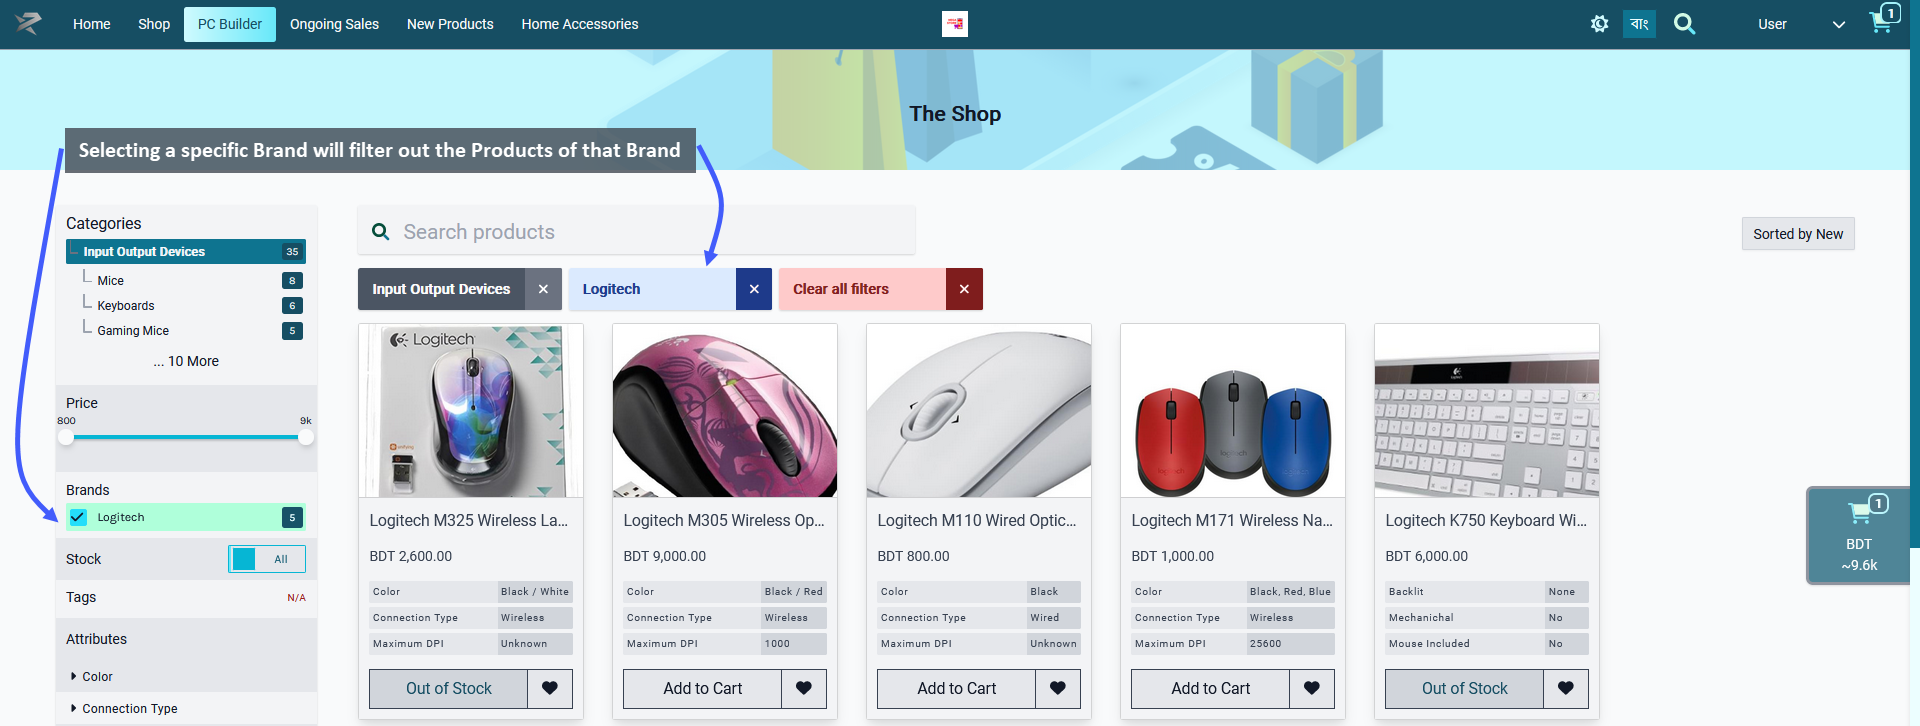
Image: When a specific Brand is selected, Products under that Brand will be filtered out and displayed.
Create Dropdown Menu for Brands
Shop Owners can create Menu within the Default Header to create dropdown menu for Brands. To do this, first go to the Menu section under the Content Management module which will open the settings to create menus. From here, select the Edit button under the Default Header (Commerce) menu:
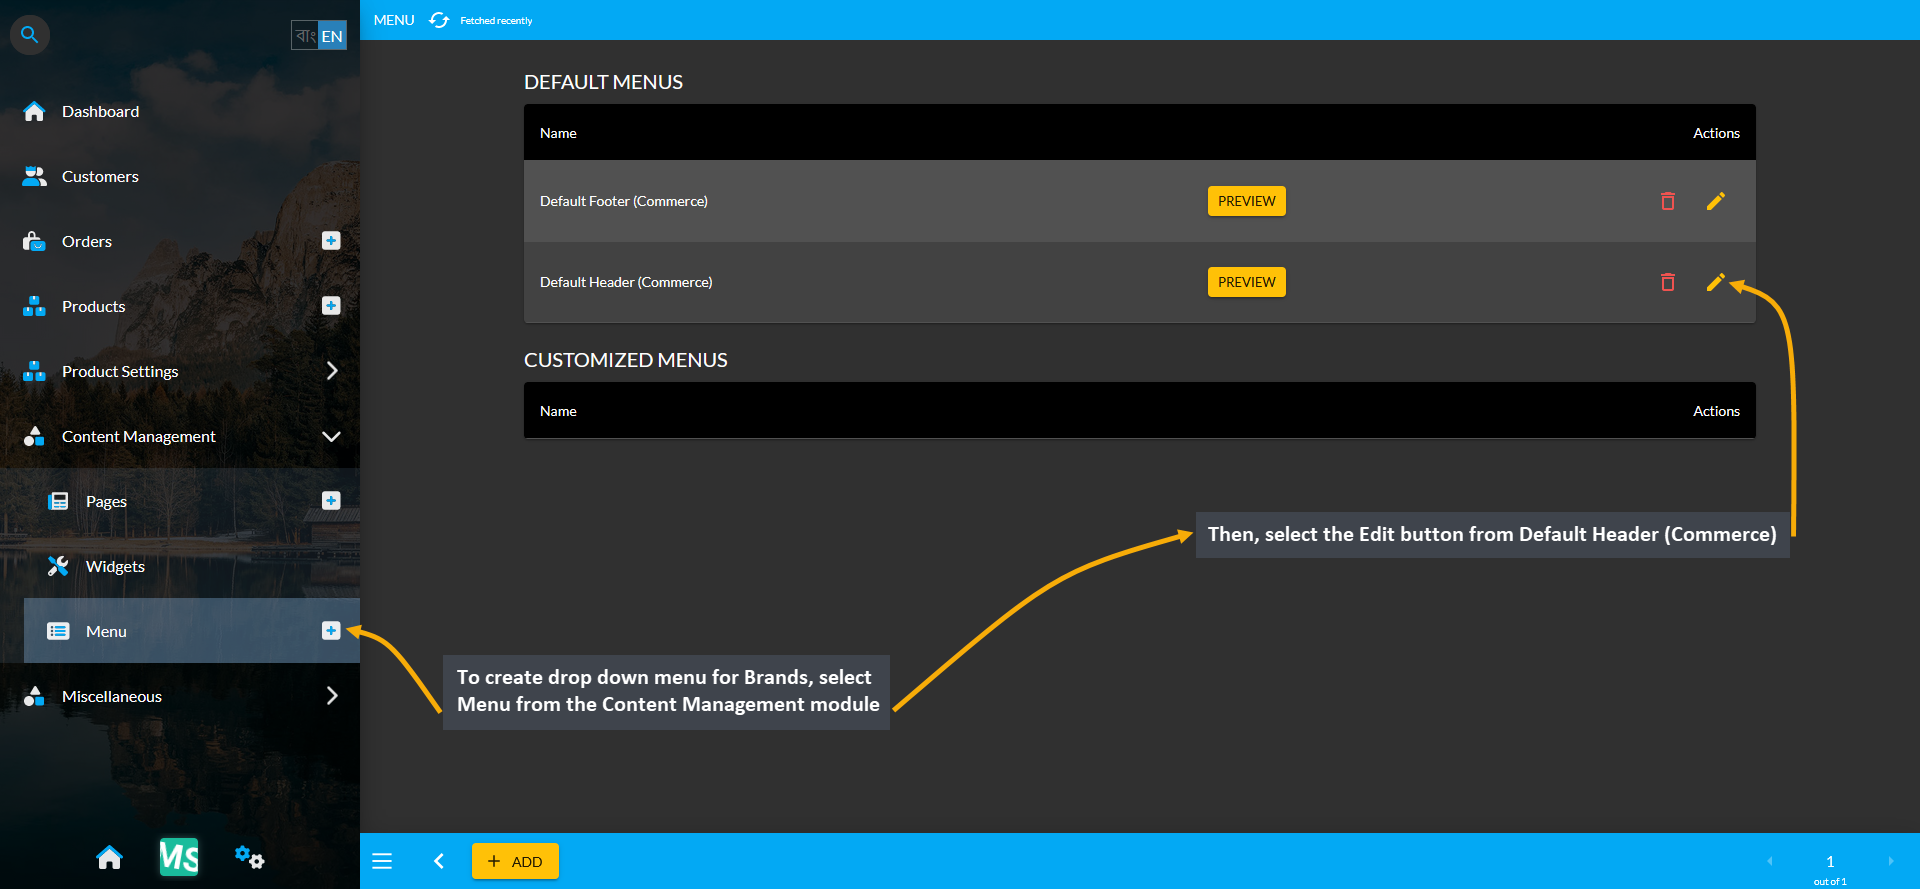
Image: To create a dropdown menu for Brands, go to Menu and select Edit button from the Default Header.
Click ADD Button to Create New Menu
On Default Header (Commerce) menu, click the ADD button from Custom Link to create new menu for Brands. Clicking on the ADD button will create new menu each time that can be assigned as main menu or sub-menu.
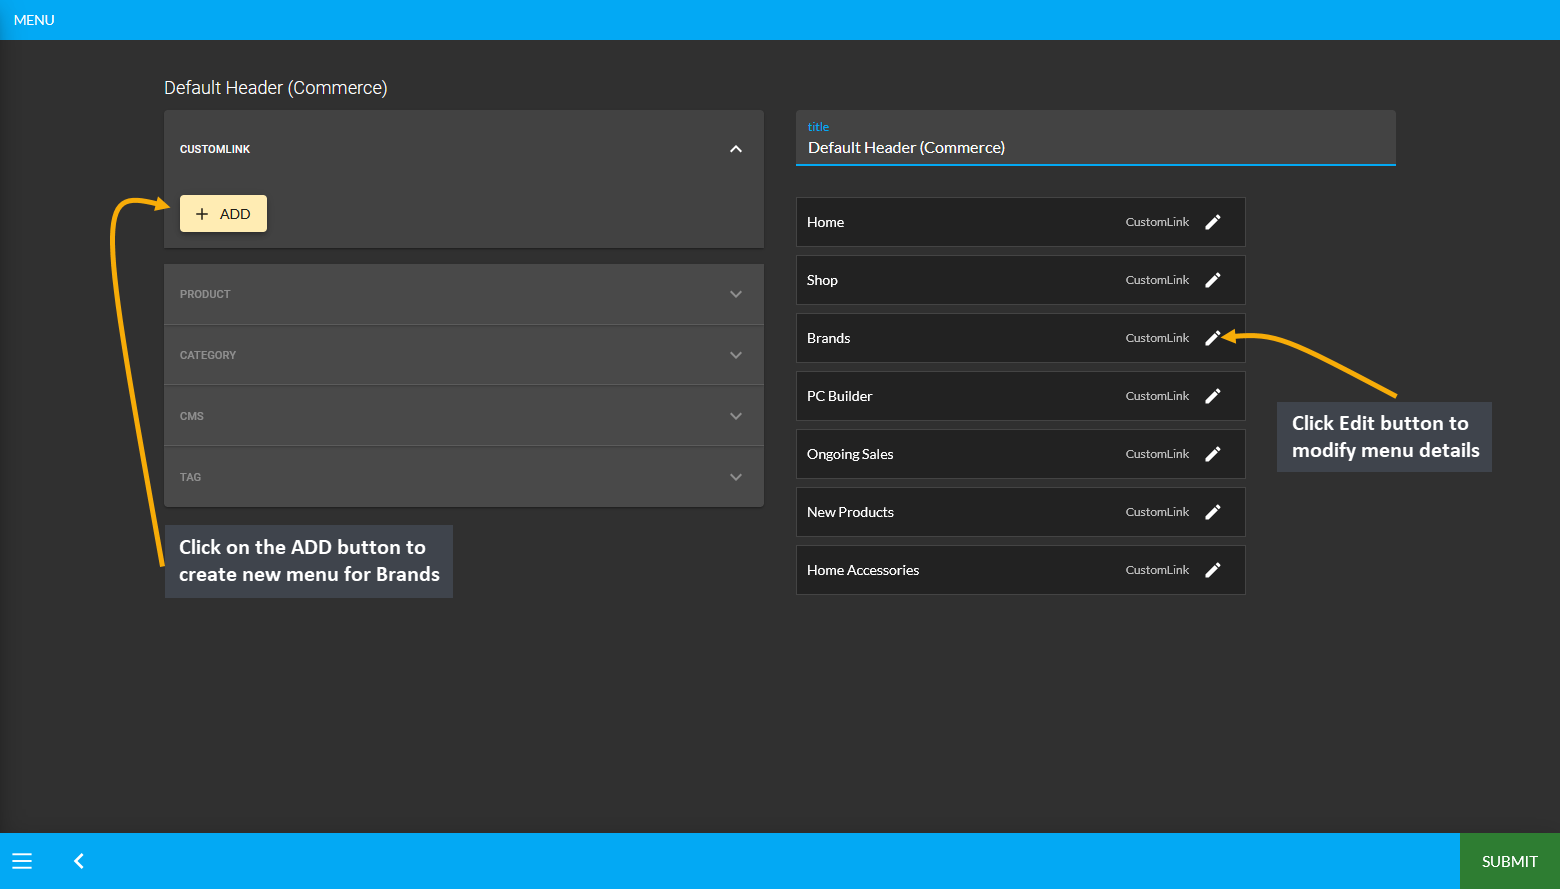
Image: Click the ADD button under Default Header (Commerce) to create a New Menu for Brands.
Edit Pop-up Details to Create Brands Menu
After creating the New Menu, click its Edit button and a pop-up will appear to edit the details of the menu. From here, set its Title as Brands and click the Update button to create new Brands menu. By keeping Brands as the main menu, the Shop Owner can add sub-menus with several Brand Names and links to their Pages.
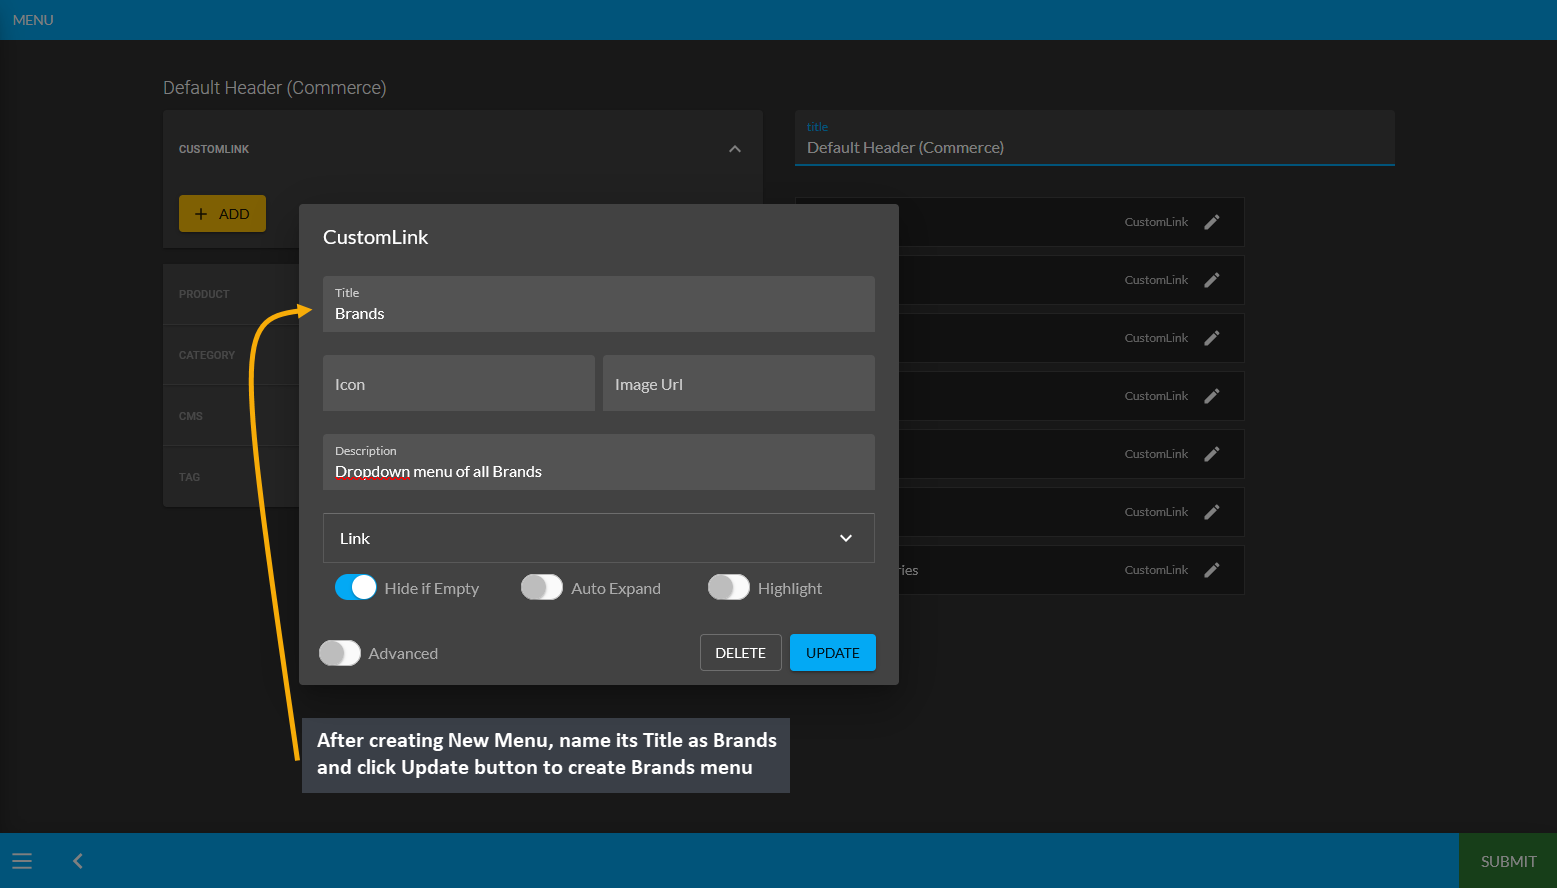
Image: On the pop-up, set Menu Title as Brands and click the Update button to create new "Brands" Menu.
Create Sub-Menu for brands under Main Brands Menu
In the example below, it can be seen that 11 Brands are listed under Input Output Devices Category, so the Shop Owner will have to create 11 sub-menu of these brands under the Main Brands menu.
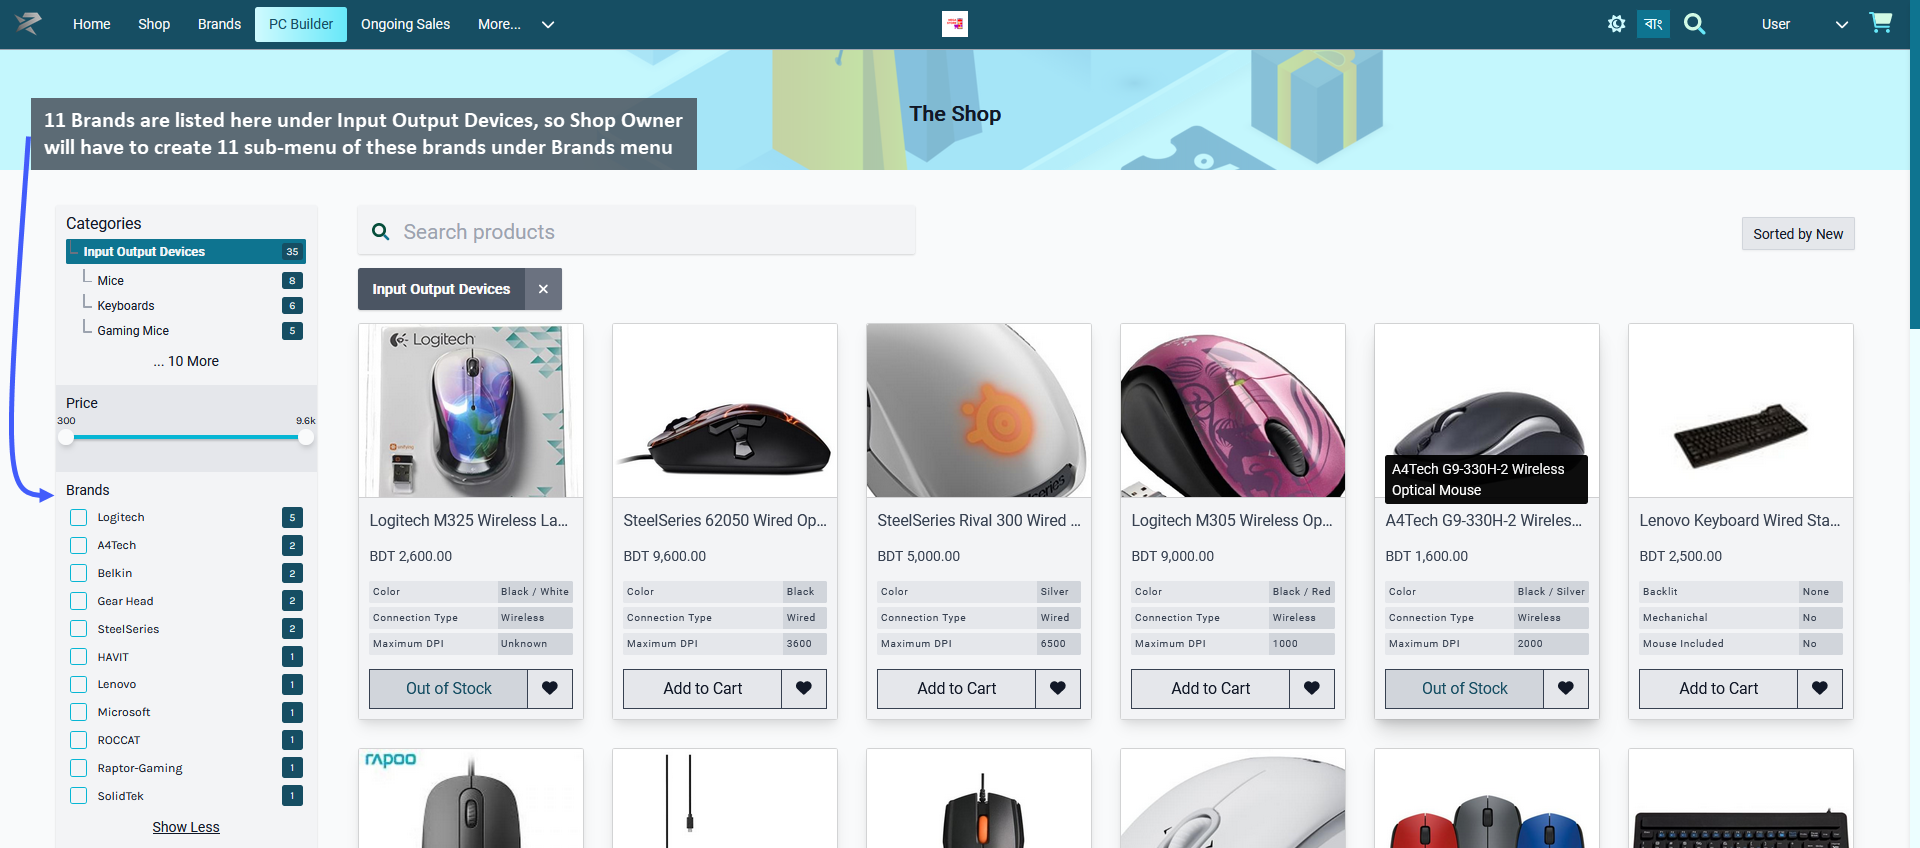
Image: The number of Brands appearing under the selected Category will have to be created as sub-menus.
To create the sub-menu for these 11 brands, click the ADD button from Custom Link to create 11 new menu and drag them under the Main Brands Menu which will automatically convert them into sub-menus.
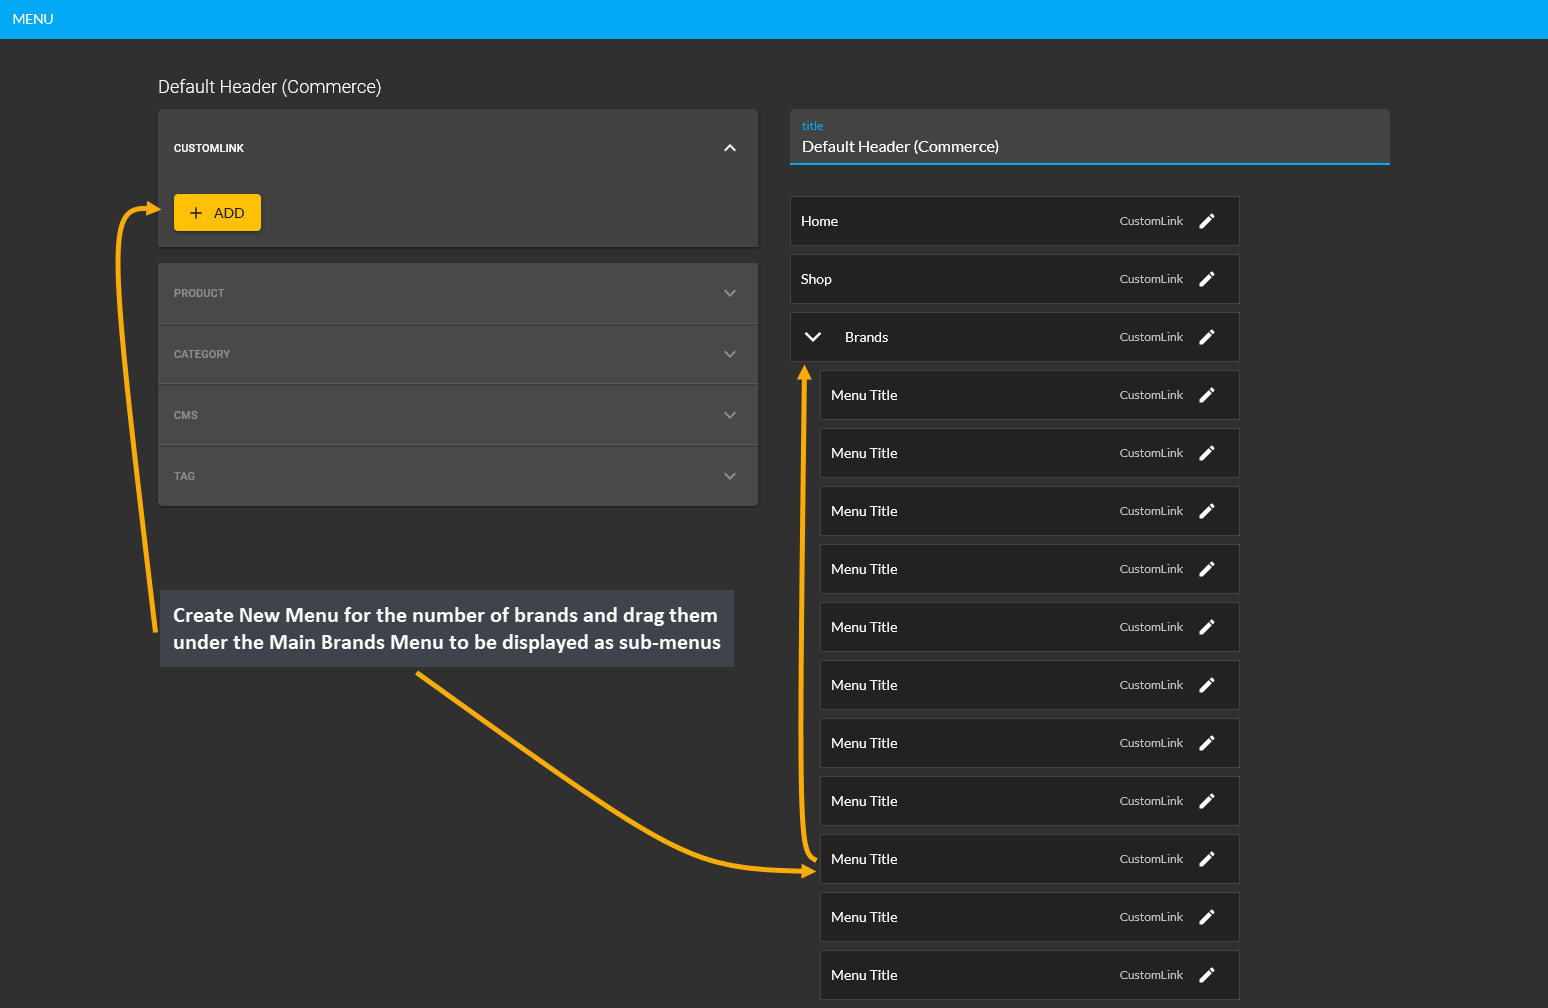
Image: Create new menu for the number of brands and drag them under main Brands menu to create sub-menus.
Now, as the sub-menus for brands are created, the Shop Owner can edit them by clicking on the Edit icon beside the menu. This will open a pop-up where Title and Link needs to be filled to activate the sub-menu. Set the Title based on the brand name like Logitech and copy the relative link from the Shop Page and click Update.
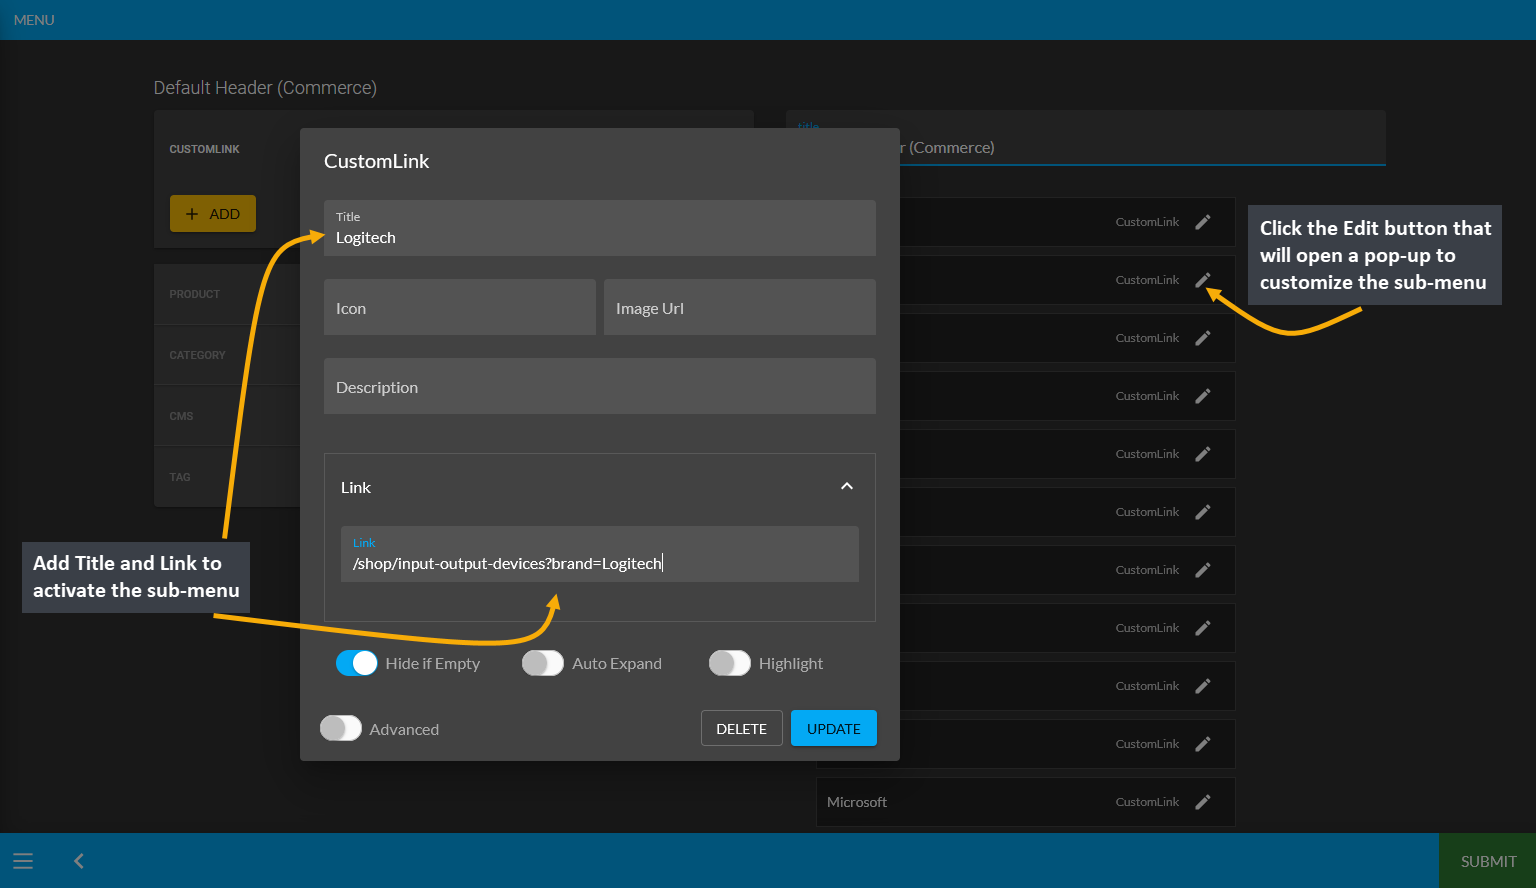
Image: Edit the sub-menu by clicking on the Edit button and fill out the Title and the Link on pop-up.
Getting the Relative Link for Brands Sub-Menu
Retrieving the relative link can be done in a few simple steps. First, visit the Shop Page and from the list of Brands that shows under the selected Category, select the specific brand like Logitech. This will only show the Products under the Logitech brand. Now, from the URL search bar, copy the relative link that will begin from /shop like:
/shop/input-output-devices?brand=Logitech
/shop/input-output-devices?brand=A4Tech
/shop/input-output-devices?brand=SteelSeries
Simply copying and pasting relative link to the Link option on sub-menu’s editing pop-up window will activate the designated brand’s sub-menu. Then, click the Update button to complete the process.
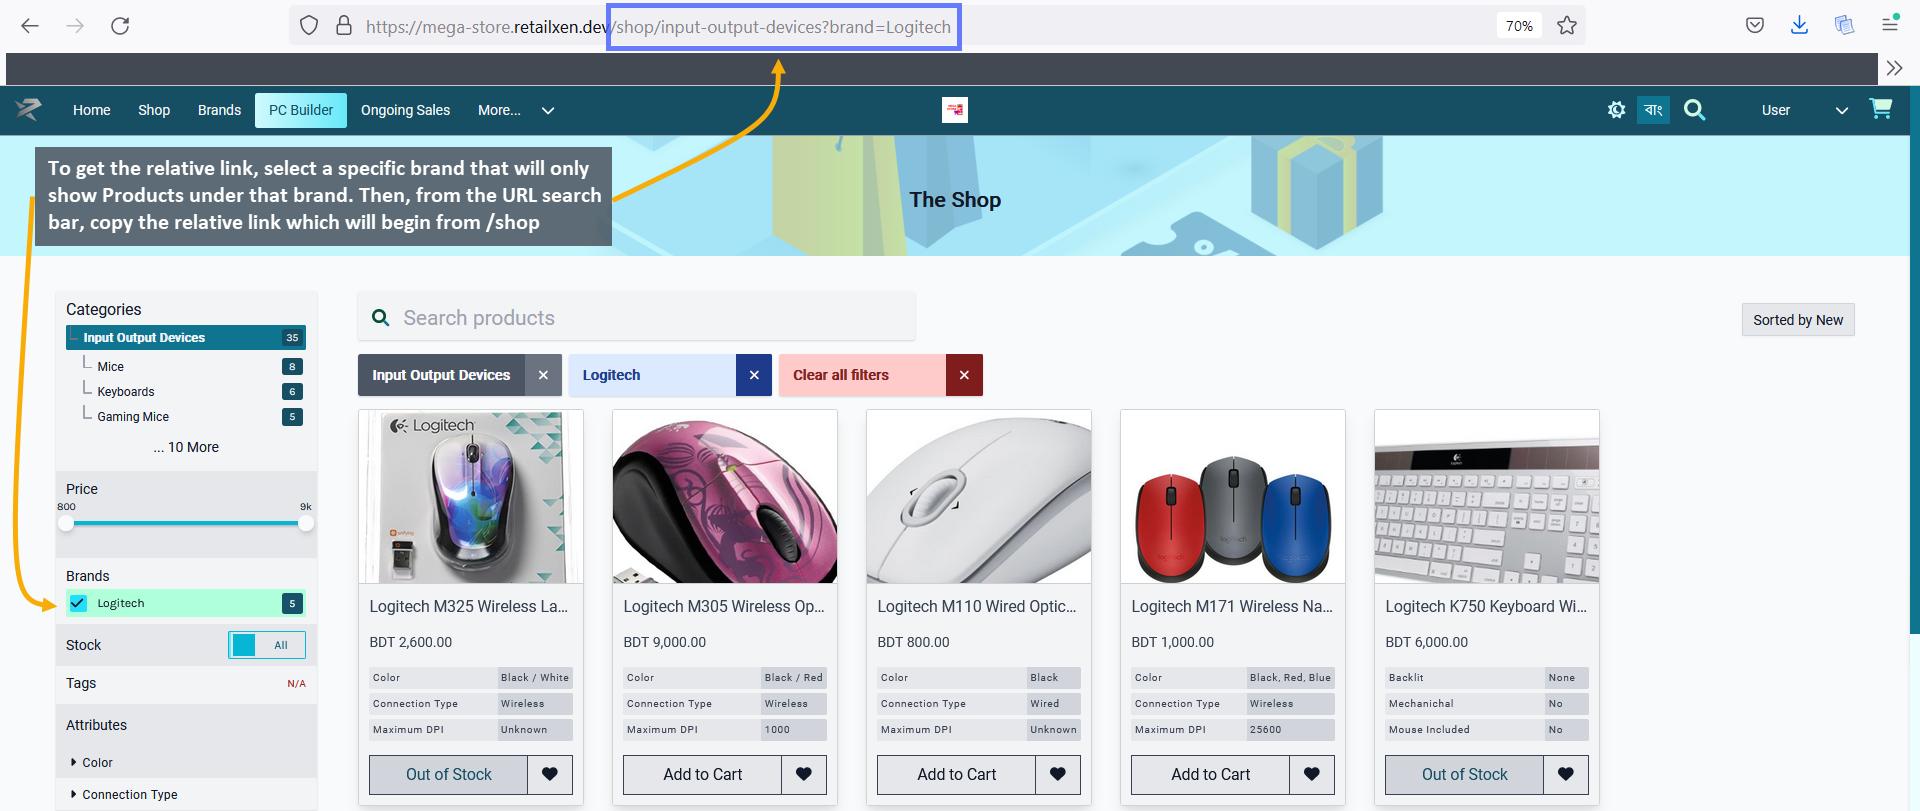
Image: Get relative link by selecting a specific Brand and copy the link from URL that begins from /shop.
Sub-Menu for Brands added under the Main Brands Menu
Now, edit the sub-menus of all the 11 Brands in the same way by adding the Title and Link on the edit window pop-up. Click on Update to complete the process which will activate all the sub-menus under the Main Brands Menu. Once done, all the added sub-menus can be seen under Main Brands Menu on Default Header Page. Then, hit the Submit button that to save all the progress of the Brands dropdown menu creation.
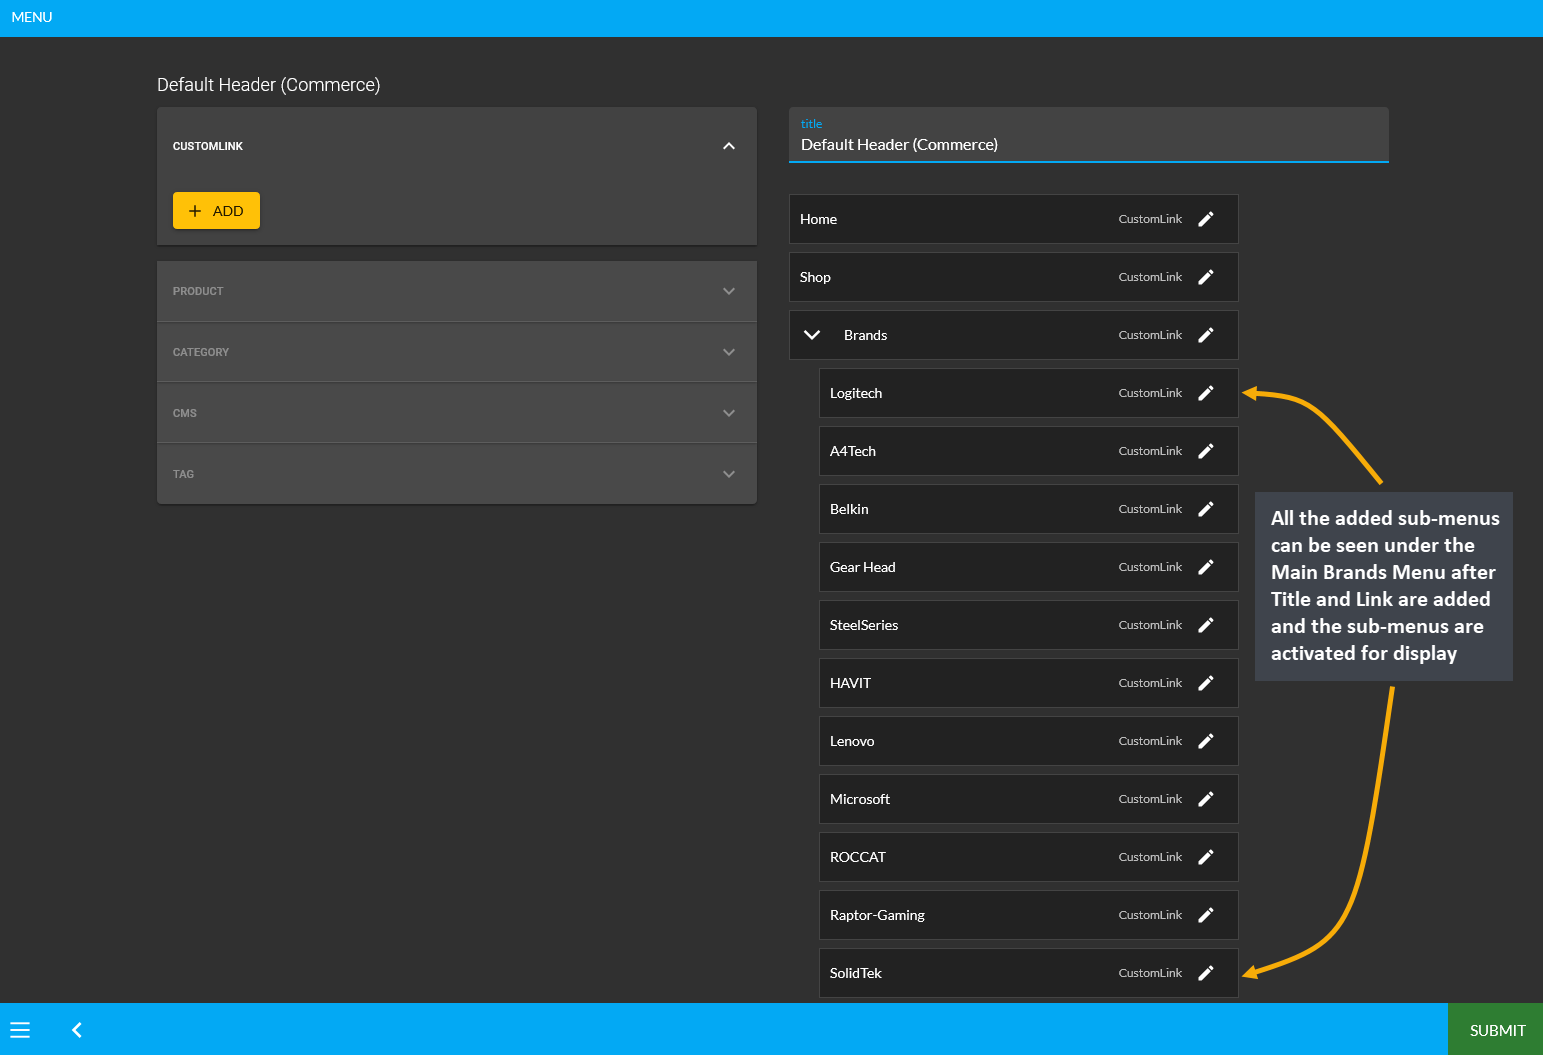
Image: Added sub-menus can be seen under the Main Brands Menu after they are updated with Title and Link.
On The Website, the Main Brands Menu can be seen on the Header with a dropdown option to select the sub-menus of different brands like Logitech, A4Tech, Belkin, Gear Head, and SteelSeries etc. Here, clicking on any of the brands will redirect to that brand’s Product Page. For instance, if Logitech sub-menu is clicked from under the Brands Menu dropdown, it will redirect to Logitech’s Product Page as shown in the example screenshots.
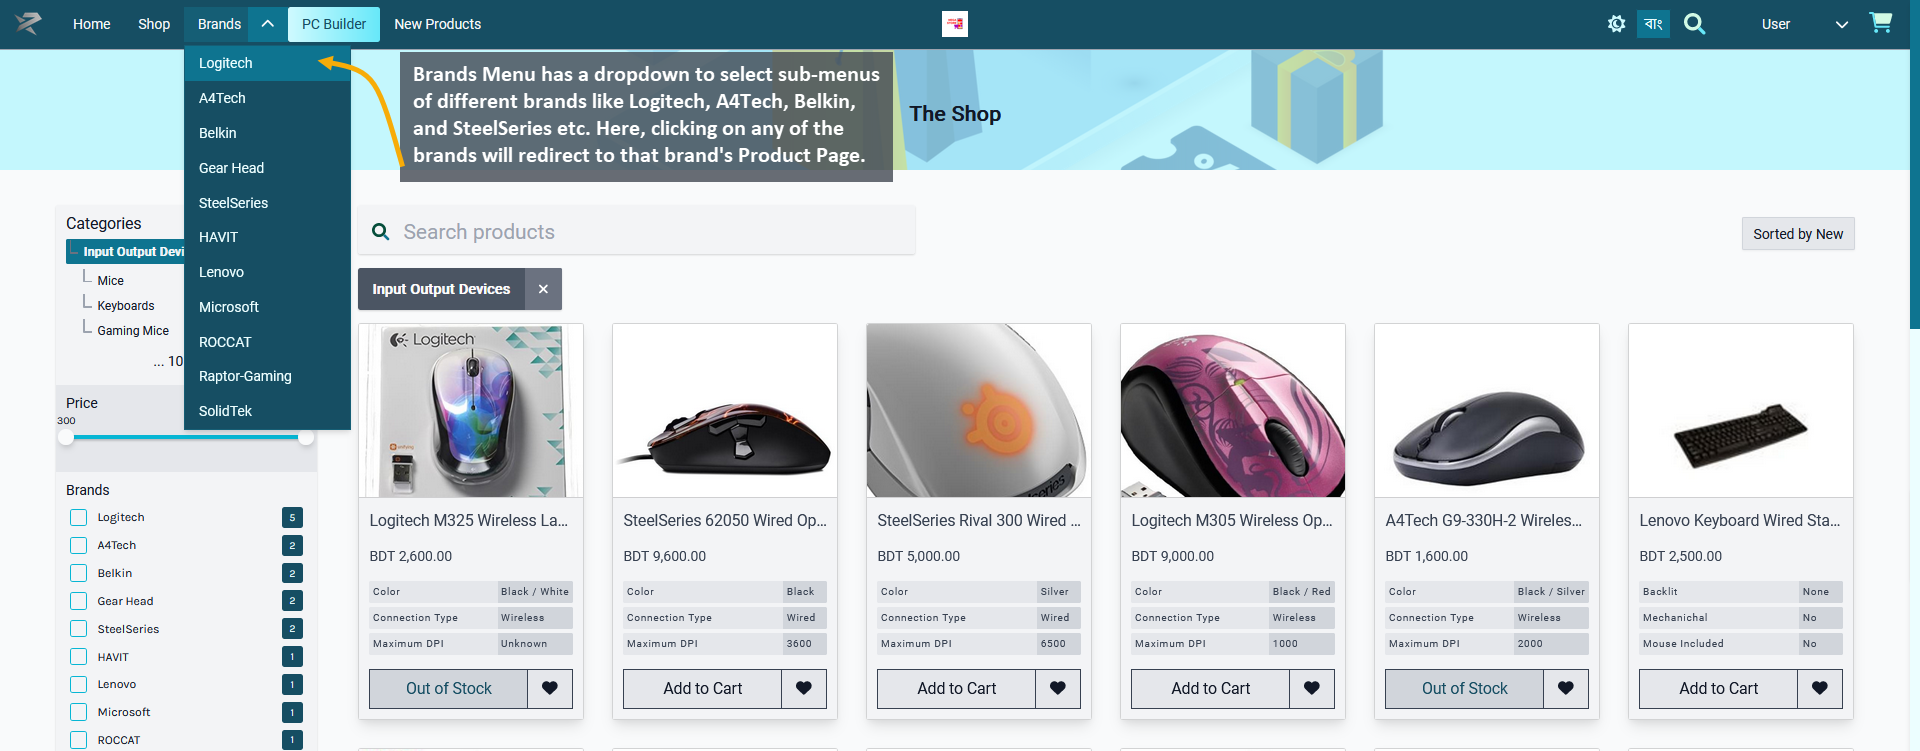
Image: Click Brands Menu and select any brand from the dropdown that will redirect to its Product Page.
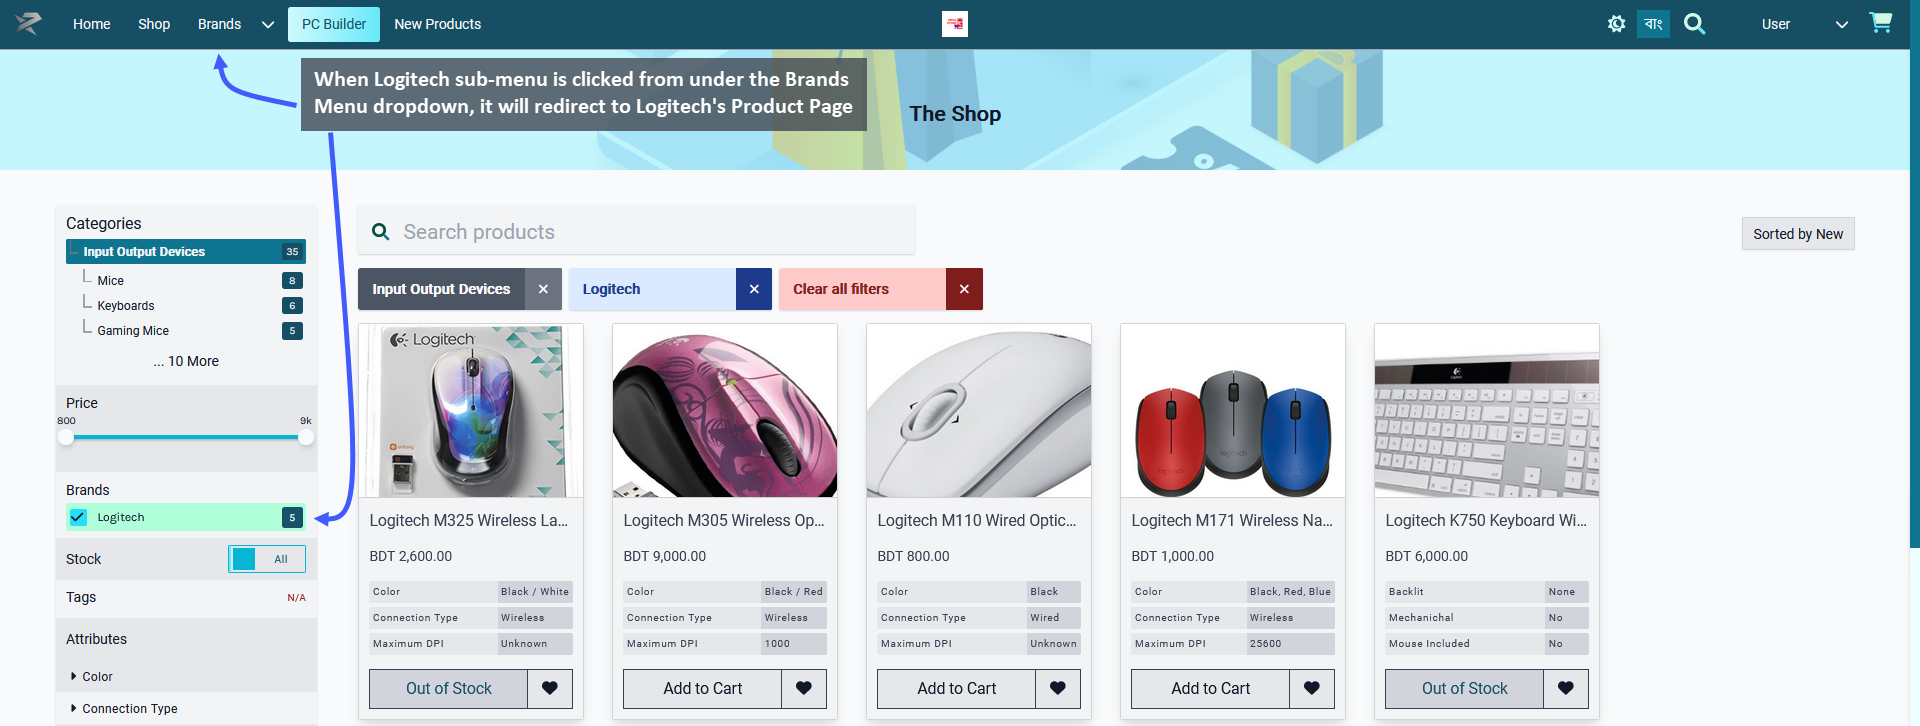
Image: When Logitech sub-menu is selected from Brands dropdown, it redirected to Logitech's Product Page.