General Tenant Settings
General Tenant Settings
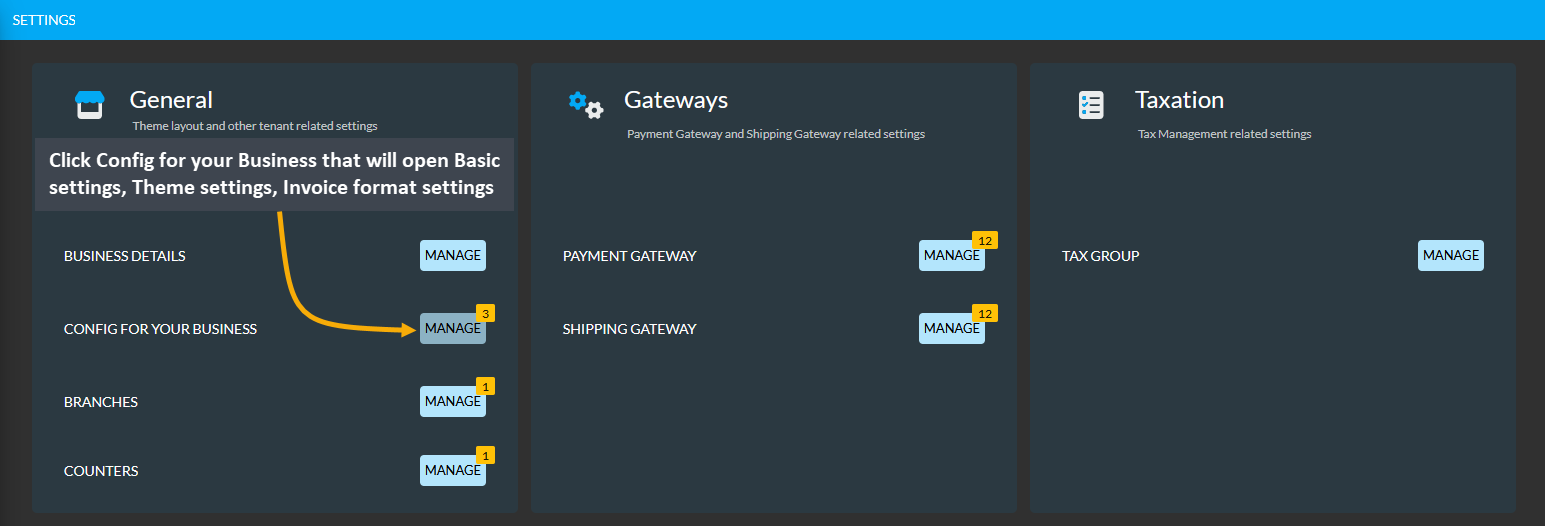
Under General Settings, the first option to configure is the Business Details, which have been previously described Setup Tenant Details. Then, there are Config for your Business, Branches, and Counters that needs to be set. Click on Config for your Business from Settings that will open Basic settings, Theme settings, Invoice format settings.
Basic Settings
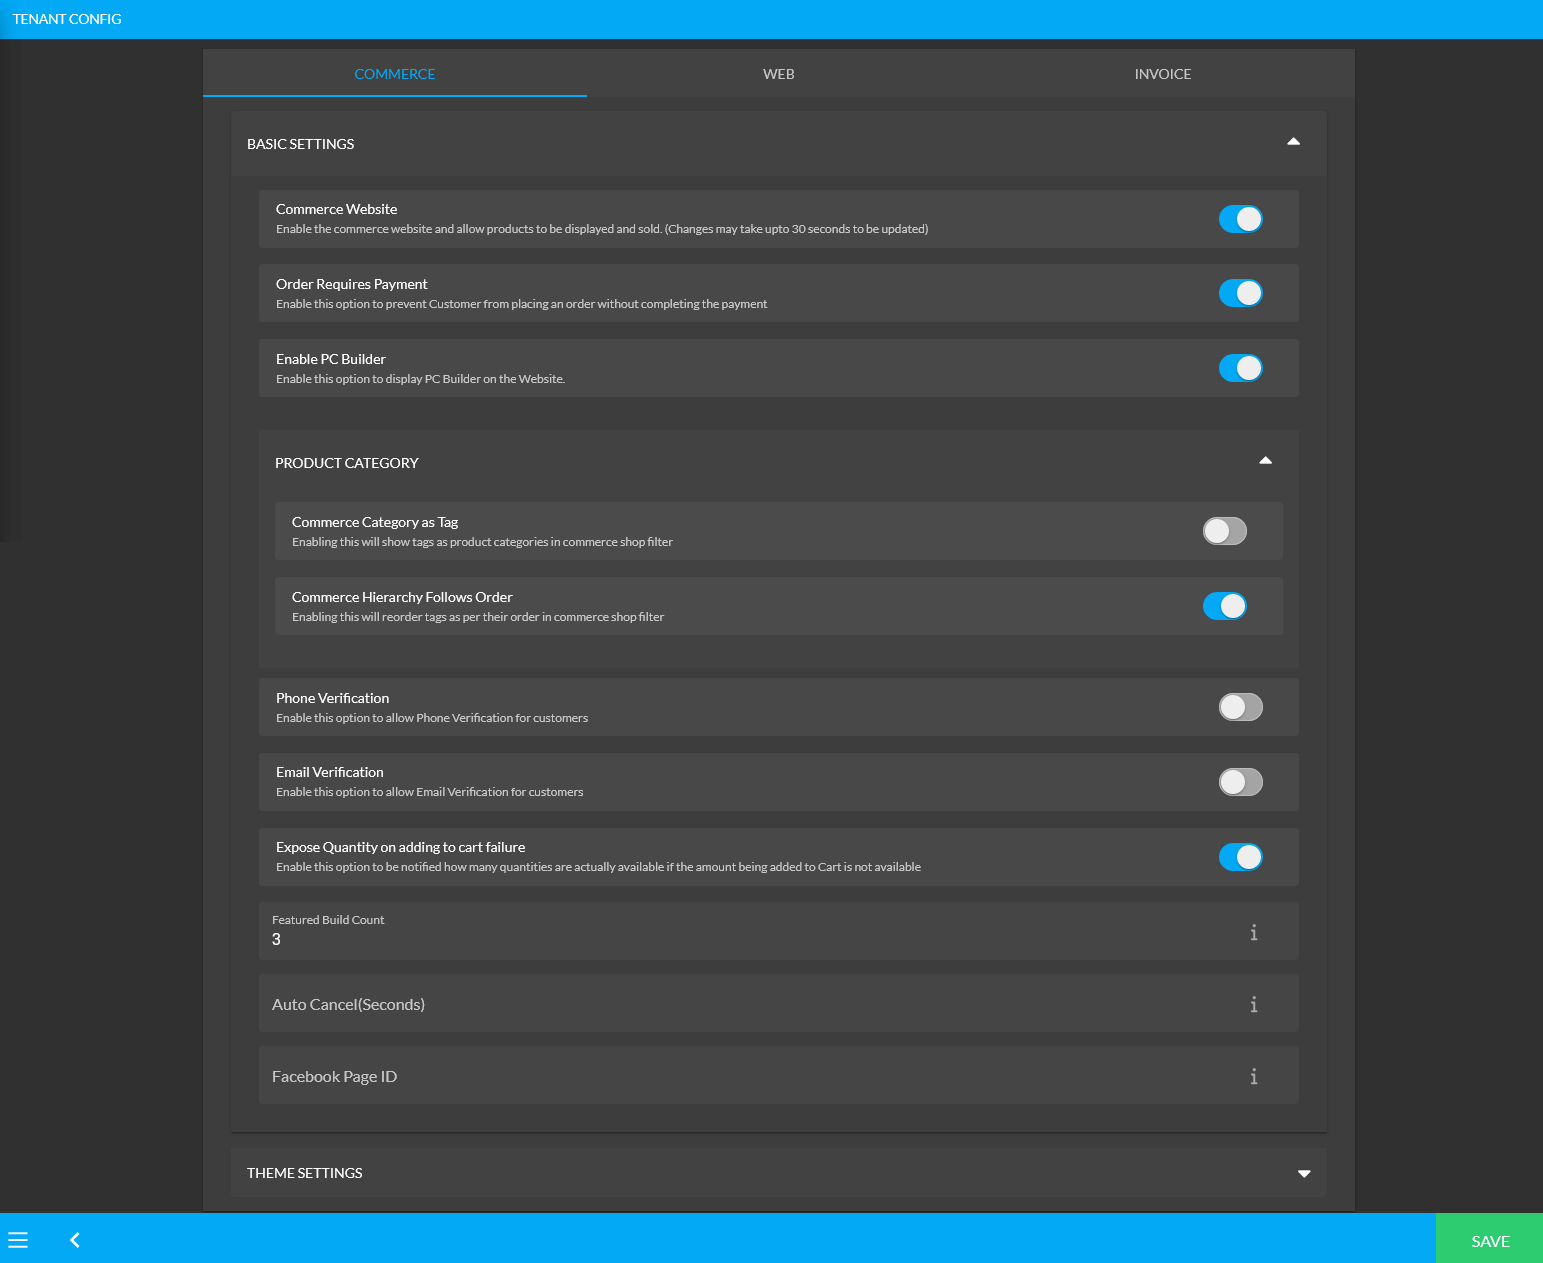
Basic Settings include options of Commerce Website toggle which enables the Website and allows Products to be displayed and sold. The Order Requires Payment toggle will prevent a Customer from placing an Order without completing the Payment. The Enable PC Builder toggle will allow displaying PC Builder tab on the Website.
Under Product Category, there are options to use Tags as Product Categories on Website, reorder Tags according to their order on Website shop filter, allow phone and email verification, expose quantities on Cart if the amount added is not available, show build count, auto cancel timing, and link the Facebook Page ID to setup Messenger widget on the Website. These are the basic settings that Shop Owner needs to configure.
Theme Settings
Click the down arrow to minimize Basic Settings and see the wide view for Theme Settings. Check the detailed configuration options for theme colors and fonts with preview. There is a dropdown to select preferred layout from Full Width (Default), Large, Standard, and Small. Click Save button to confirm all the changes.
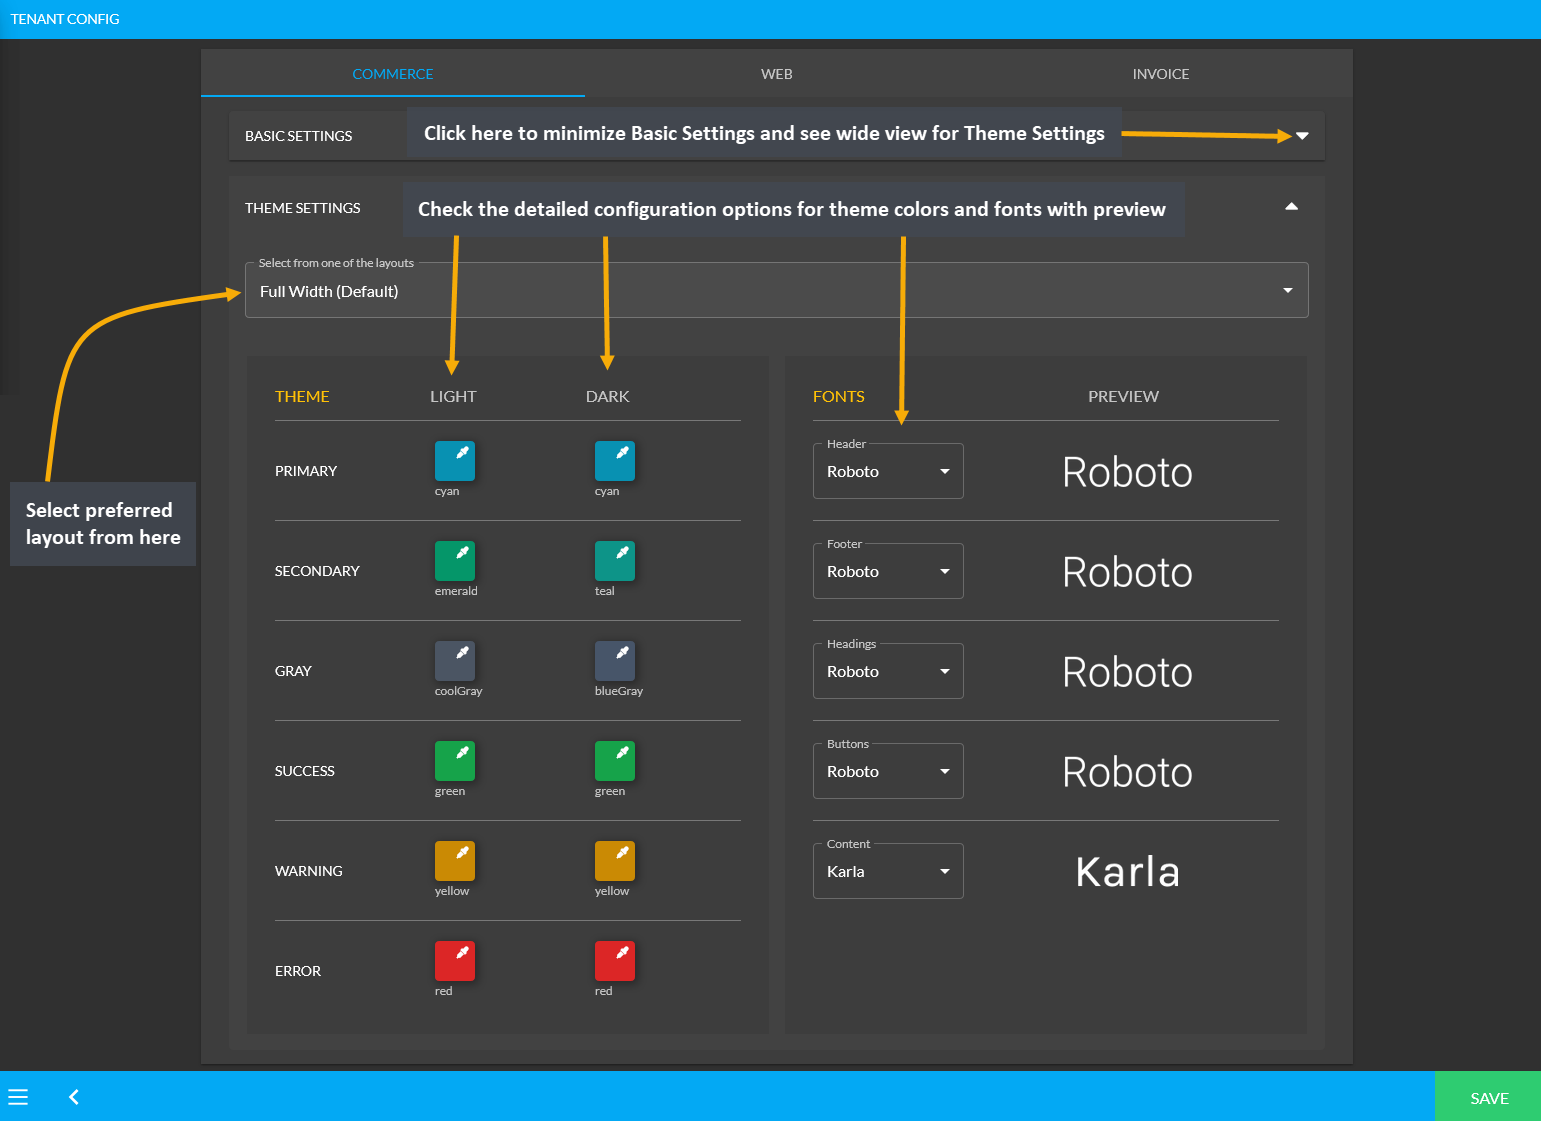
Image 1: Check detailed configuration options for theme colors and fonts with preview from Theme settings.
Instantly change the Website themes to Dark, Light, or Auto, click on the Web tab beside Commerce tab which will allow switching Themes immediately for the Website. Click on any of the options to set the desired Web outlook.
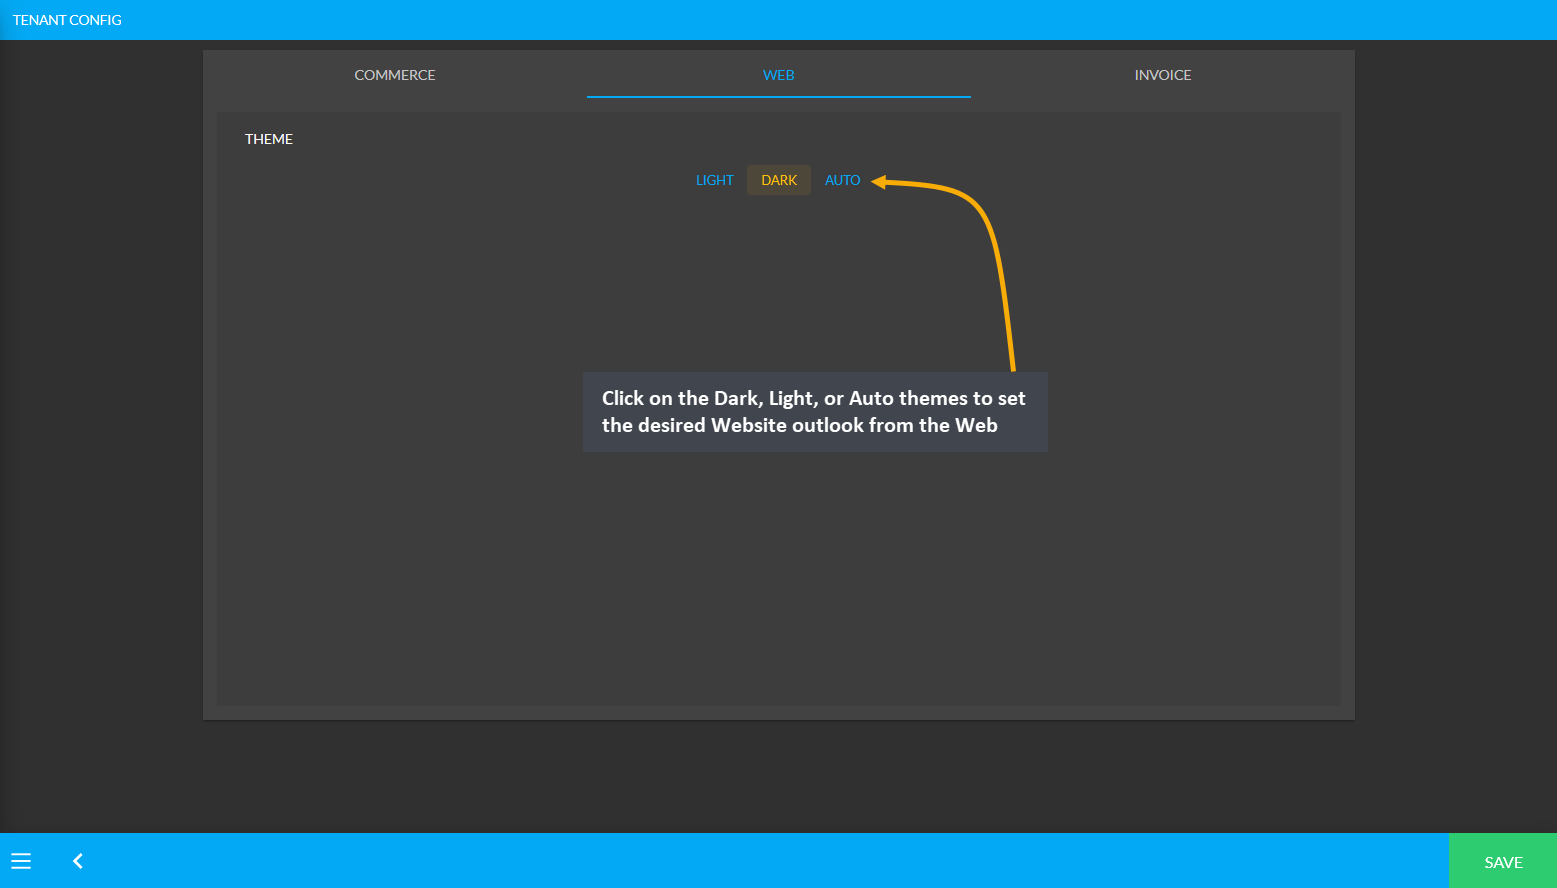
Image 2: Click on the Dark, Light, or Auto themes to set the desired Website outlook from the Web tab.
Invoice Layout Settings
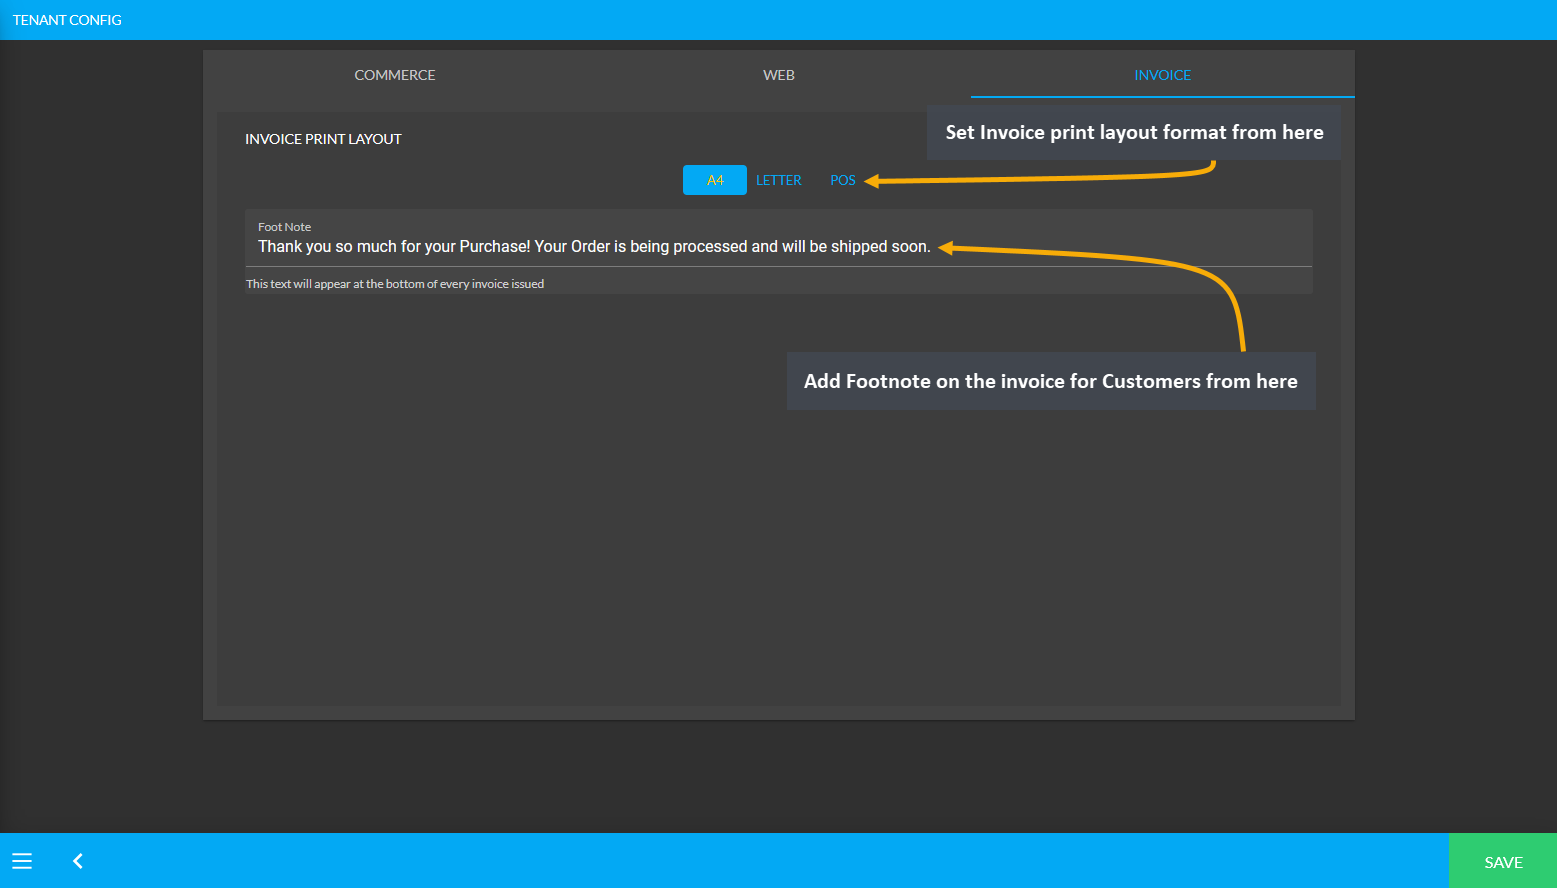
Invoices can be printed anytime for both new and old Orders. Shop Owners can retrieve the old invoices anytime whenever they need to print out from the Order List. Retail Xen supports three invoice printing formats. Invoice printing formats can be configured from the Invoice tab beside the Web tab.
There are three types of Invoice print layout. One of them is the cost machine printing format, also known as the Point of Sales (POS) format, and the other two formats are the regular A4 invoice printing format and the Letter invoice printing format. There is an option to include a Footnote on the invoice for Customers as illustrated.
Branch Settings
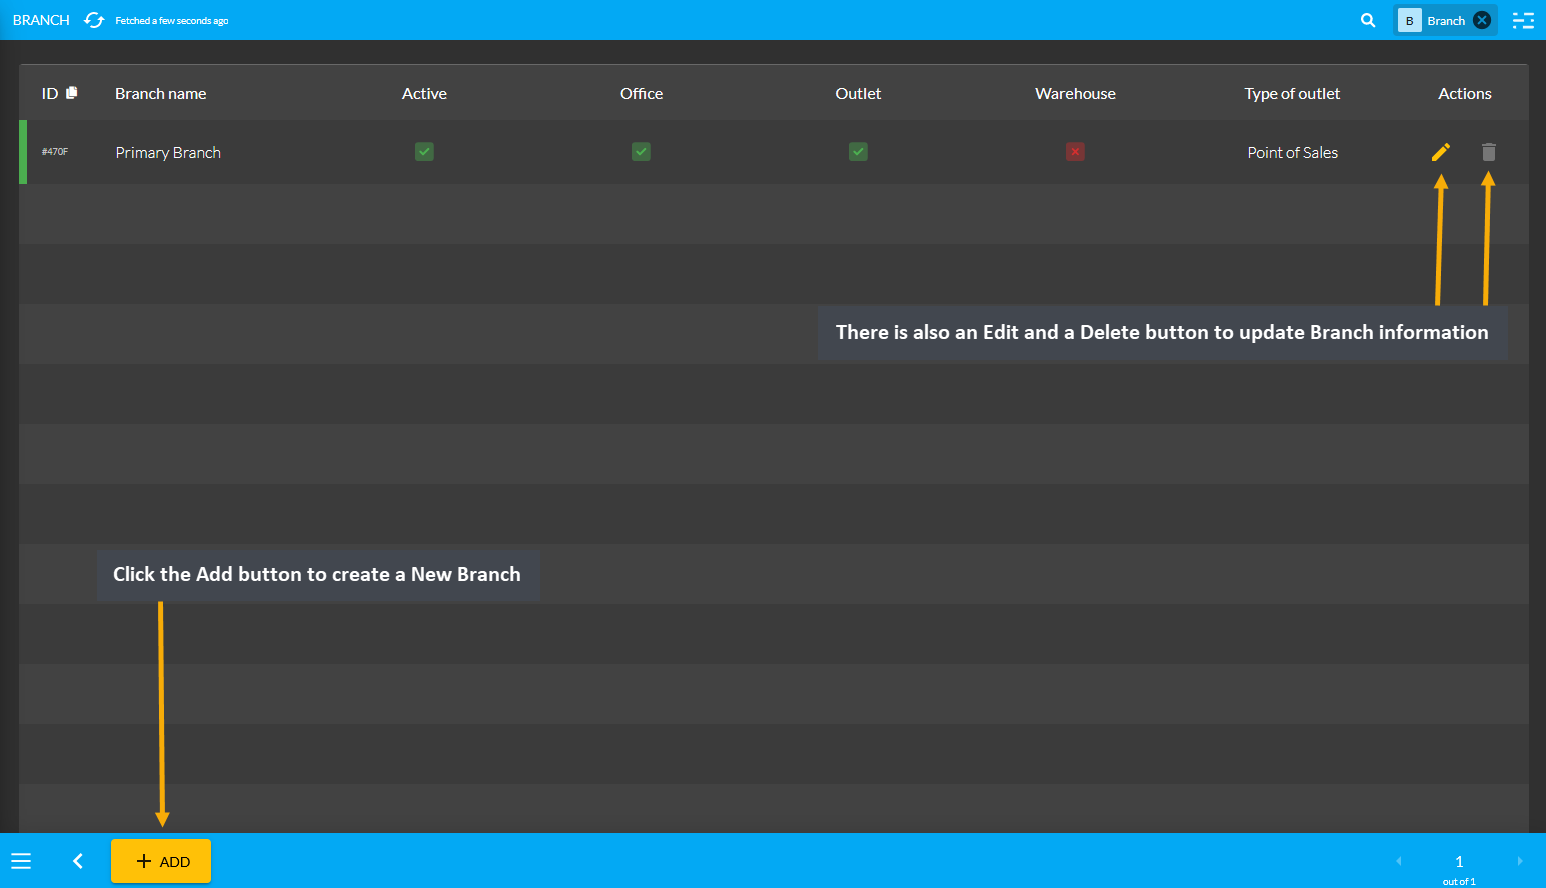
Under General Settings, the third option to configure is Branches. There are options to add Branch Name, make any Branch active or inactive, display Branch as Office or Warehouse, or add Type of Outlet as Point of Sales or Restaurant. To add a New Branch, click the Add button at the bottom left of the page. This will redirect to a new page for updating Branch information. There is also an Edit and a Delete button to update Branch information.
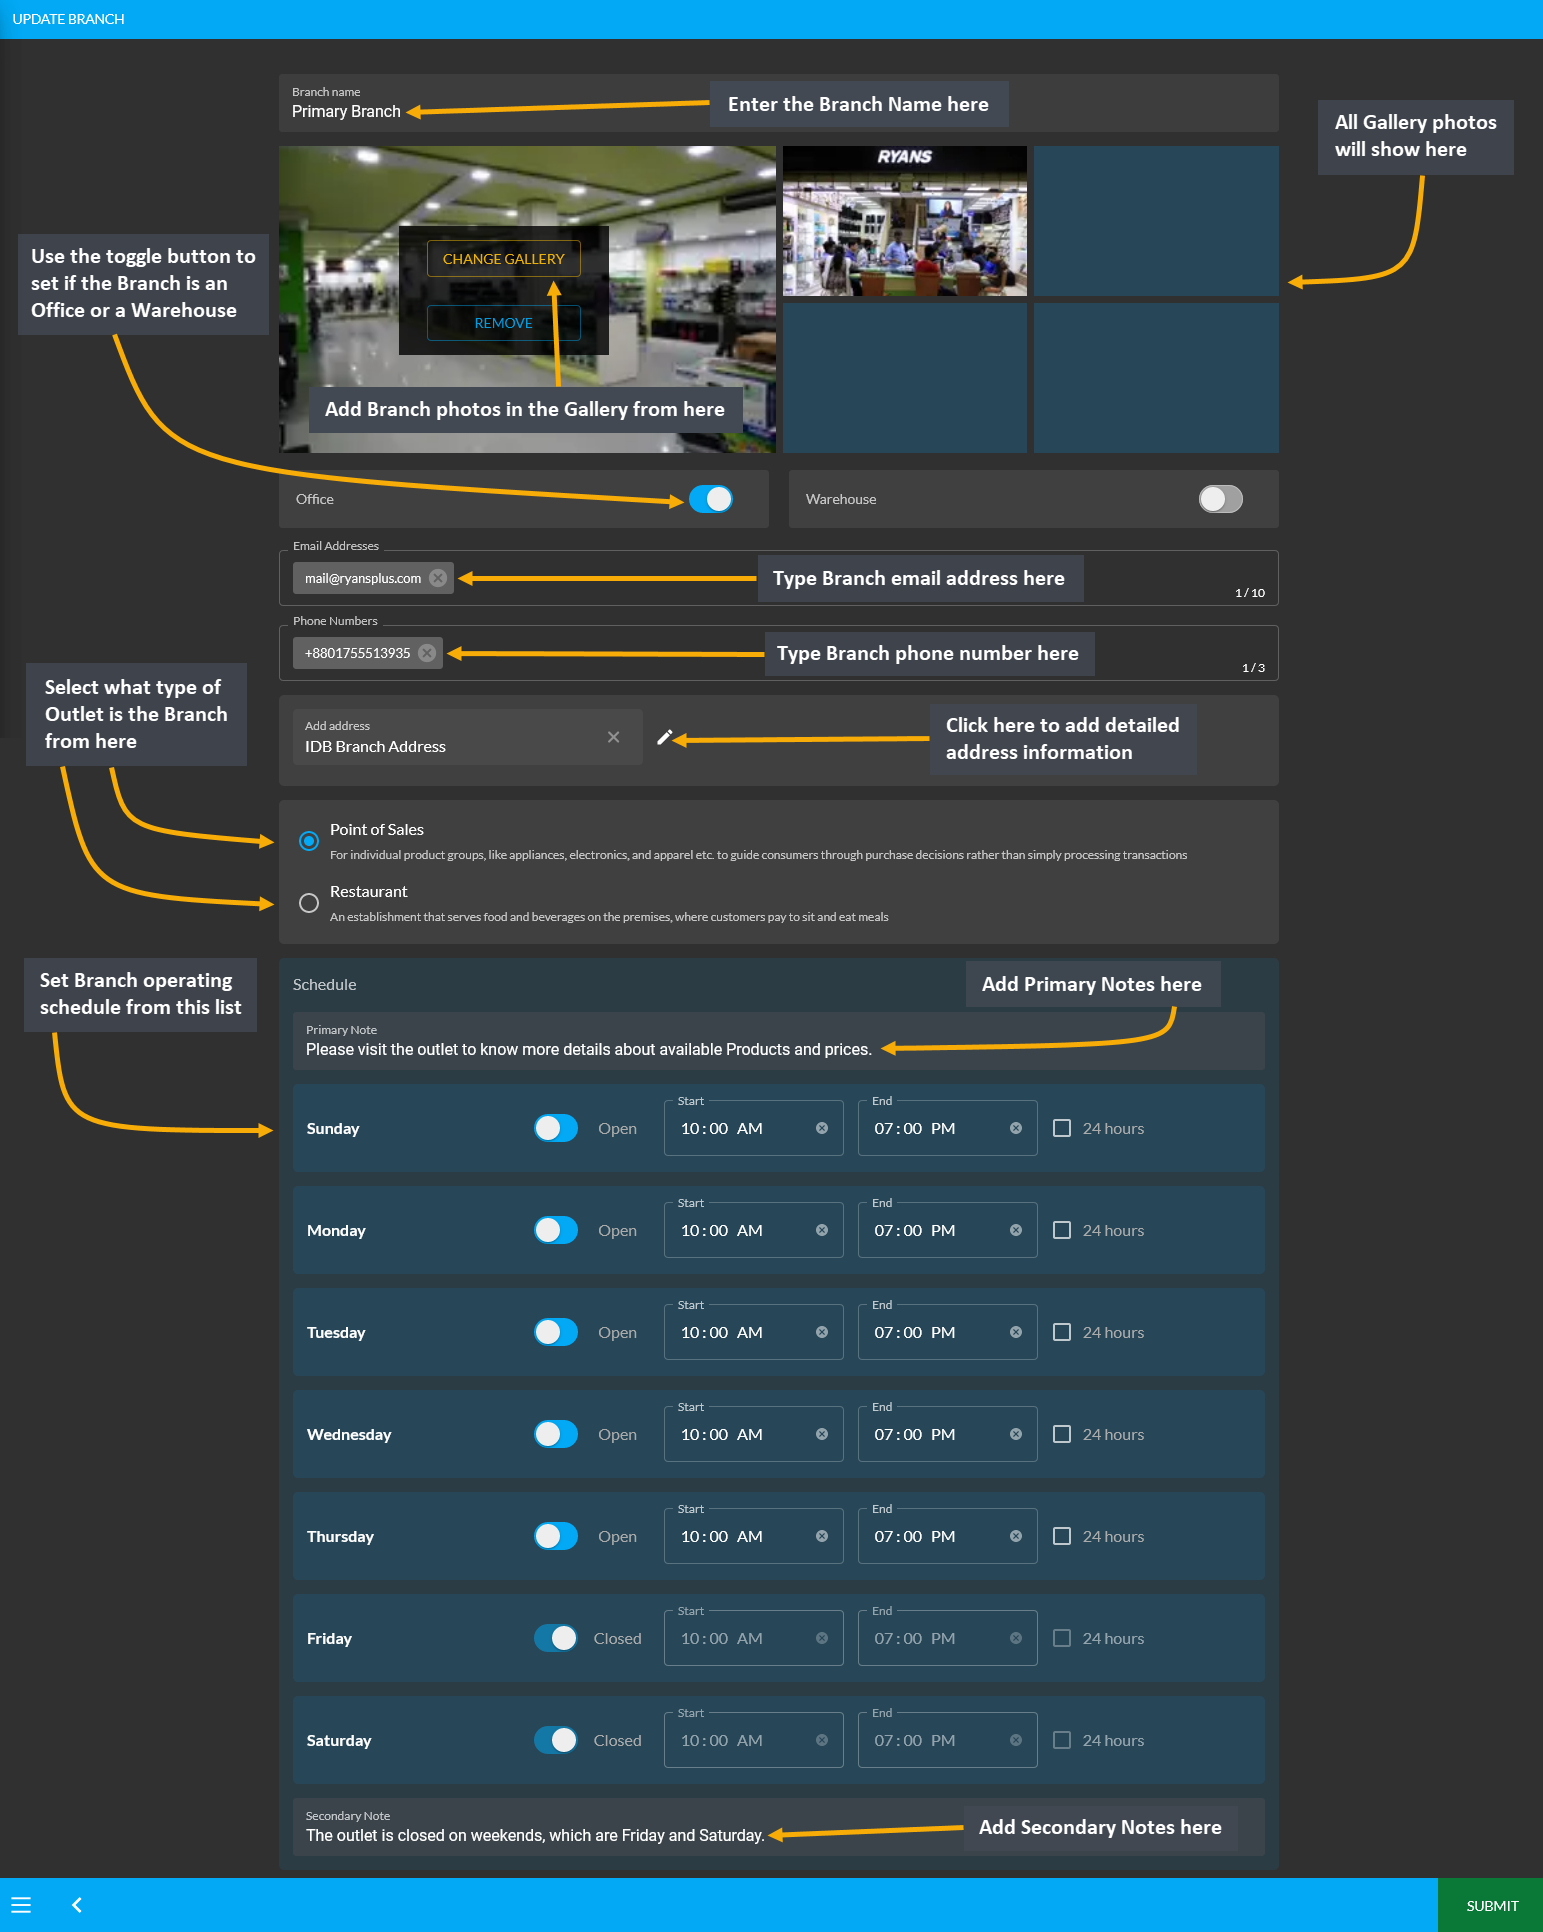
Every Shop will have different Branches on various locations. For this reason, the Admin Panel include options to create Branches. Under Update Branch, the Shop Owners can set Schedule with business hours for Customers to visit and make a Product purchase. The first field to fill out for the Branch is the Branch Name.
Below is the Gallery where Shop Owners can add photos of their Branch outlets with Add New Gallery option. Add multiple images for Branch gallery. Then, there are two toggle buttons to set Branch as Office or Warehouse. Next, the Shop Owner can select if their Outlet is Point of Sales or Restaurant that best describes the Branch.
Then, fill out the email address, phone number, and detailed address of the Branch. Then, set the Branch operating Schedule for Customers to visit or make a purchase. Set business days and holidays with Start and End times. Use the toggle button to show when the Branch is open or closed. Add Primary Note or Secondary Note as needed.
Add Branch Address
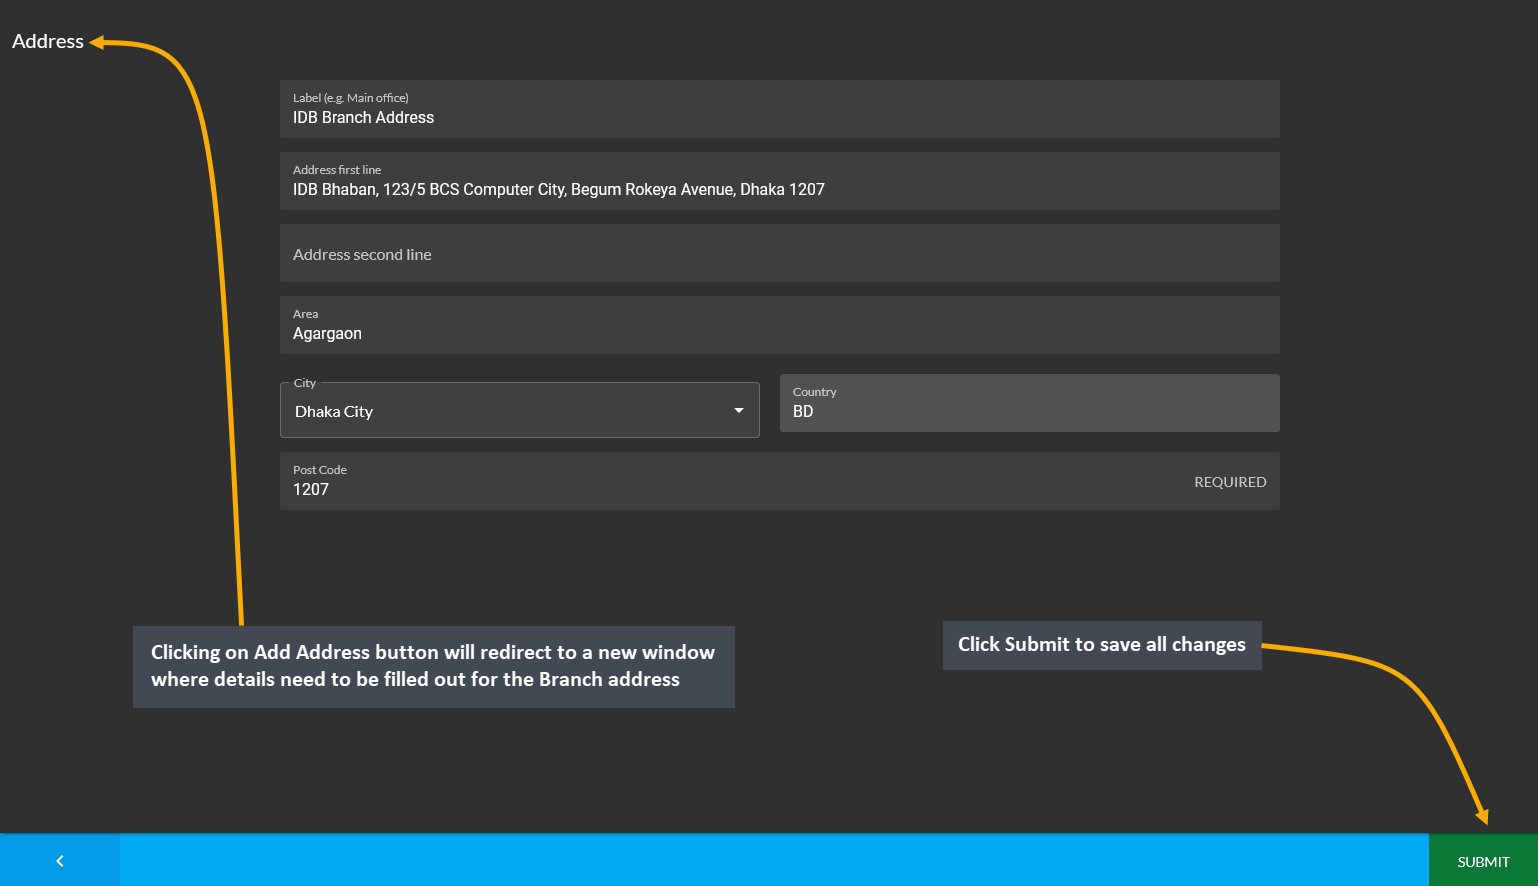
Within Branch Settings to Update Branch, clicking the Edit icon beside the Add Address box will open a pop-up where Branch address details needs to be filled out. From here, fill out the Label, Address, Area, City, Country, and Zip Code. Click Submit to save all changes. It will redirect to the main page to update rest of the details.
Counter Settings
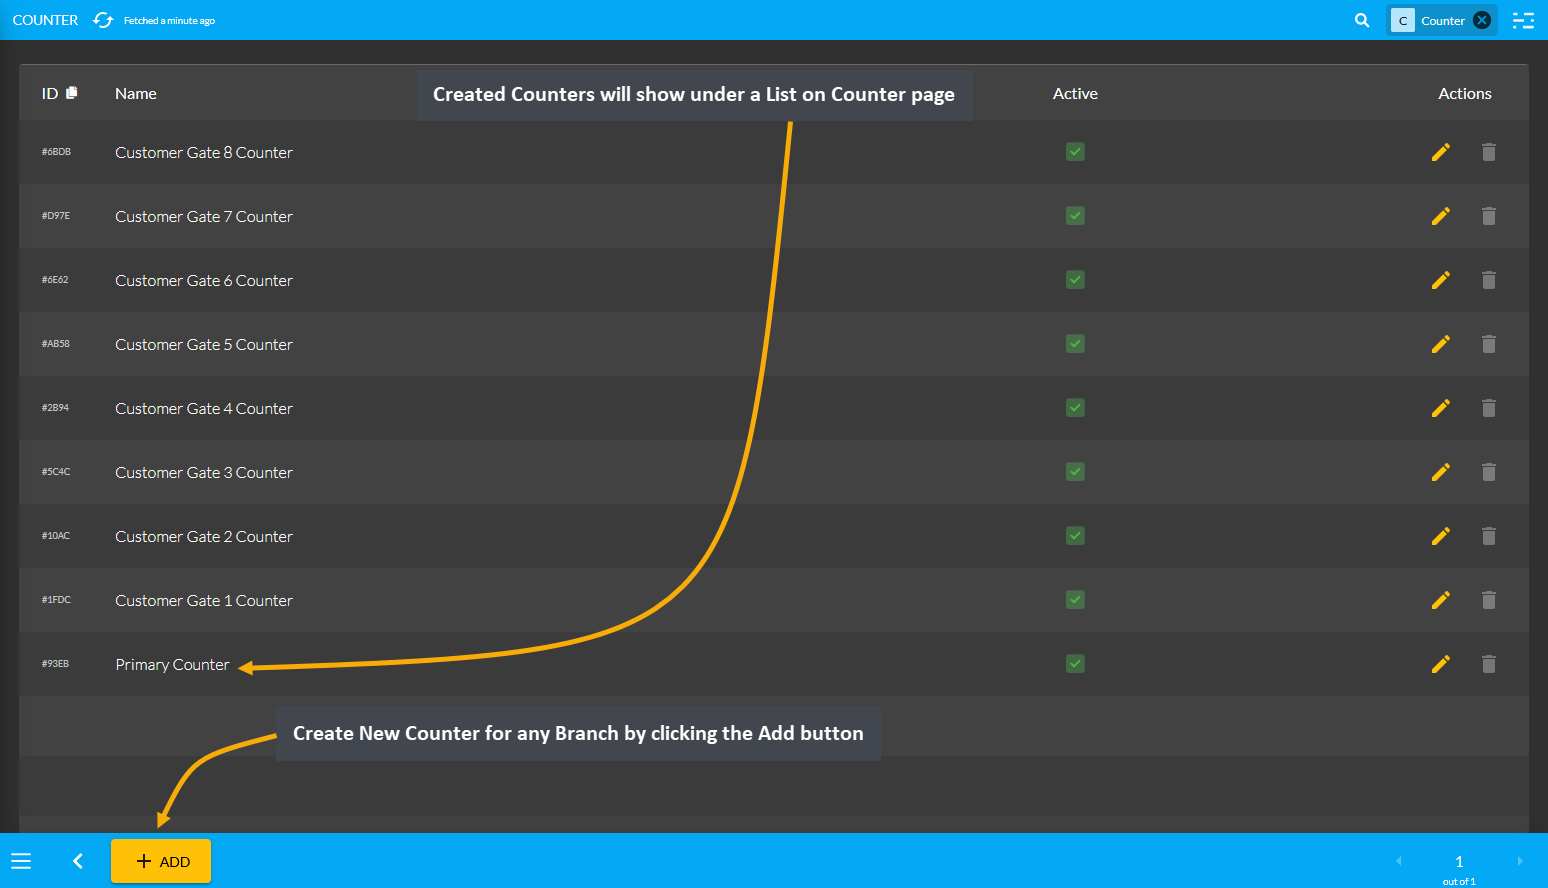
Under General Settings, the fourth option to configure is Counters. Create and set Counters under a specific Shop Branch for taking Orders from Customers. When there are too many Counters in a single Shop Branch, creating Counter will help Admins create and handle Orders. Created Counters will show under a List on Counter page.
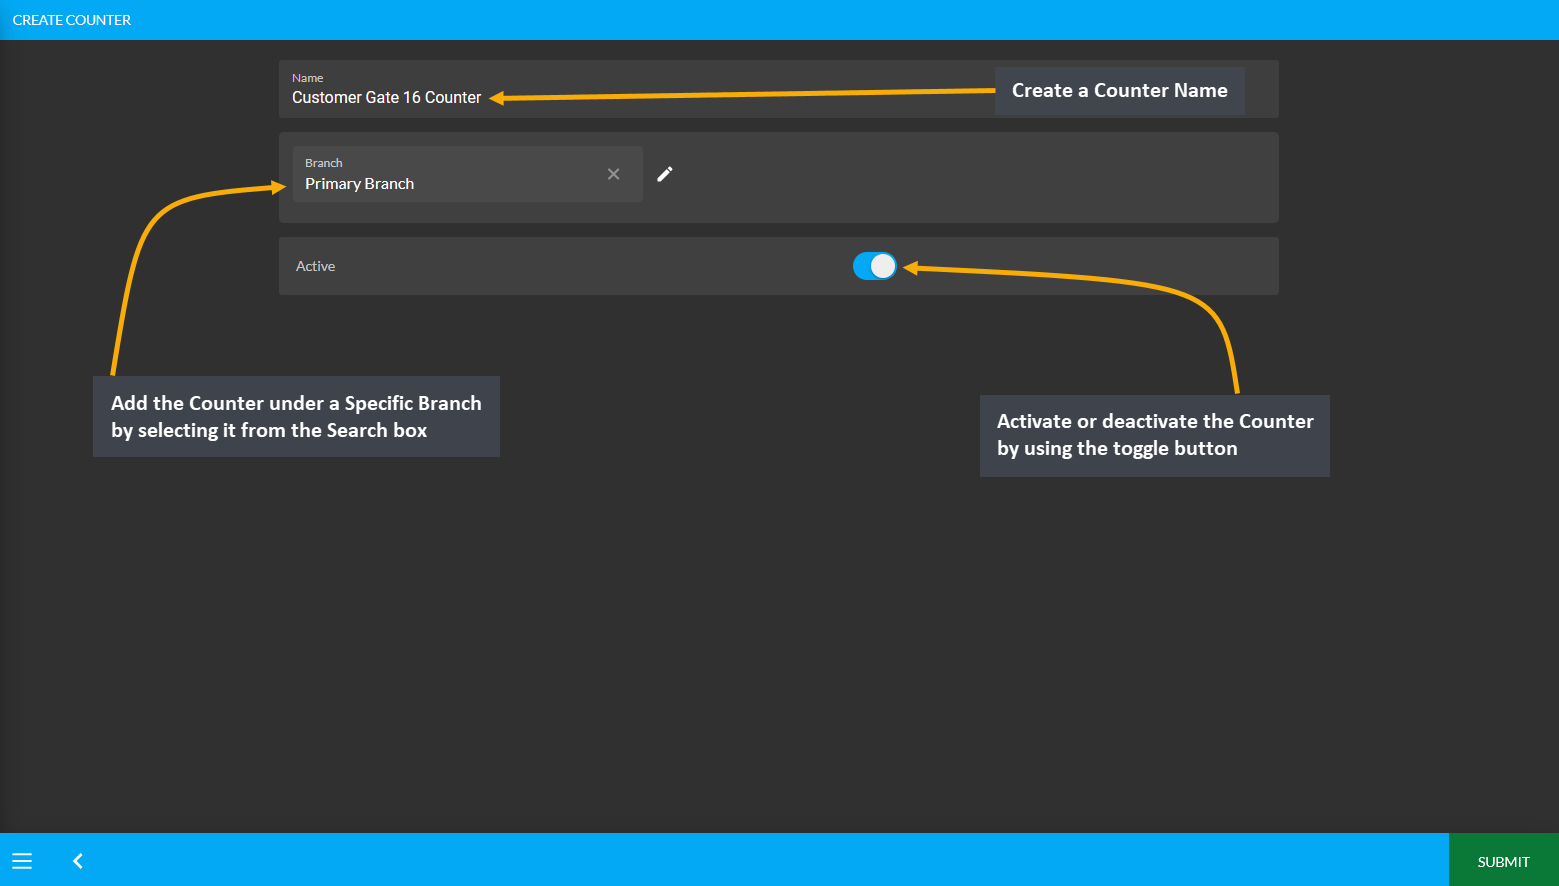
Create New Counter for any Branch by clicking the Add button. It will redirect to a new page from where Counter Name needs to be created and added under a Specific Branch by selecting it from the Search box, and activate or deactivate the Counter as needed. Click the Submit button to create a New Counter that will show under the list.
