Configure Product Retail Channel
Configure Product Retail Channels
Configure Product Retail Channels from Retail Channels under All Settings tab. Click on All Settings to be redirected to Retail Channel Settings from the Dashboard. Click on Manage button under Retail Channels to access, create, activate, and configure all the Retail Channels or Websites that are maintain by the Tenant Admin.
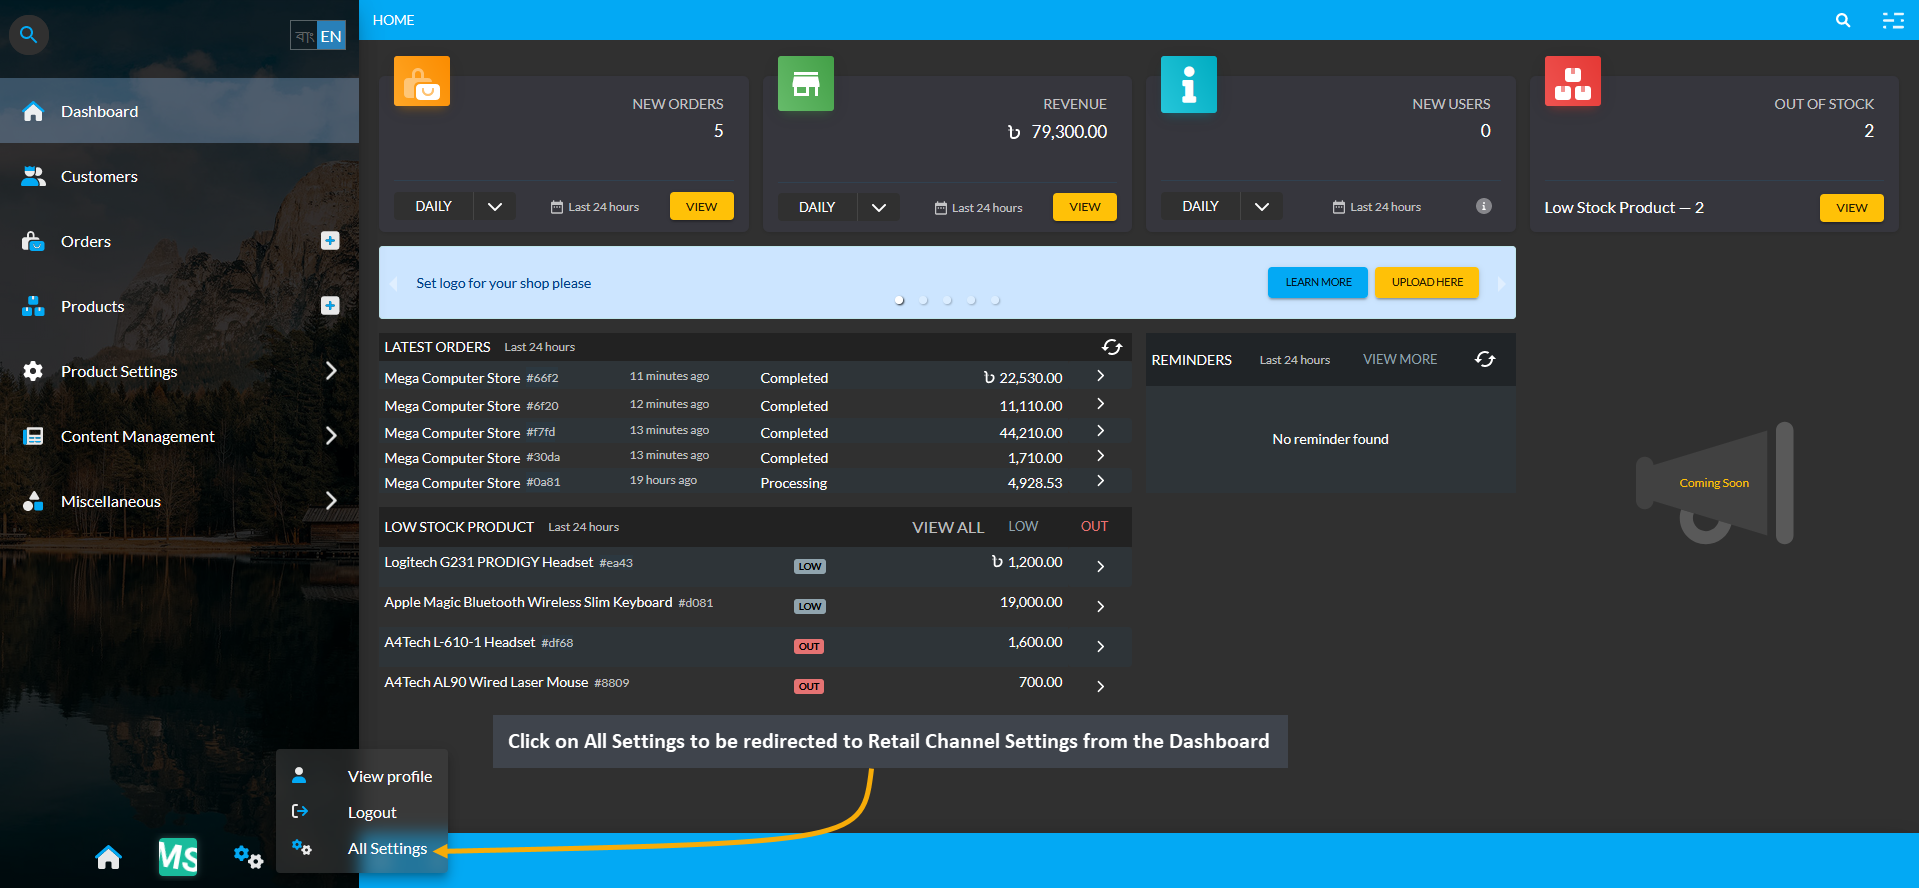
Image 1: Click on All Settings to be redirected to Retail Channel Settings from the Dashboard.
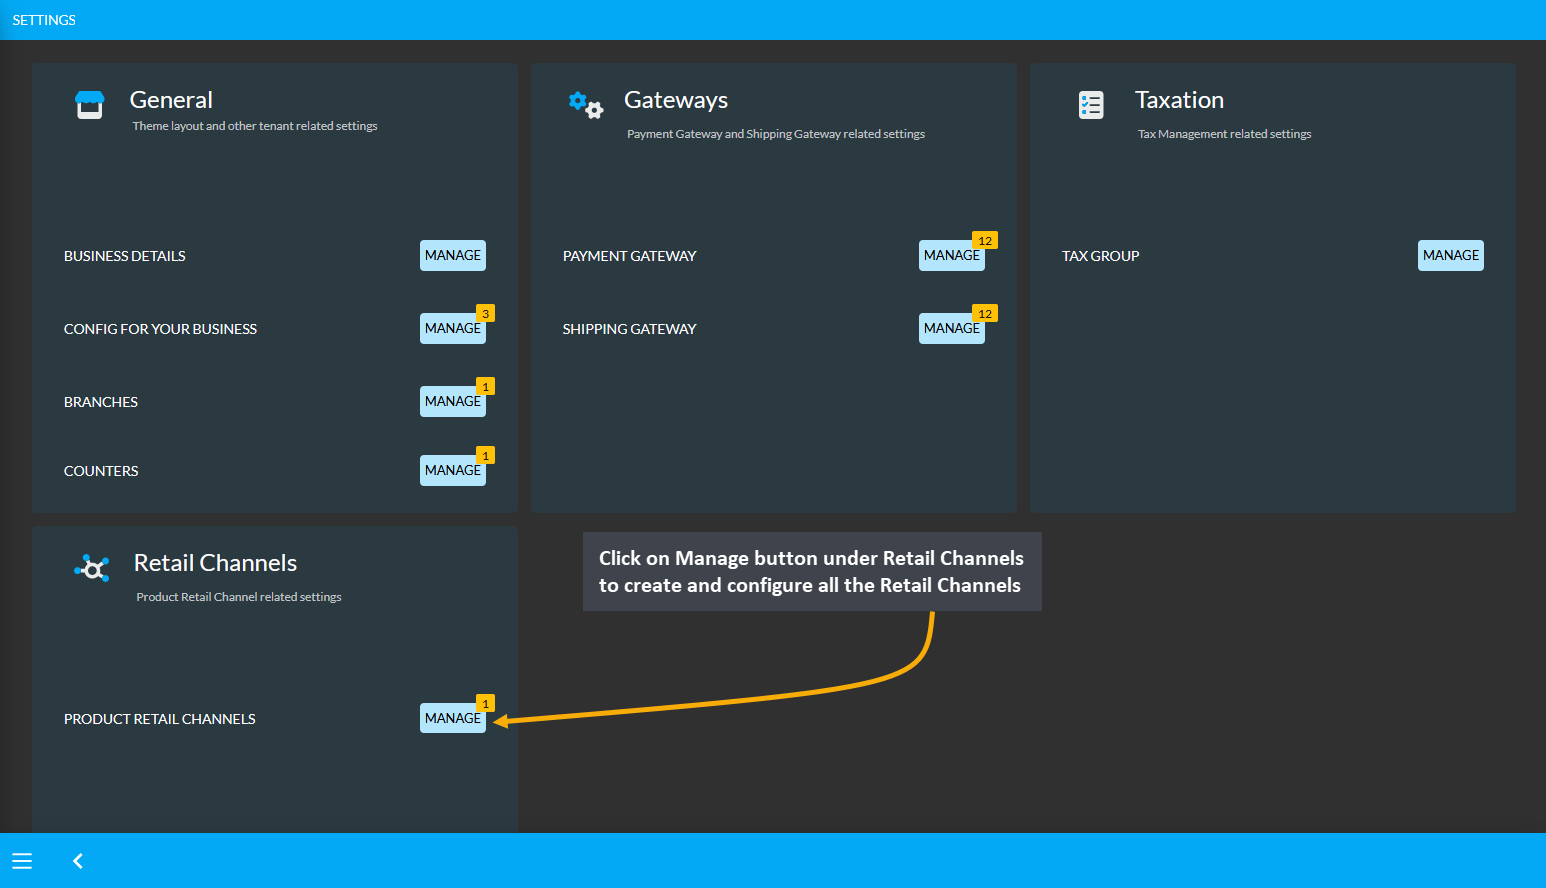
Image 2: Click on Manage button under Retail Channels to create and configure Retail Channels.
Create Product Retail Channel
On Retail Channels Page, list of available channels will show and new Retail Channel can be added by clicking the Add button. The Shop Owner can create or update Product Retail Channels by setting up name and avenues.
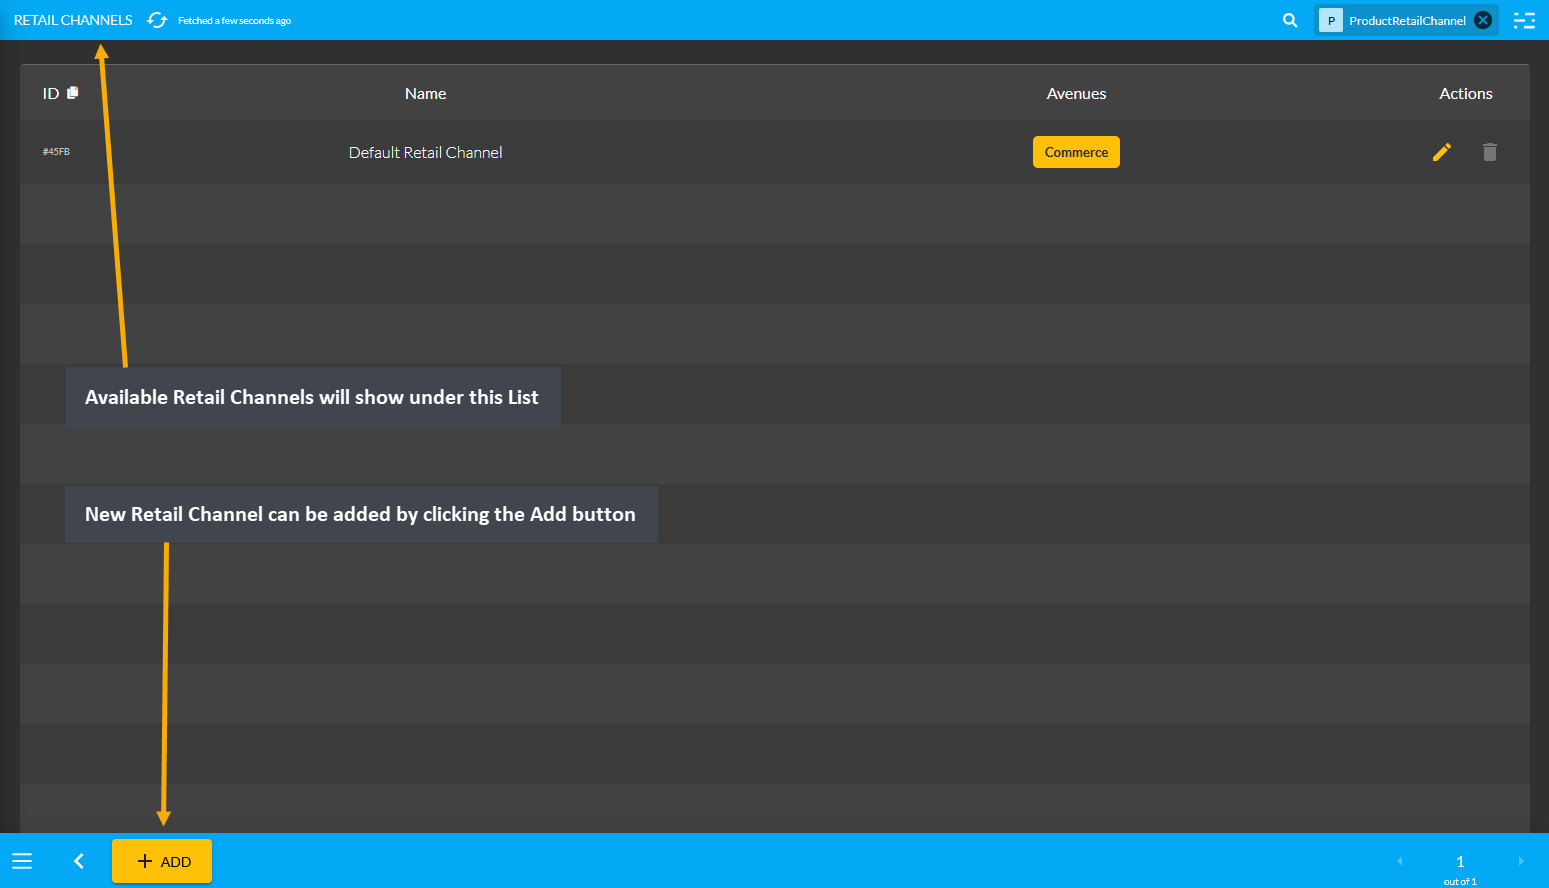
Image 3: Click on All Settings to be redirected to Retail Channel Settings from the Dashboard.
Edit Product Retail Channel
When editing a Retail Channel, there is an option for Commerce with a checkbox under Avenues. This option controls whether the Shop Owner want their Products to be shown or hide on the Website.
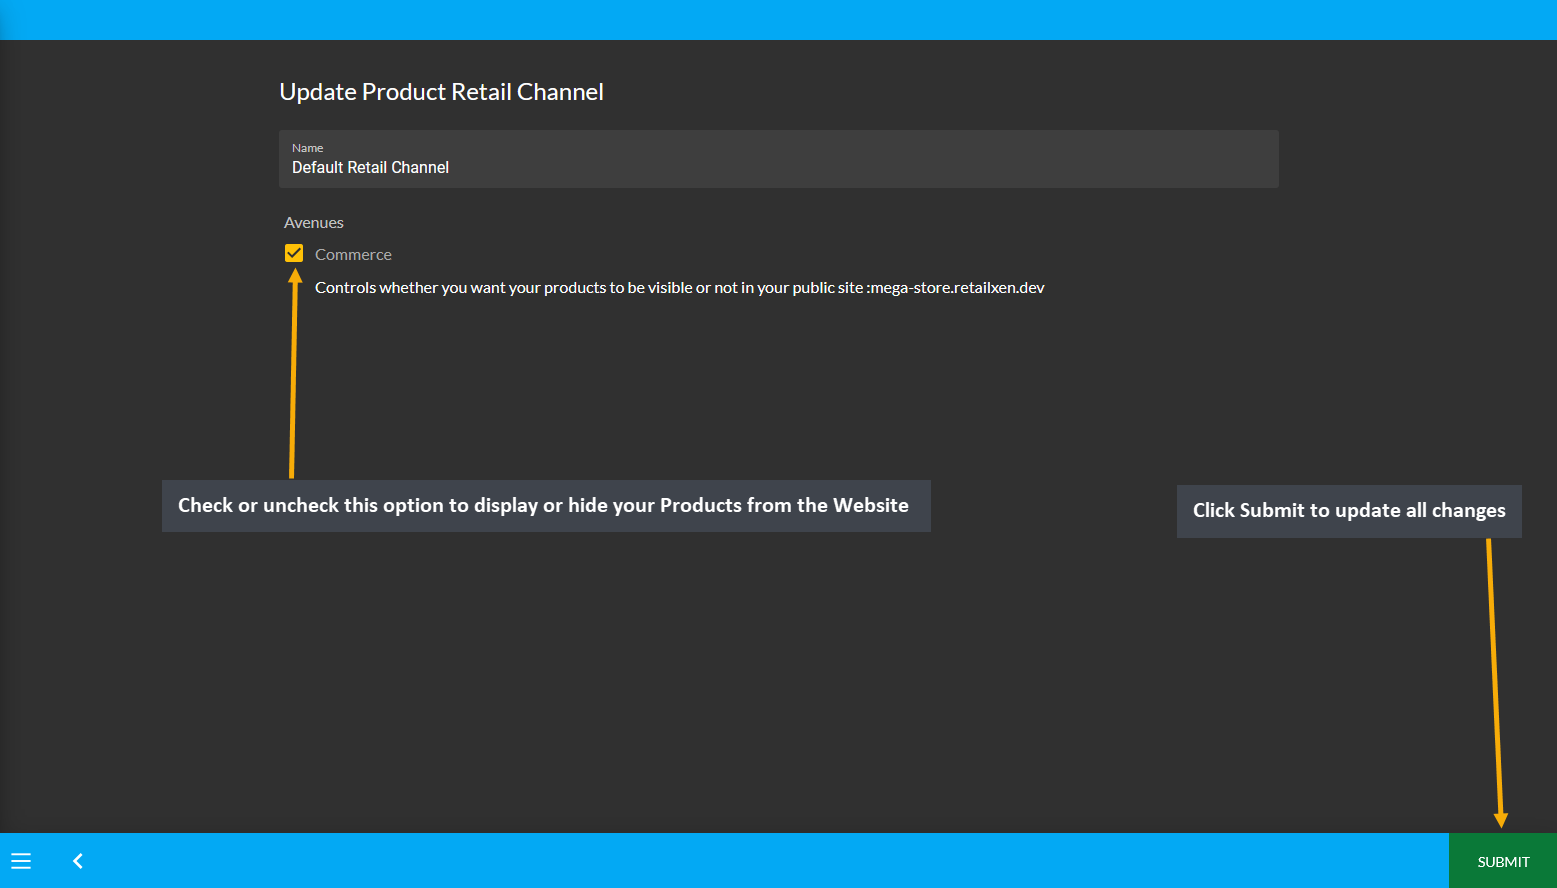
Image 4: Shop Owners can check or uncheck Commerce option to display or hide their Products on the Website.
Select Retail Channel
Retail Channels are where Products can be sold like Facebook, Google, or Website. Products can be assigned on other Retail Channels than the Default Retail Channel, which is the Website. After selecting other Avenues like Facebook or Google, Products will show in selected avenue of the Retail Channel, but not on the Website. Enabling or disabling any avenue will show or hide the Products within that avenue.
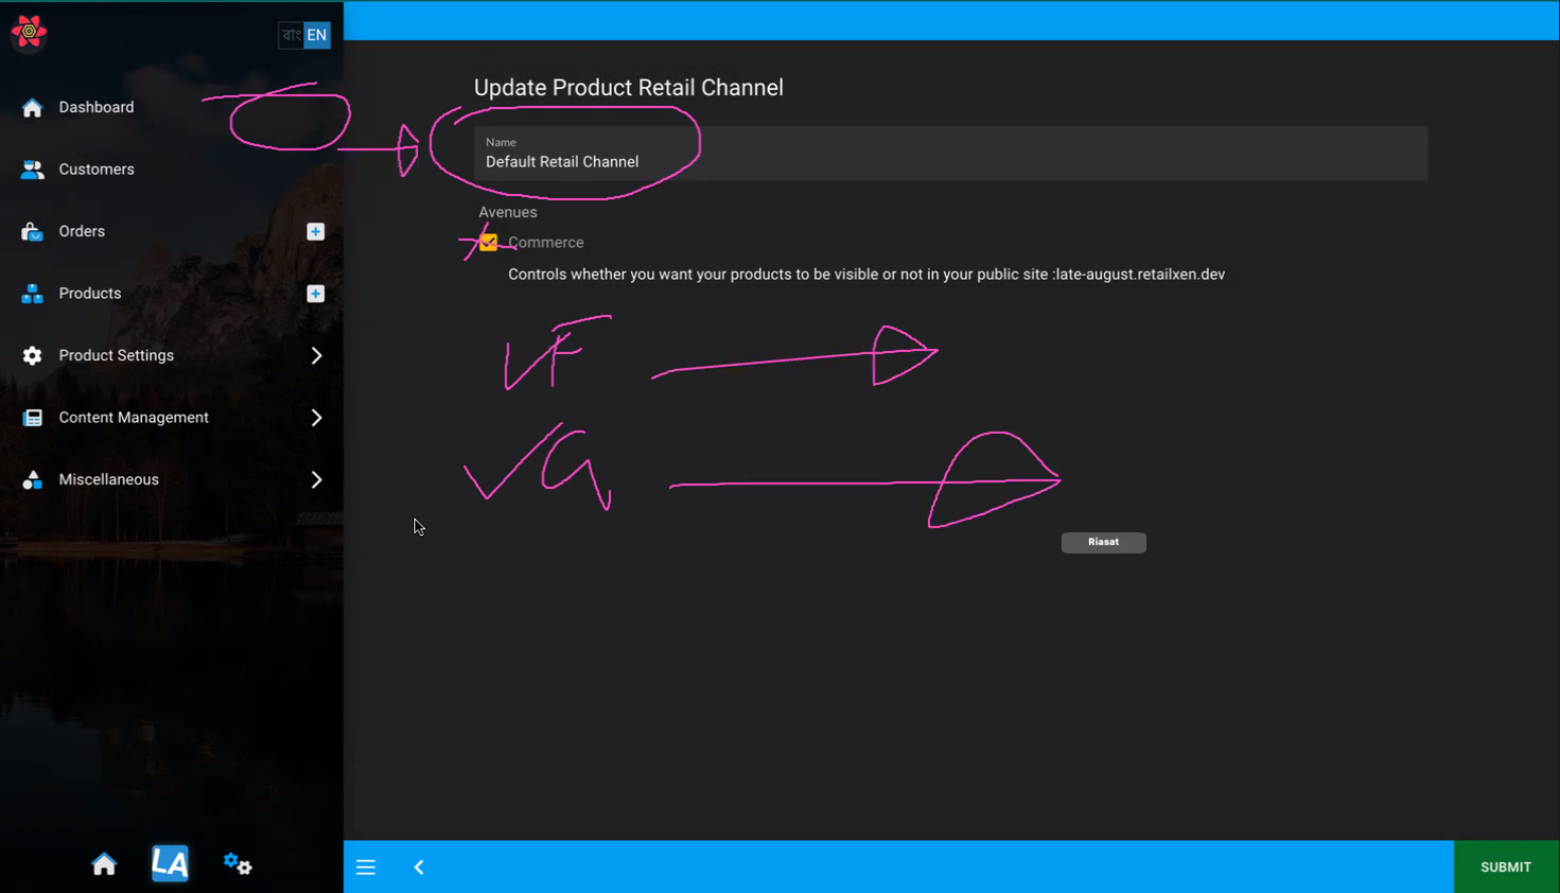
Image 5: Products can be assigned on other Retail Channel and their Avenues than on Default Retail Channel.