Introduction and Admin Panel
Introduction to our Retail Xen Website Content Management
This page introduces you with the basics of our Content Management System.
Retail Xen Content Management System
Thank you for purchasing our e-commerce software. This Content Management System will allow Shop Owners or Content Managers to modify their Website templates with minimum monthly charges in different package plans. The system is specifically designed to get your online business or store up and running and aims to be a positive solution to your e-commerce needs. The CMS allows to personalize the Store, add Products, take Orders, manage Customers, generate invoices, maintain ledger, and start selling right away!
Please read through the documentation to get used to various sections involved with managing your online store using the CMS. This web-based management tool with a comprehensive admin panel will provide all the facilities of maintaining an online businesses easily. Administrative tools intended to help manage the commerce Website are available on the Tenant Admin Panel which also grants permission to create single to multiple admins.
Features of Retail Xen
The salient features of the Content Management System also includes creating and editing the Website interface and handling the Website’s maintenance with ease. The built in admin tools with their various levels of access are there for creating, editing, and publishing contents with modules. The Content Management System is run from our own servers to protect the data and prevent unauthorized access to sensitive information.
1 - Overview
Retail Xen CMS will give Shop Owners edge over the competition from other online businesses. It will let them create and manage Website Pages on the Shop easily.
Admin Panel Modules
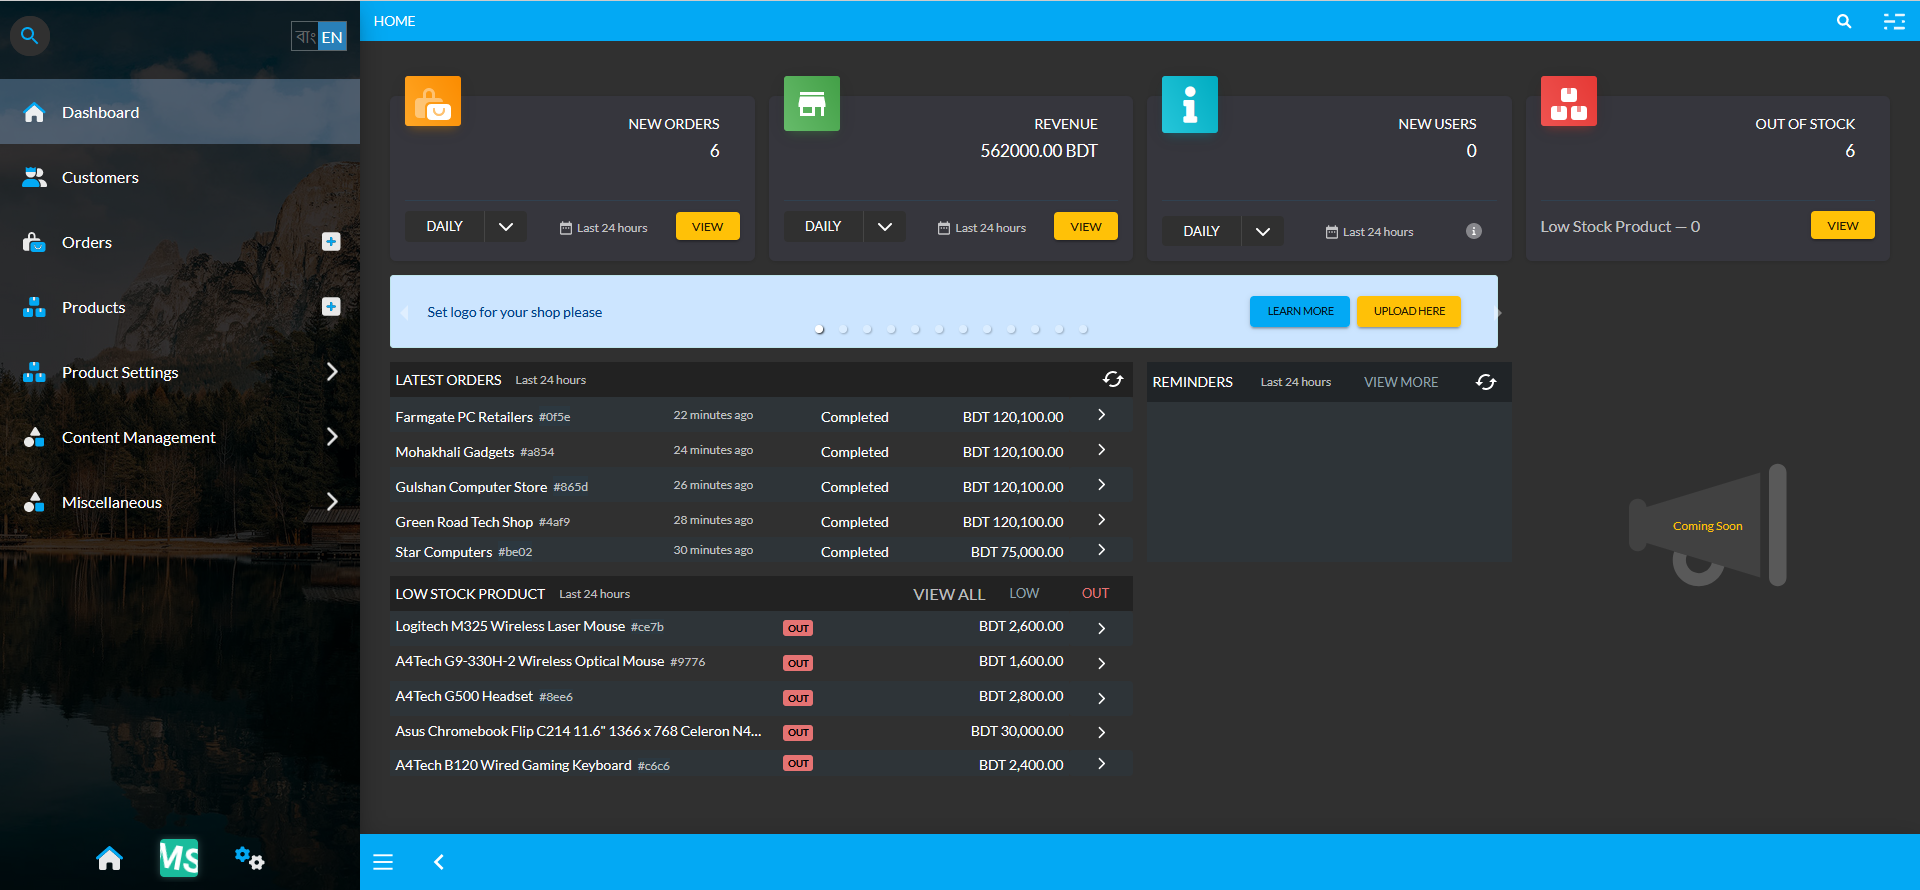
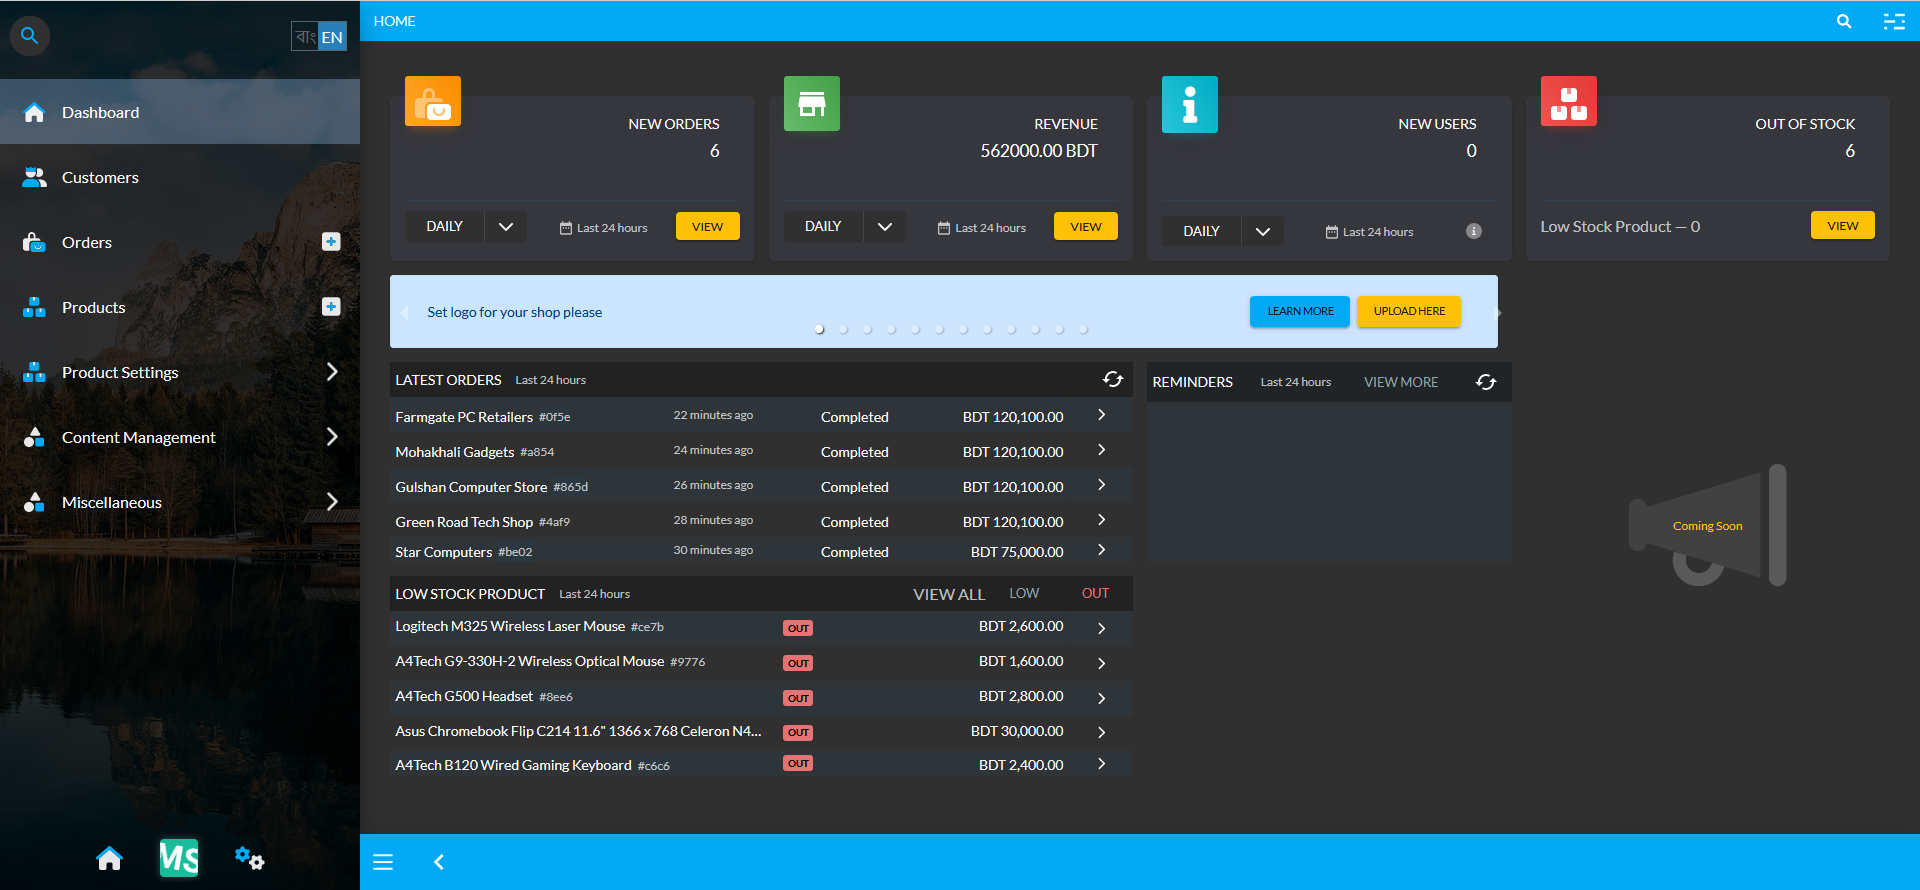
Use this Content Management System to create, modify, and remove contents from the Website without needing to know the Hypertext Markup Language (HTML). Utilize the straightforward admin panel with built-in editors and modules for creating, reviewing, and publishing web page contents. The main modules consist of the Dashboard, Customers, Orders, Products, Product Settings, Content Management, and Miscellaneous.
Shop Management
The Shop Owner can efficiently use the CMS to manage contents, add Payment Methods, Shipping Gateways, or create Products, Customers, Orders, Brands, Galleries, Tags, and Warranty Plans. Besides, they can view overall statistics of Orders, revenues, new users, or low stock Products etc. Upon successfully registering and creating various tenant users, the Shop Owner can edit and manage their shop fast and efficiently with the CMS.

Image: Shop Owners can edit and manage their shop fast and efficiently with the Retail Xen CMS.
2 - Browser Requirements
This Content Management System is compatible with certain browsers but has limited compatibility with other browsers.
This Content Management System have been designed to be compatible with the following browsers:
- Latest version of Chrome, Edge, Firefox (All Platforms)
- Latest version of Safari (Apple Devices)
- Internet Explorer, Safari (Windows) will not work
- Other browsers may work but not recommended
3 - Creating User Account
Create a New User Account in our Content Management System to handle your daily business tasks easily and efficiently.
Purchase Retail Xen™ Package Plans
Business Owners can purchase from four different Package Plans to setup their shop through the Retail Xen Content Management System. The current values of the package plans may change.
| Package Names | Package Description |
|---|
| Trial Package | Include 30 days Validity with 1 Admin, 1 Branch, and 1 Product for Free (Without any Fee). |
| Silver Package | Include 30 days Validity with 1 Admin, 2 Branches, and 50 Products for 2,500 BDT Monthly Fee. |
| Gold Package | Include 30 days Validity with 2 Admins, 2 Branches, and 100 Products for 5,000 BDT Monthly Fee. |
| Platinum Package | Include 30 days Validity with 10 Admins, 5 Branches, and 500 Products for 10,000 BDT Monthly Fee. |
Register on Retail Xen CMS
Registration for the Content Management System can be done through this: Retail Xen Register Link. Clicking on this Registration Link will redirect to the following page as shown in the example screenshot here.
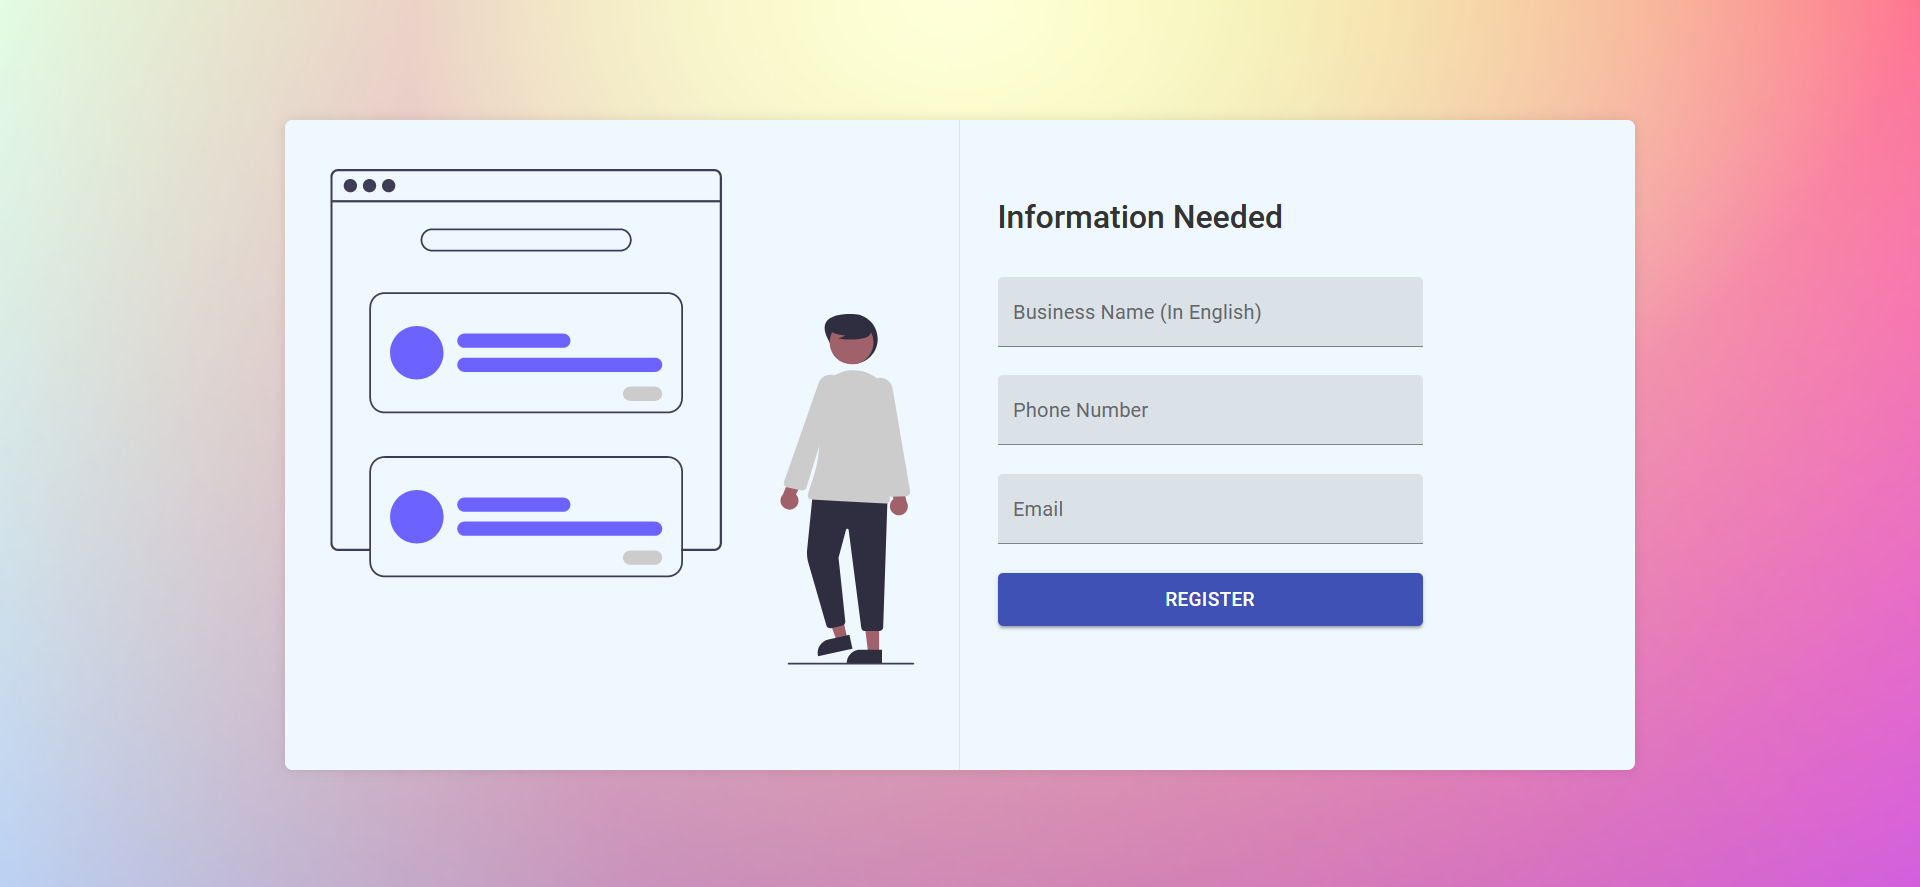
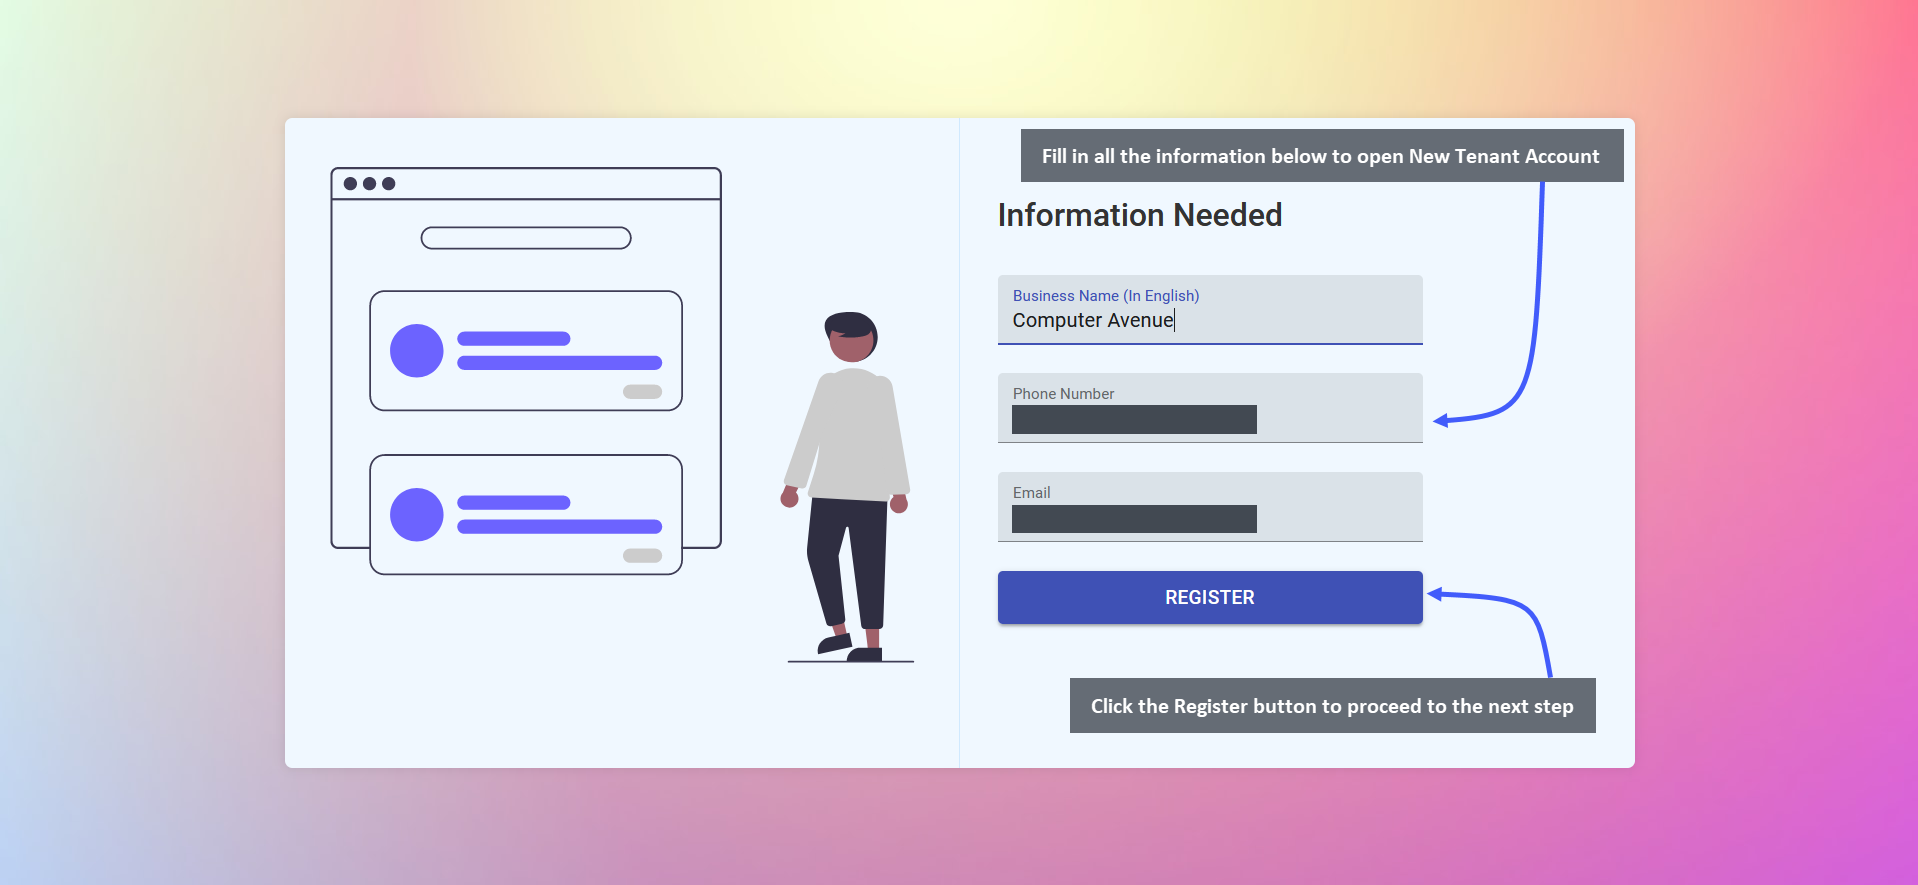
The New User Account needs to be opened with few information including Business Name (In English), Phone Number, and Email. Fill them in and click on the Register button to proceed to the next step as shown below.
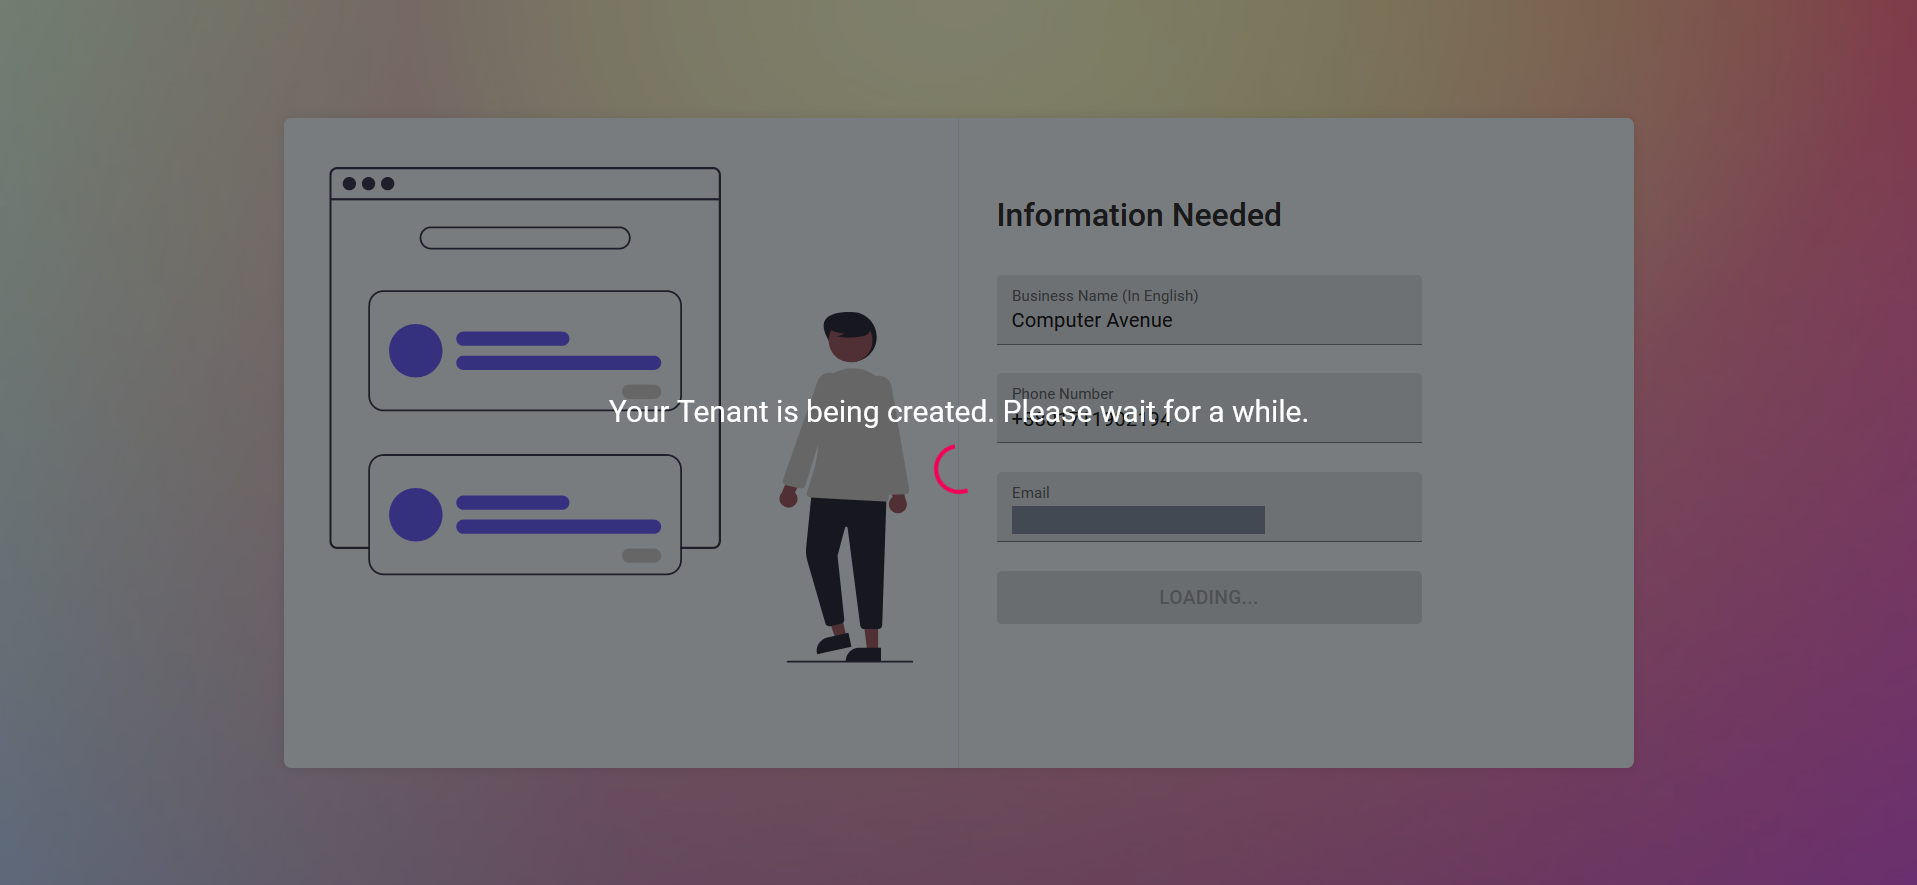
Clicking on the Register button will display that the Tenant is being setup as shown in the screenshot below.
Signing Up with a New Phone Number
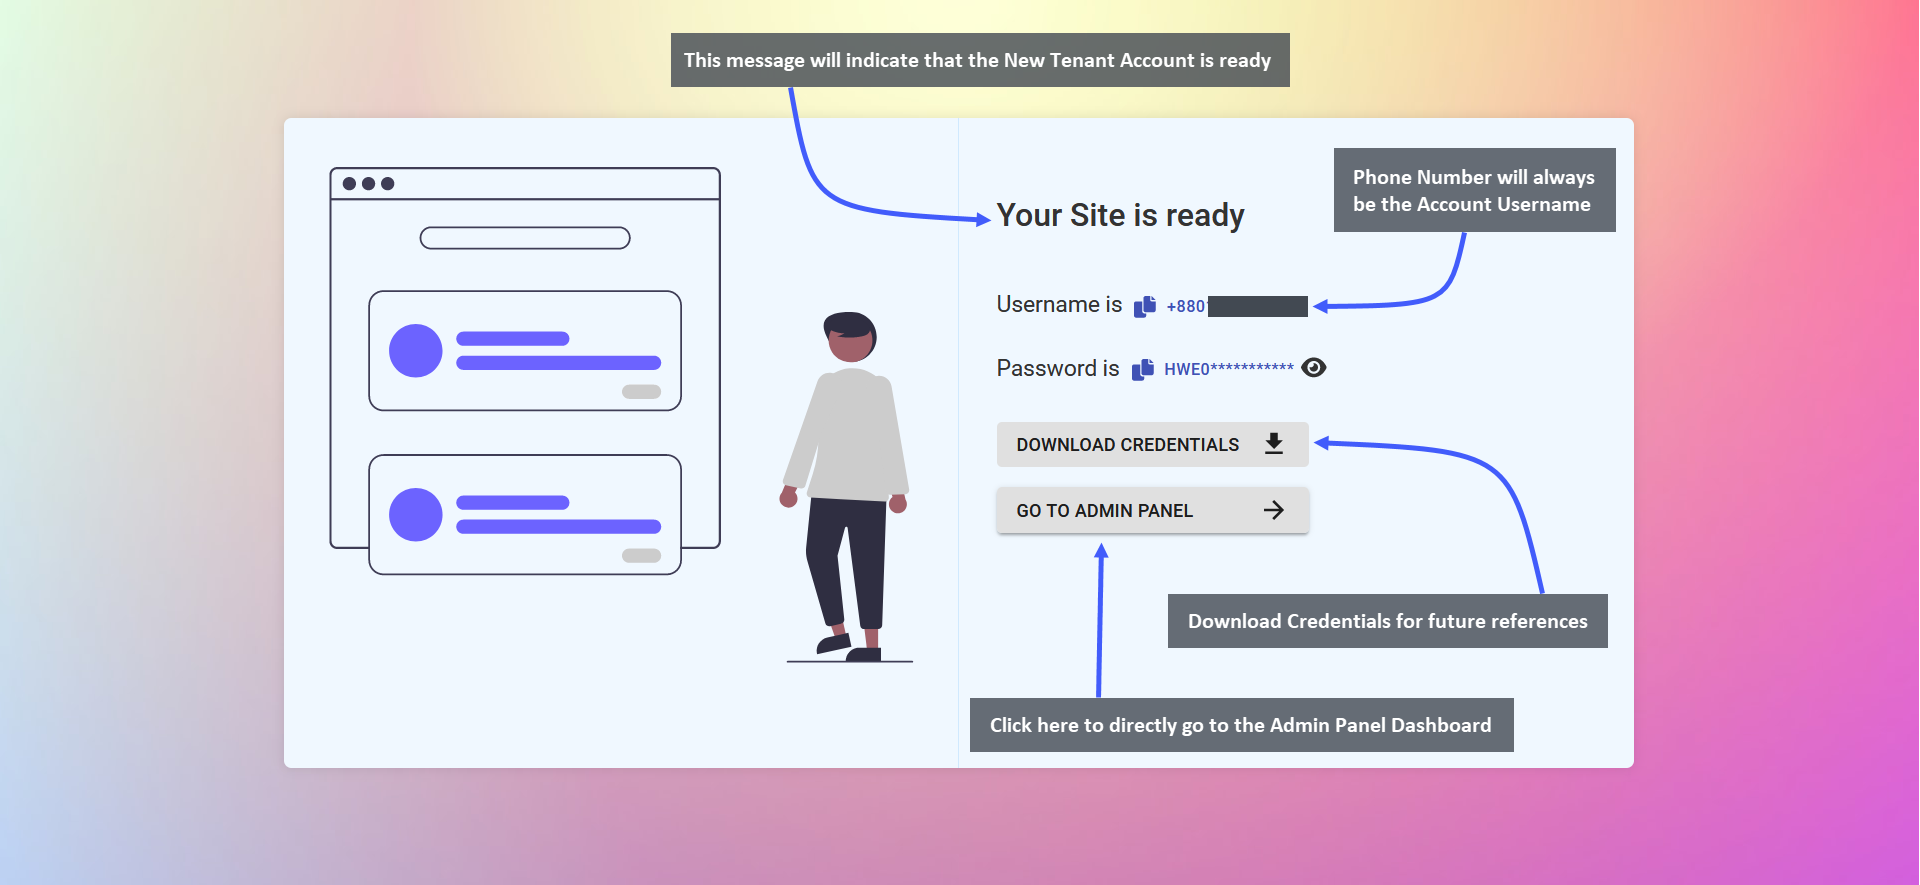
If the User Signs Up for the Tenant Account with a new phone number that has never been used for registration before, then it will redirect to the Username and Password download page. So, once the New Tenant Account is ready, it will redirect to a page from where there will be a button to Download Credentials for New User.
Below will be an option to Go to Admin Panel, clicking on which will redirect to New Tenant Admin Dashboard. It is important to download the credentials of the Tenant Account for future references.
Signing up with an Existing Phone Number
If the User Signs Up for the Tenant Account with an existing phone number, then it will redirect to a page with a message and a box asking to provide the OTP that is sent to the Phone Number. Type the OTP that sent to the phone number. Once OTP is typed, it will automatically start processing the Tenant Account of the New User.
If OTP is not sent, click on the Resend button to send a new OTP. OTP is only sent if an account with the phone number already exists. When New Tenant Account is ready, it will redirect to a page to Download Credentials for New User. Click Go to Admin Panel to directly go to the Dashboard of the New Tenant Admin.
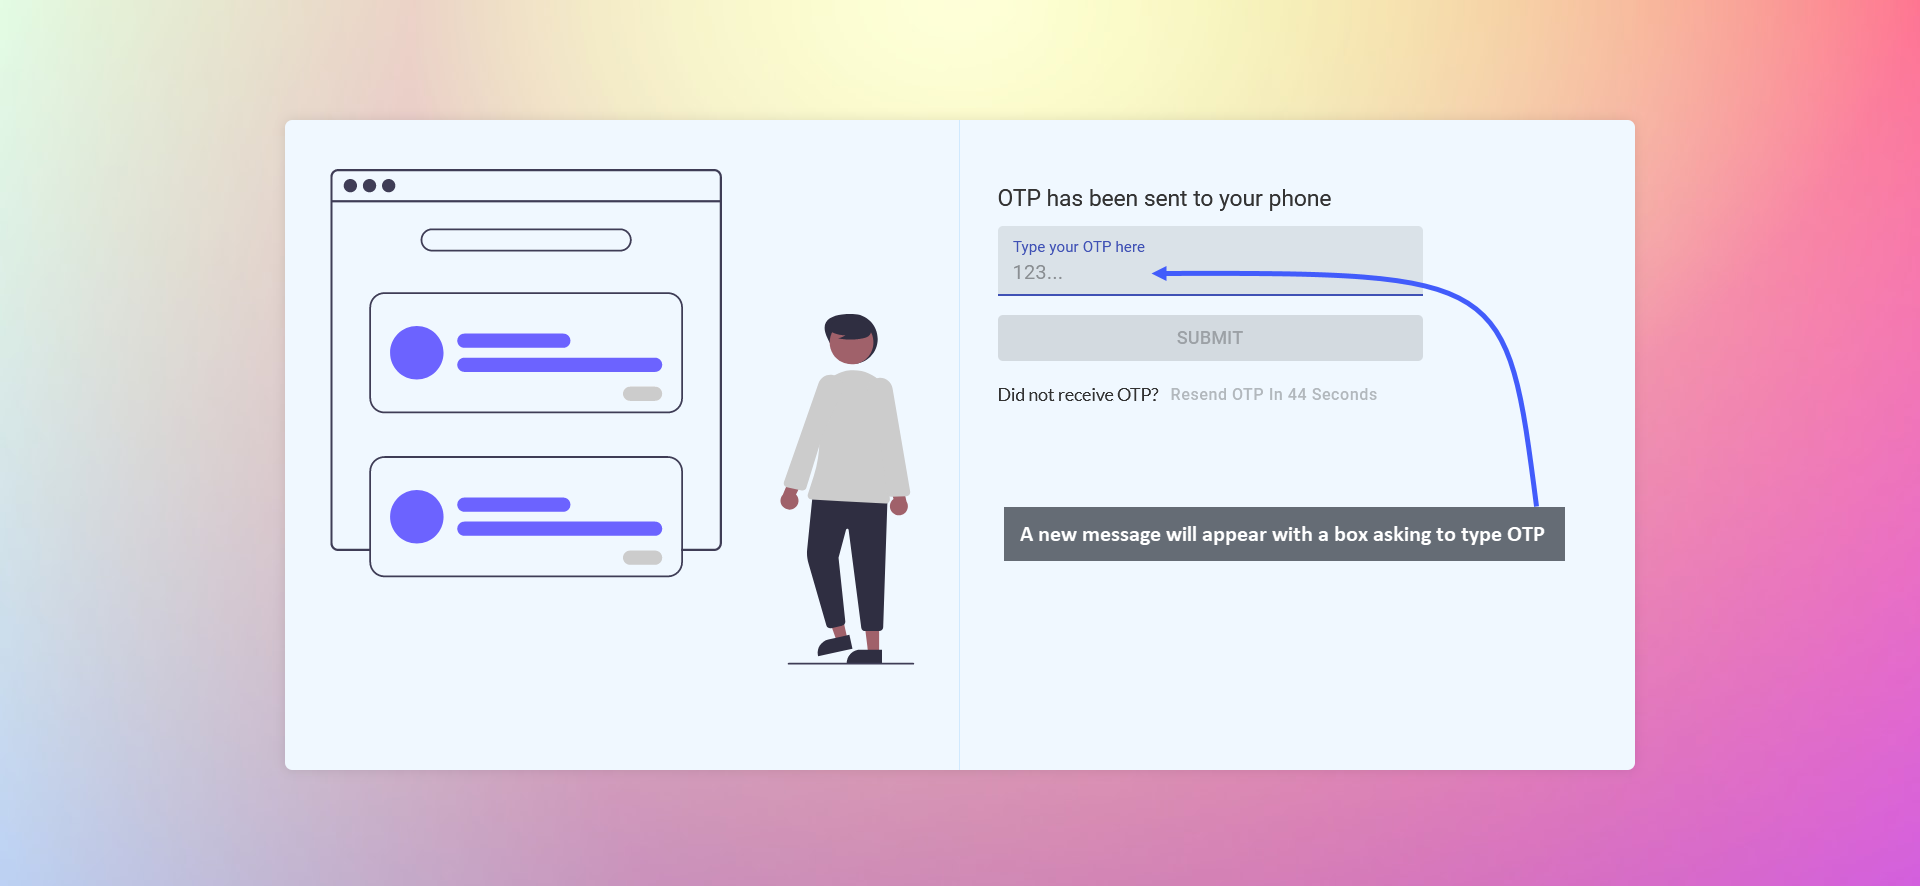
Image 1: After OTP is sent to Phone, a new message will appear with a box asking to type the OTP.
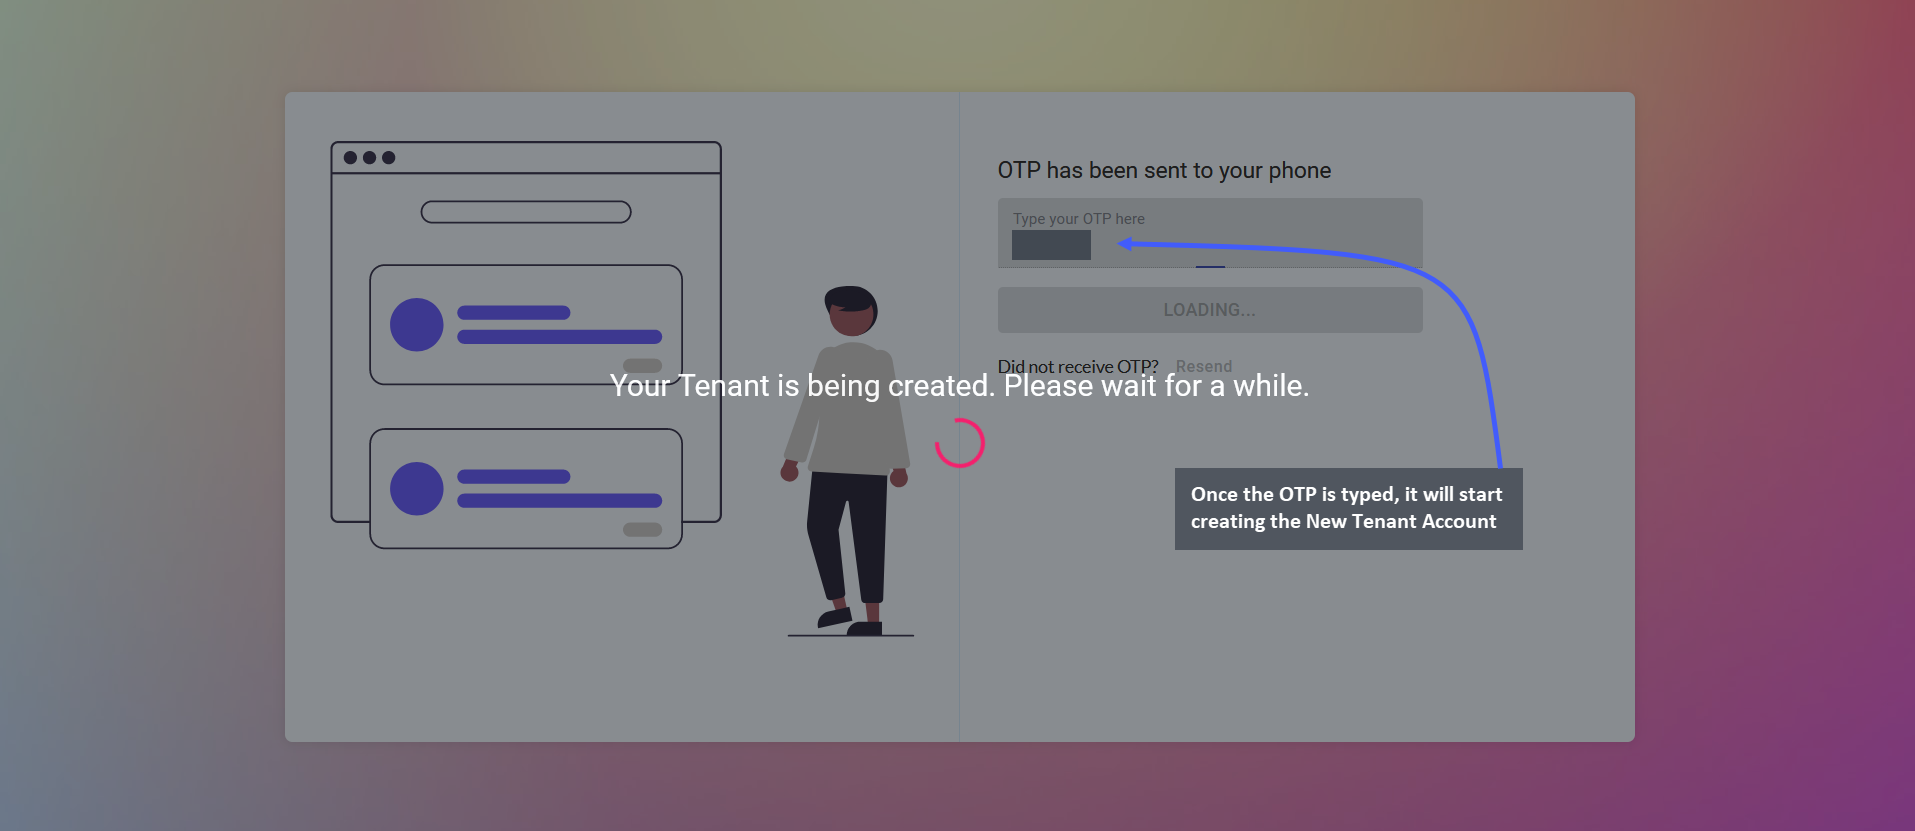
Image 2: After the OTP is typed on the box, it will start processing and creating the New Tenant Account.
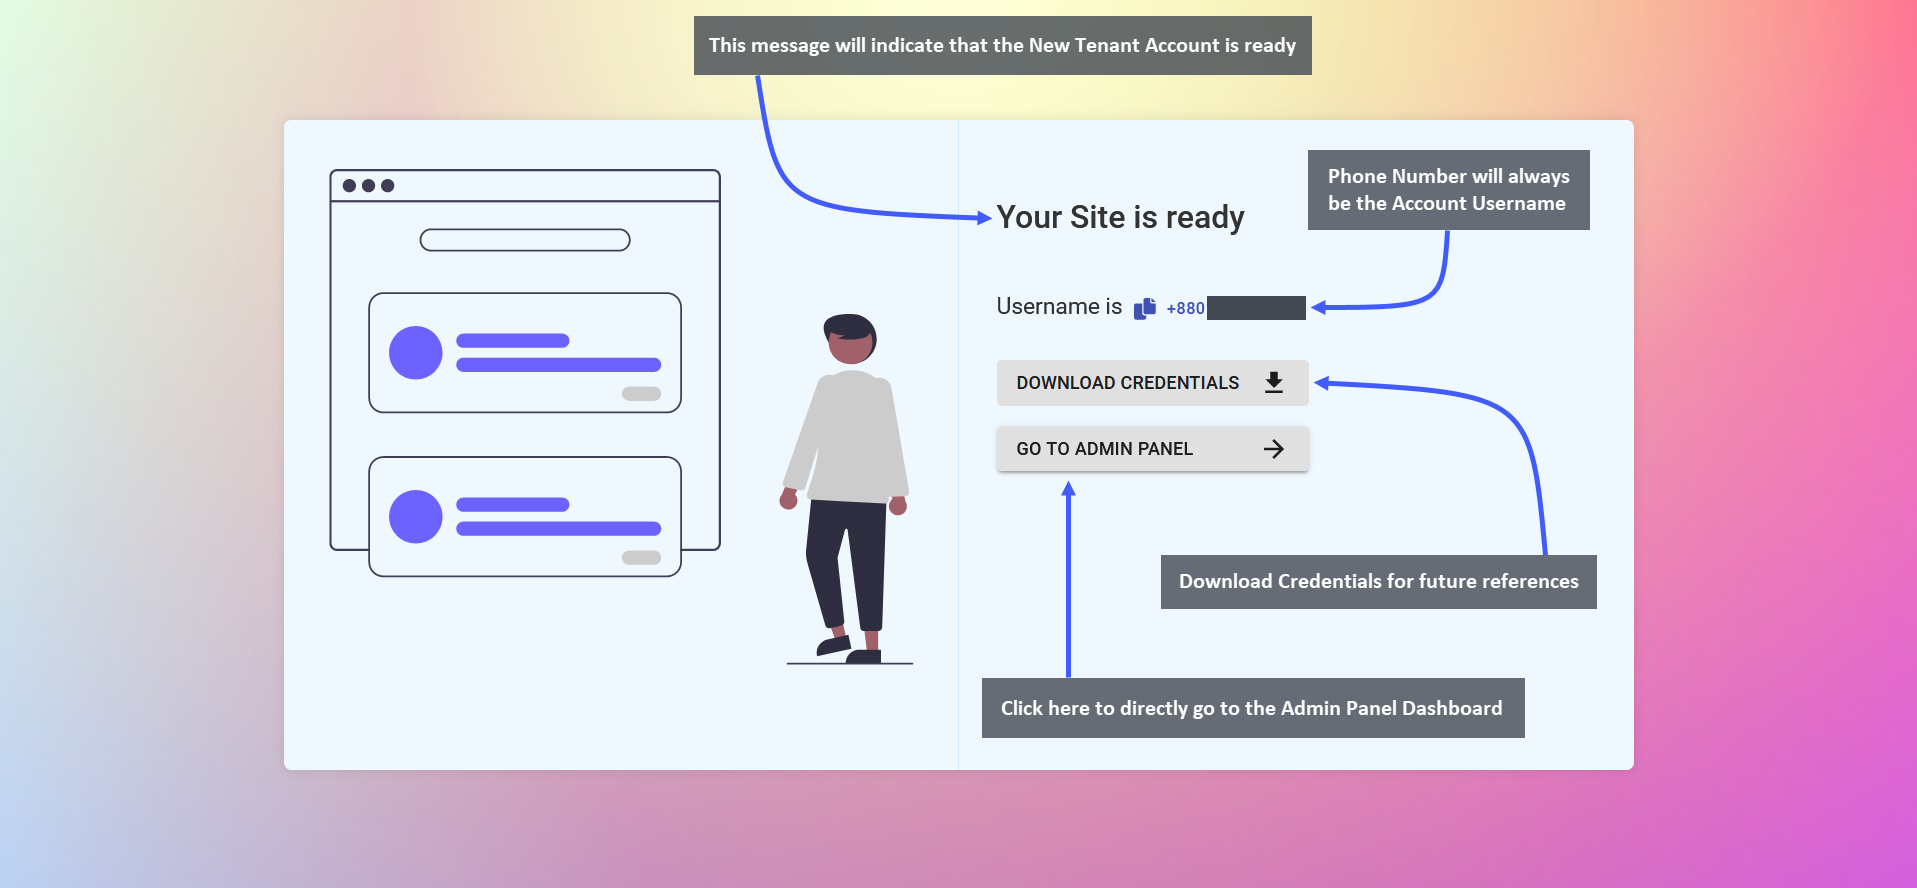
Image 3: When Tenant Account is ready, Dashboard will be accessible and Credentials can be downloaded.
New Admin Panel Dashboard
Click on Go to Admin Panel to be redirected to the New Admin Dashboard with various settings and modules. It consists of six main modules - Dashboard, Customers, Orders, Products, Product Settings, and Content Management.
4 - Logging into the CMS
Logging into the CMS will allow Tenant Users to create and manage several tenants and shops.
Login to the Admin Panel
When the New Tenant Account is created, save or bookmark the Login URL for future logins. The Login Link will usually include the Store Name at the beginning of the URL within the blank space as shown in this example: https://_________________________________.retailxen.net/admin/dashboard
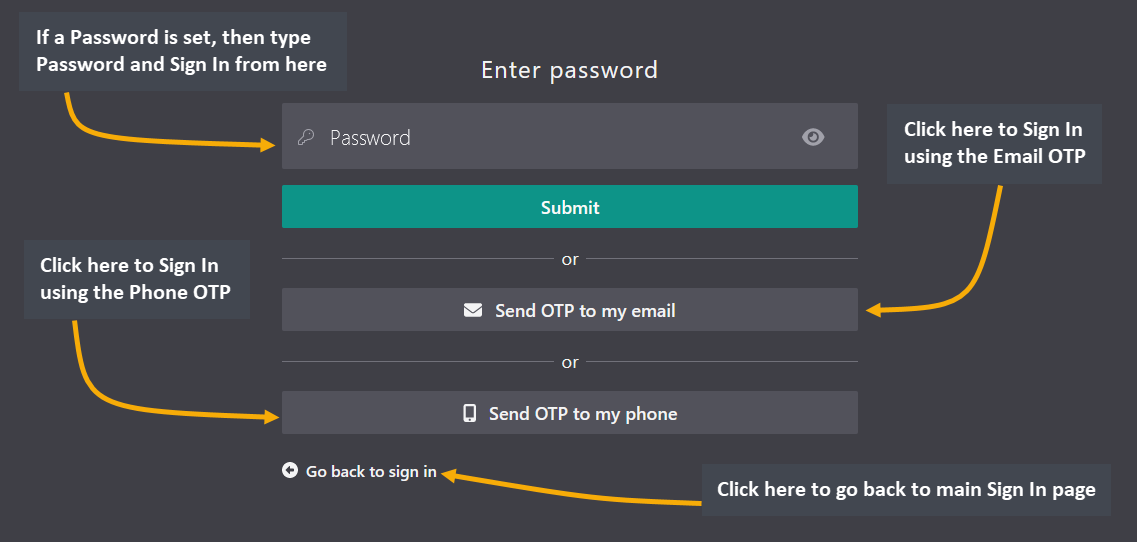
Therefore, log into the Admin Panel using the saved login link. When attempting to Log in, the page will appear as follows, where the User can Sign in with Password, or alternatively Sign in with Email or Phone OTP.

Steps of Admin Panel Login
Clicking on the Sign In button will redirect to this page, where there are options to Sign In using Password, Email OTP, or Phone OTP as shown in the screenshot. So, use any of the three Sign in options to Login to Dashboard.
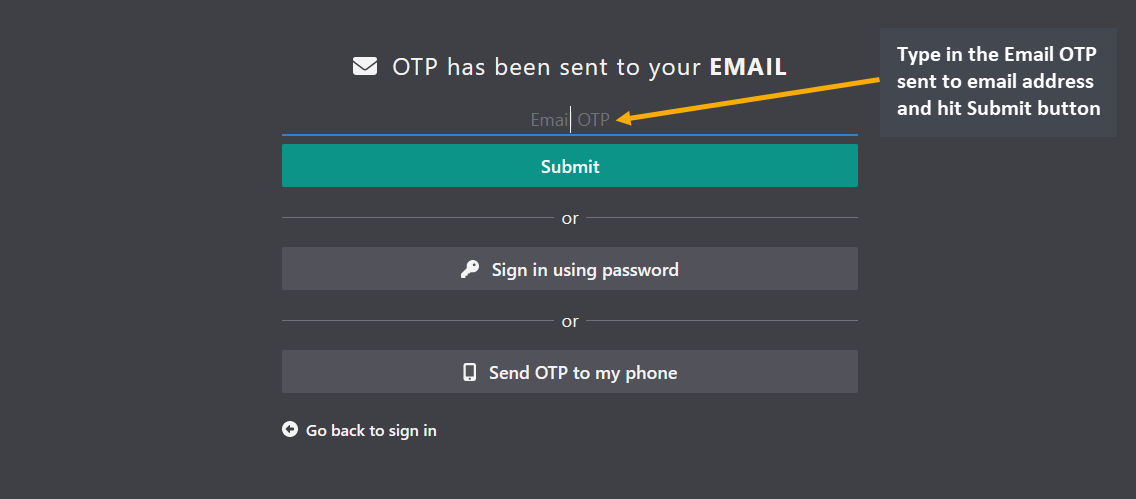
To Sign in with Email OTP, click on Send OTP to my Email that will redirect to this page. Type in the Email OTP received in the email address and hit Submit that will automatically Log the User into the Dashboard.
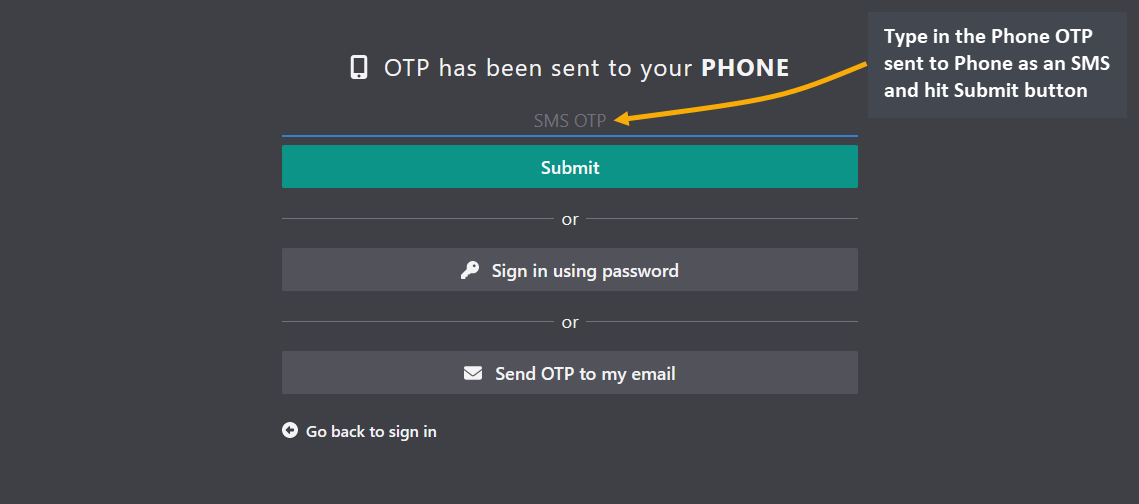
To Sign in with Phone OTP, click on Send OTP to my Phone that will redirect to this page. Type in the Phone OTP received in the phone as an SMS and hit Submit that will automatically Log the User into the Dashboard.
Admin Panel Dashboard
Logging in will redirect to the Admin Panel which comprises of separate modules to manage various aspects of the Shop like – Customers, Orders, Products, Product Settings, Content Management, and Miscellaneous. So, check up on day-to-day sales or manage Products, Orders, Customers, and The Website using these modules.

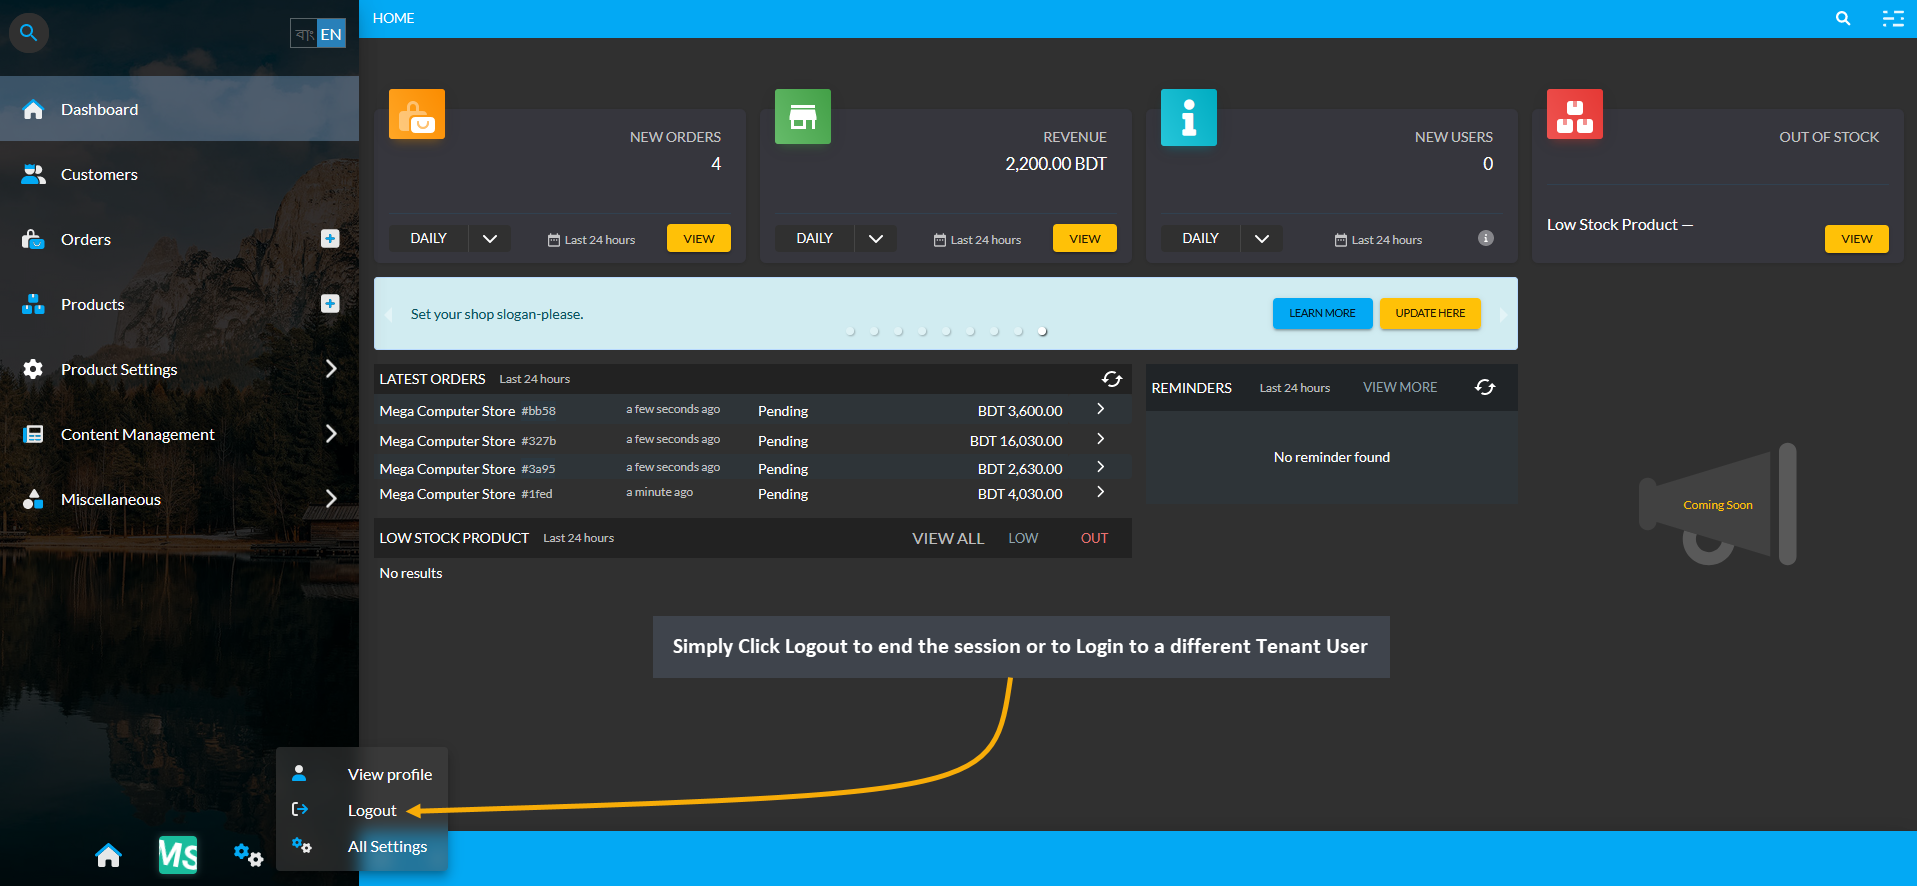
To end the sesson or to login to a different Tenant User, simply click Log Out option from the Navigation Menu.
