Purchase History
Click Products module and use Stock Purchase option to buy new stock and view them in Purchase History.
Stock Purchase
After Stock Purchase from a Supplier, Shop Owner can view the history of stock purchase from Purchase History page. Select the Stock Purchase option for any Product by clicking ⋮ on the Products Page. Clicking this option will redirect to the Add Product Stock page from where Shop Owner can purchase the Per Unit Products with different payment methods from the target Credit Supplier.
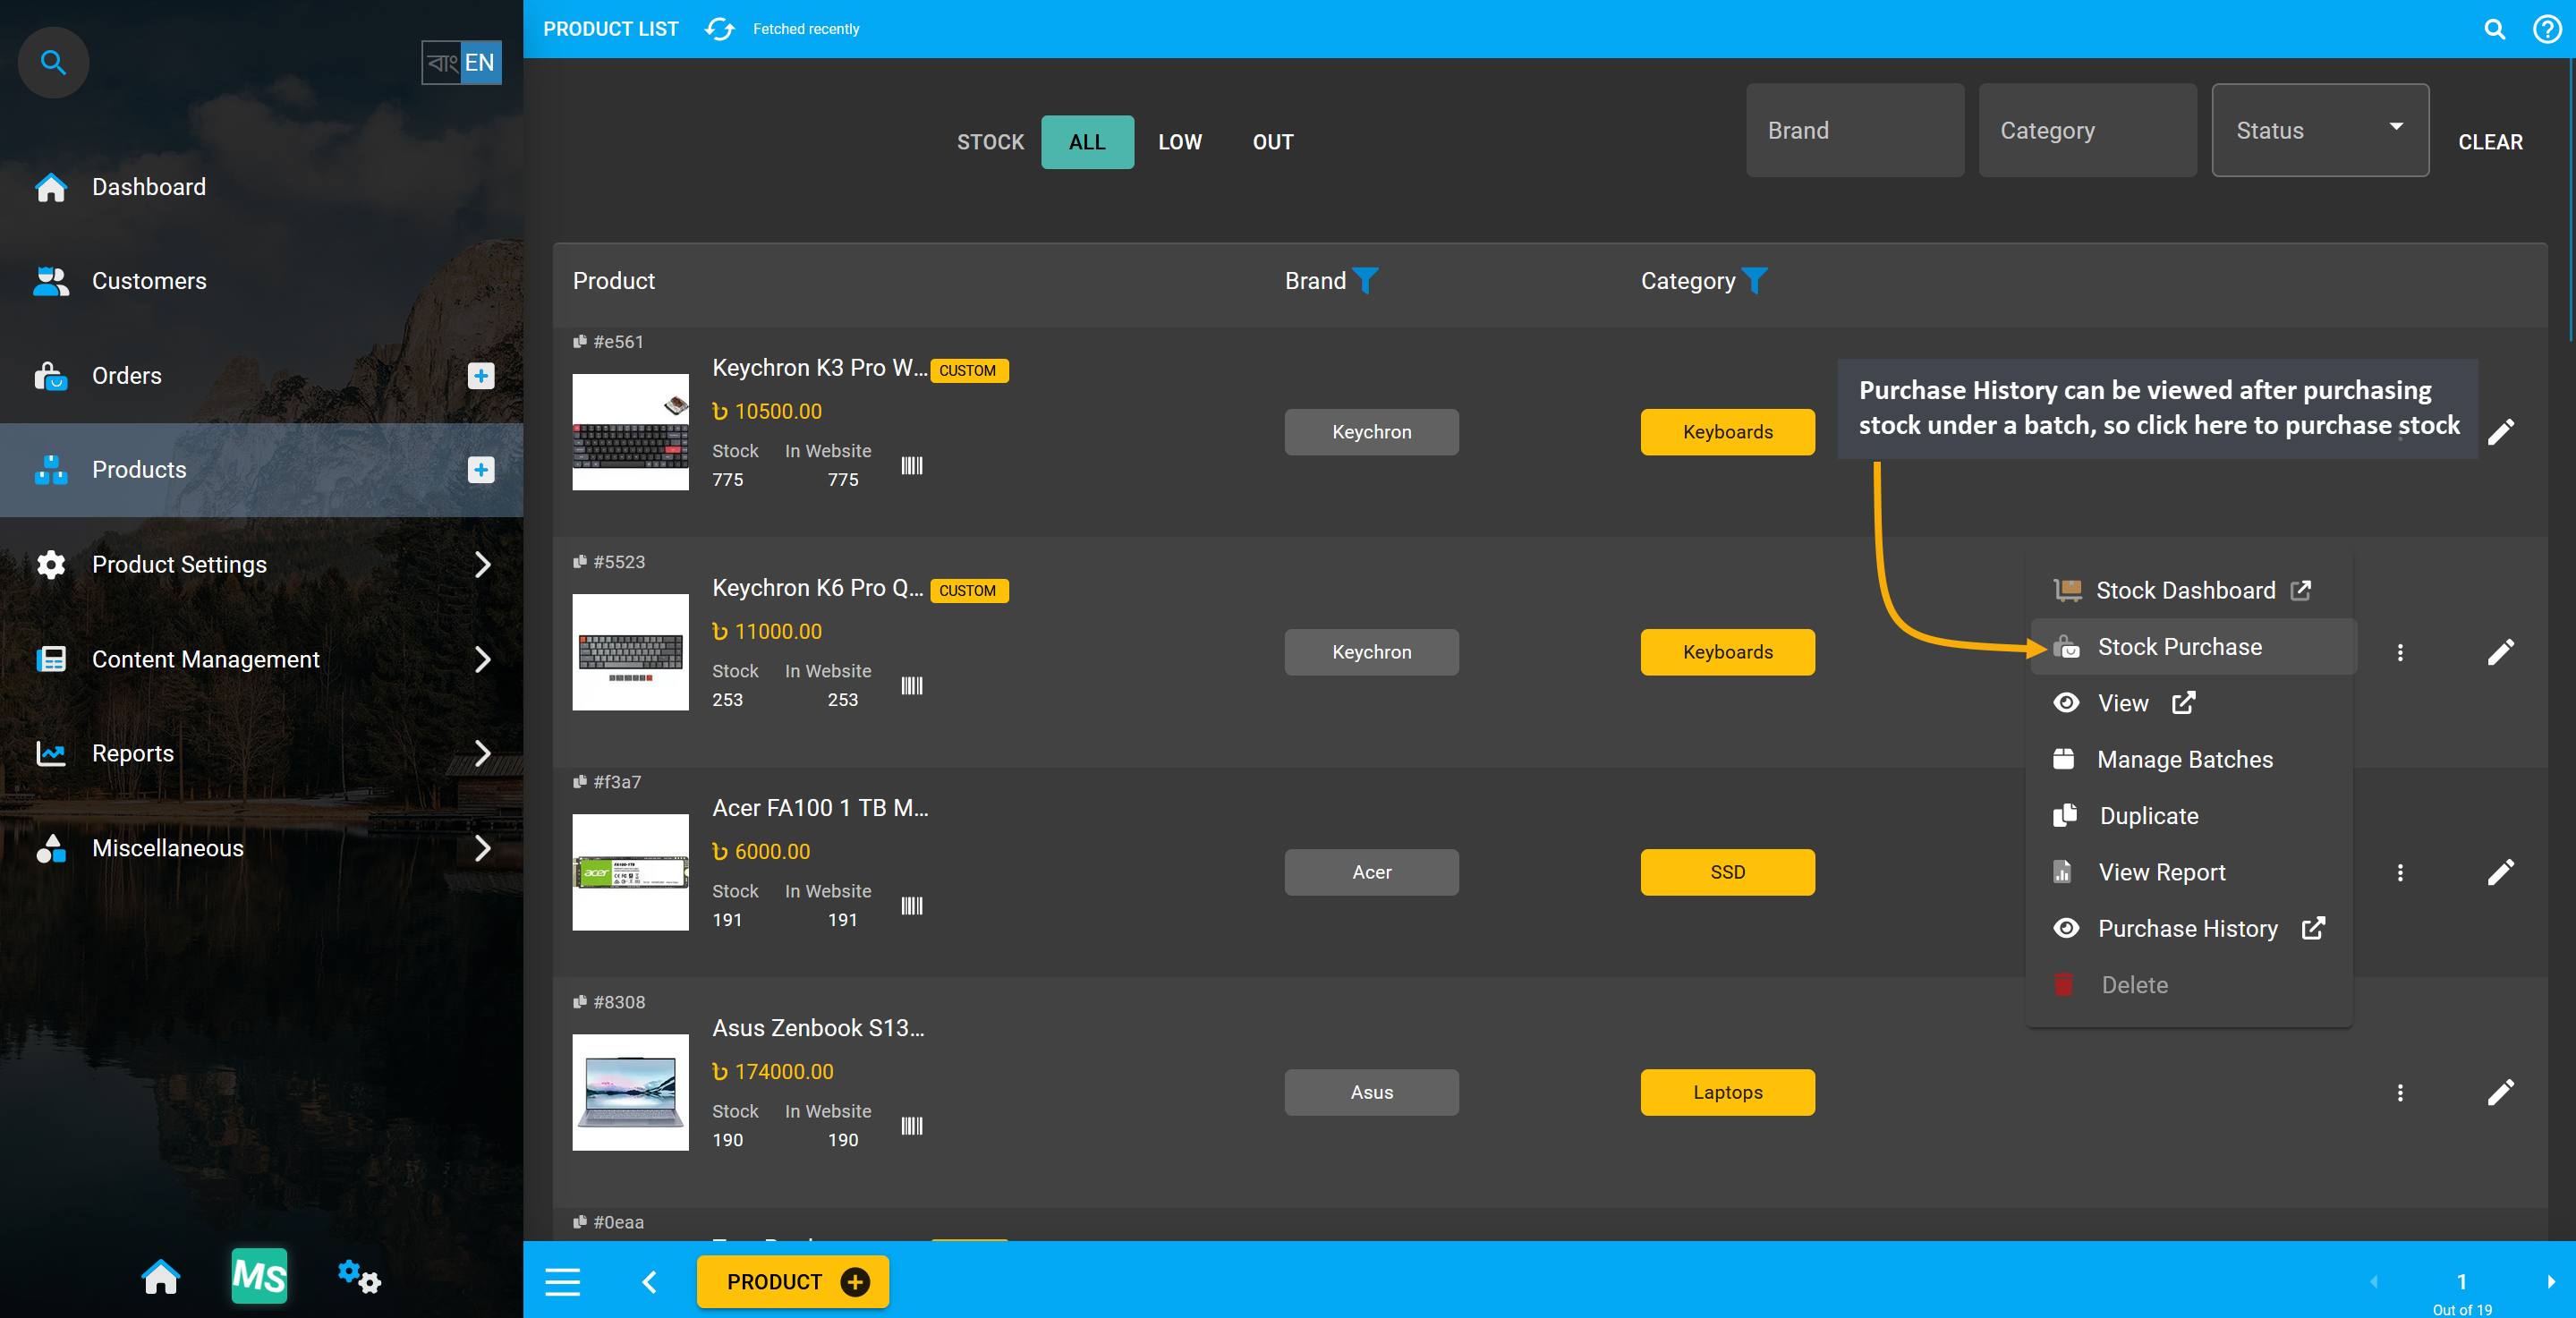
Image 1: Purchase History can be viewed after purchasing stock, so click to purchase product stock.
On the Add Product Stock page, select a Payment Method from Acquisition Options, set Purchase Price and Sell Price Per Unit, select Credit Supplier, and Warranty if it is not automatically selected. Add Settled Price if full payment is not selected. Then click Auto Generate Serial Numbers button to generate Quantity and Serial of Per Unit Product that Shop Owner will buy from Credit Supplier. Fill Prefix, Suffix, Start Counter, and End Counter on the pop-up that opens to generate Product Stock with individual serial numbers.
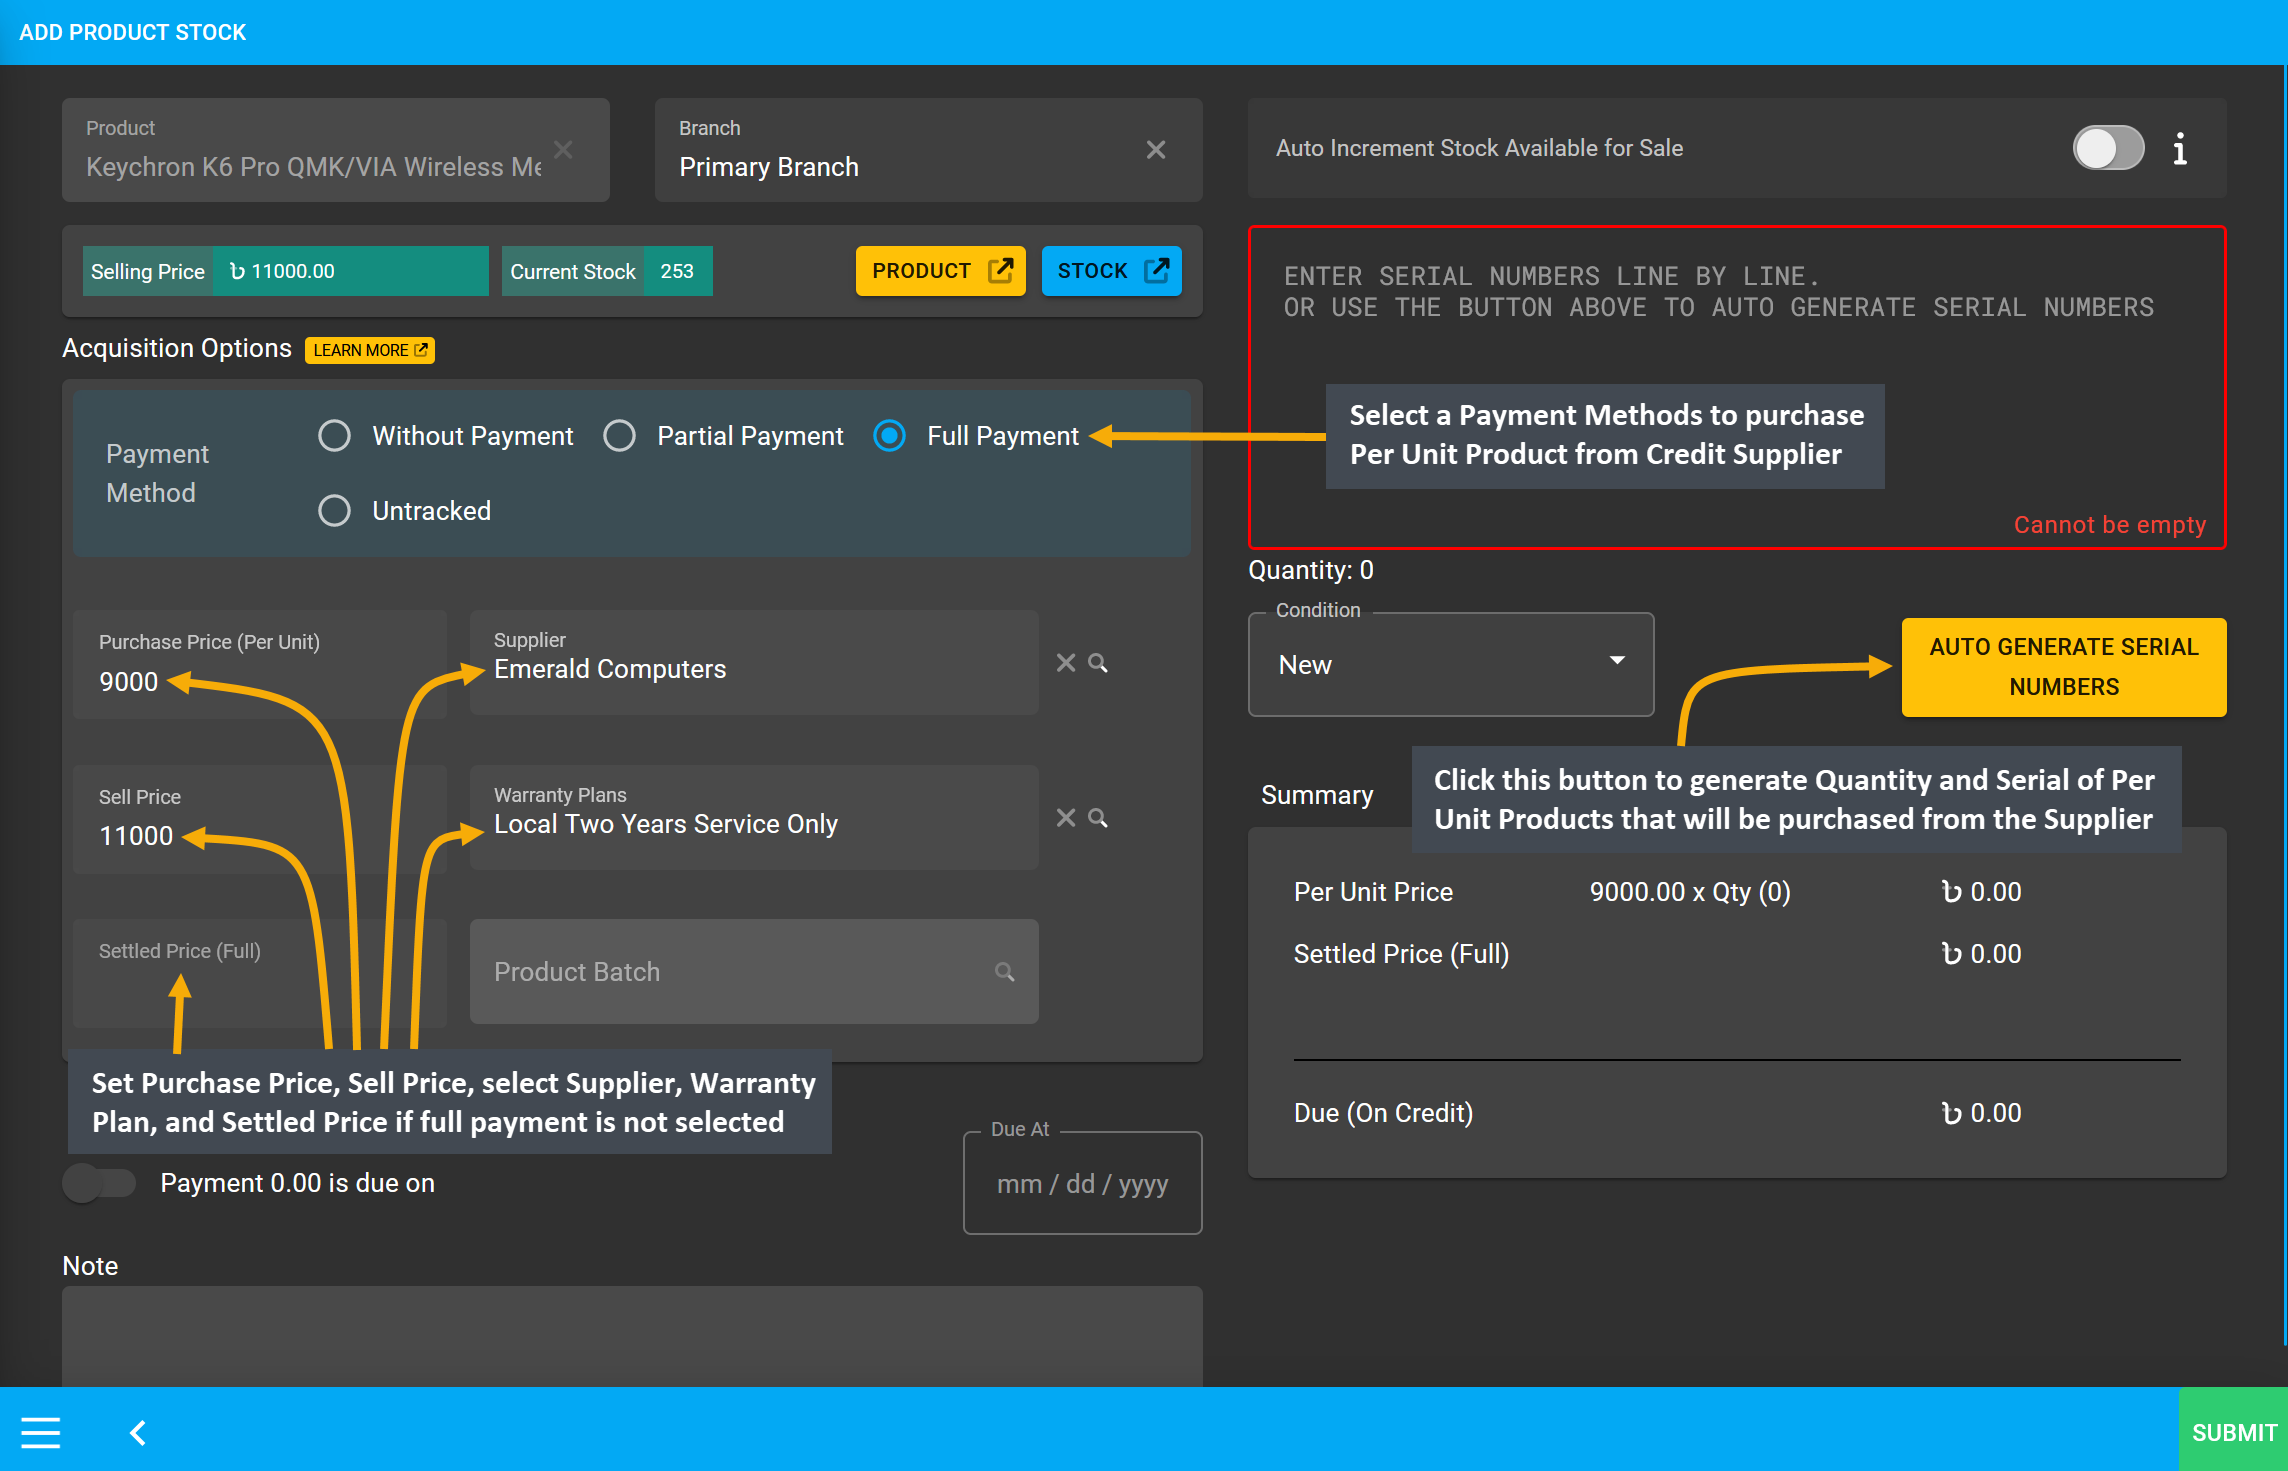
Image 2: Set Purchase, Sell Price, Supplier and Warranty, and click Auto Generate Serial Numbers.
After clicking the Auto Generate Serial Numbers button, a pop-up will appear where Product Serial Number and Quantity needs to be set with Prefix, Suffix, Start Counter, and End Counter. Click the Generate button to create the Per Unit Products purchased from Credit Supplier that will generate serial numbers.
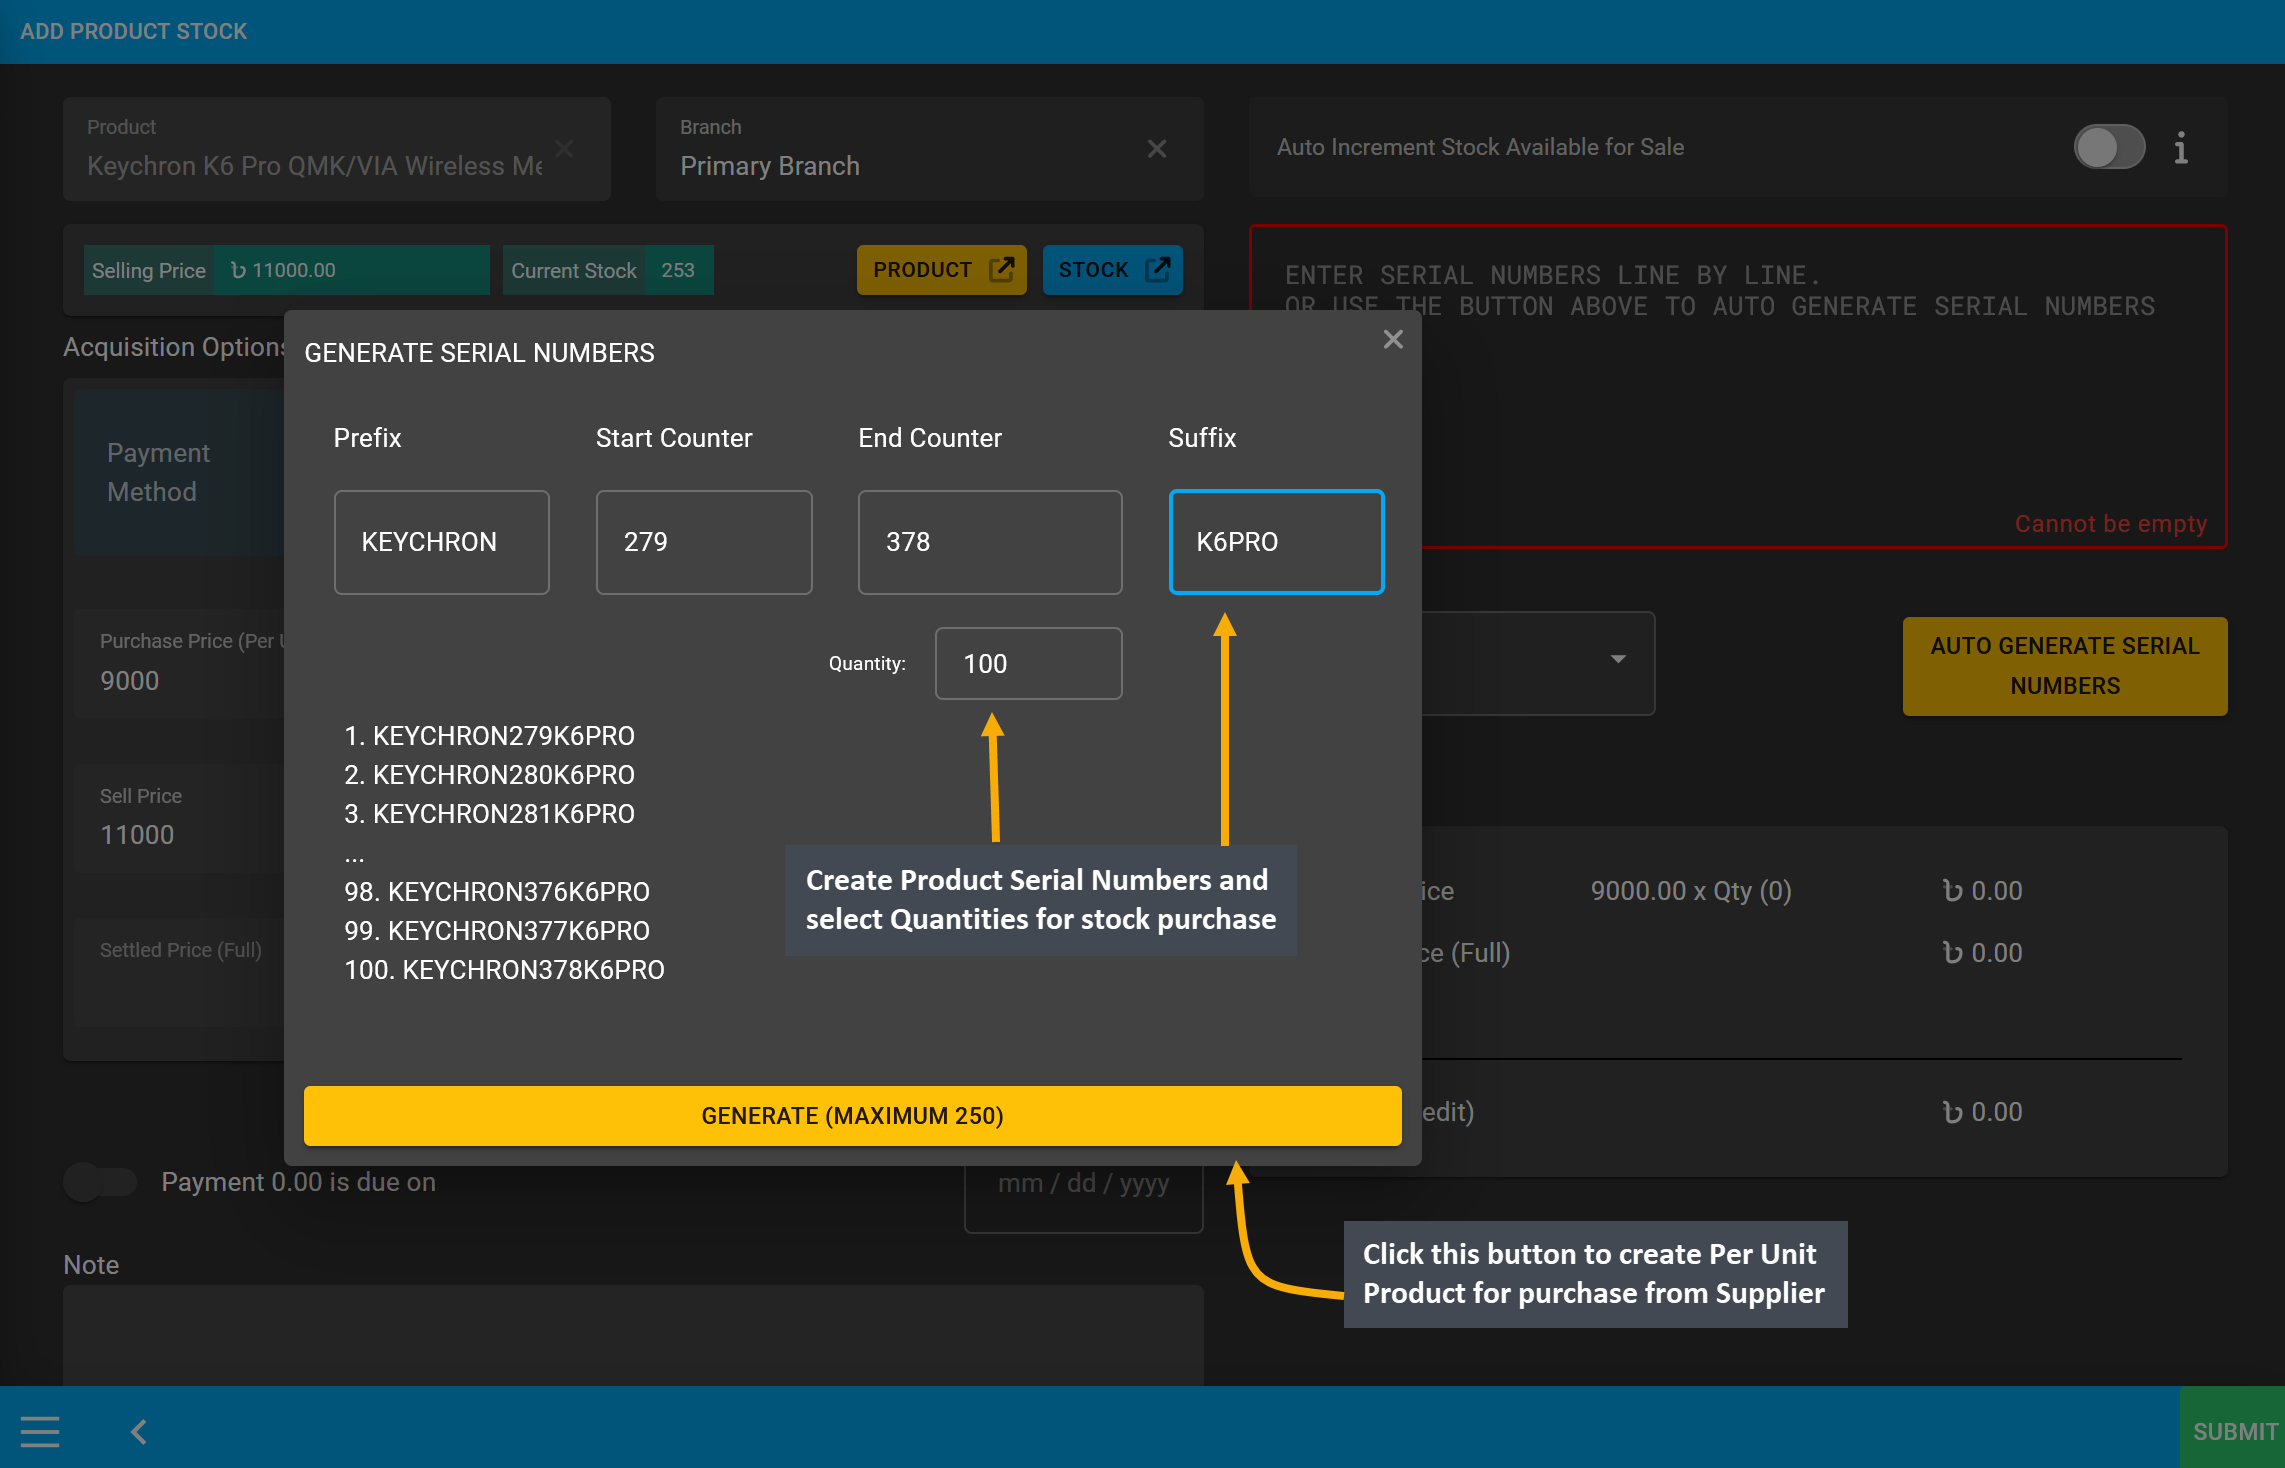
Image 3: Set Product Serial Number and Quantity with Prefix, Suffix, Start Counter, and End Counter.
After Product Serial Numbers and Quantities are generated for the target Per Unit Product, full payment amount will automatically be set on the Settled Price box. The autogenerated serial numbers for created Per Unit Product quantities will show inside the box. Click the Submit to complete the purchase process.
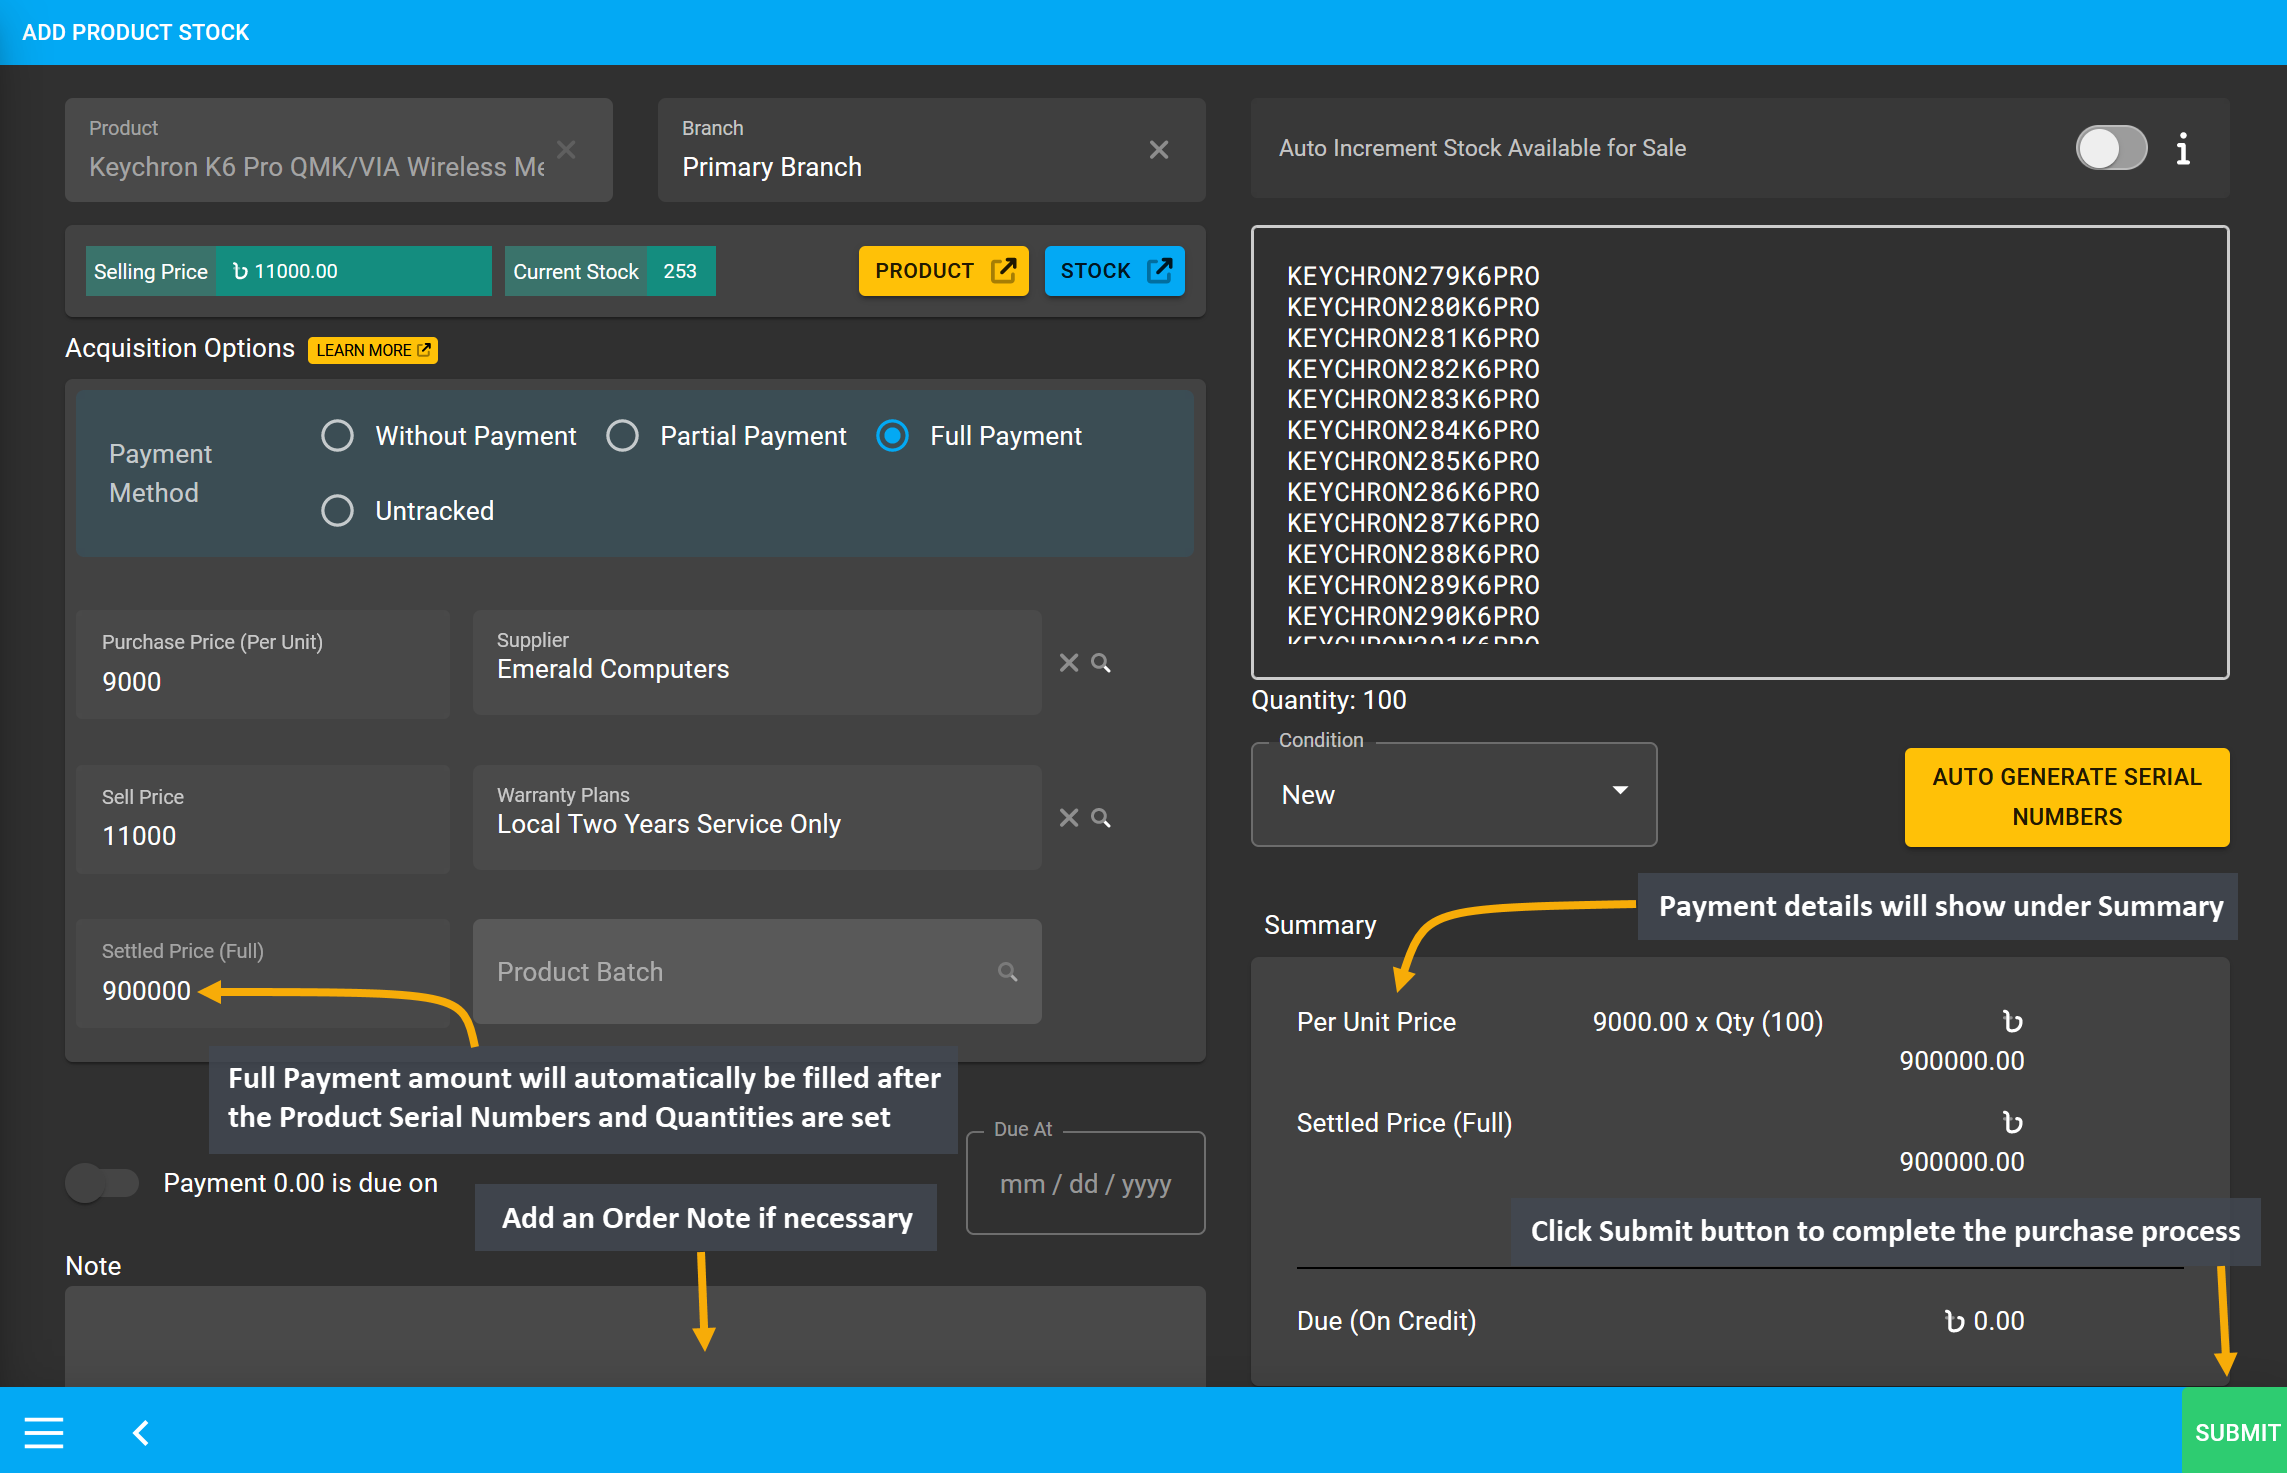
Image 4: After Payment amount is set, click Submit to complete purchase with selected Payment Method.
Then, a pop-up will show uploading with assigned Per Unit Product quantities and confirm when units are successfully created. Click Okay to save changes when auto generated serial numbers are 100% uploaded for completing the Per Unit Product purchase process from Credit Supplier. To purchase more quantities of same Per Unit Product from same Credit Supplier, click the Purchase Product from Same Supplier button.
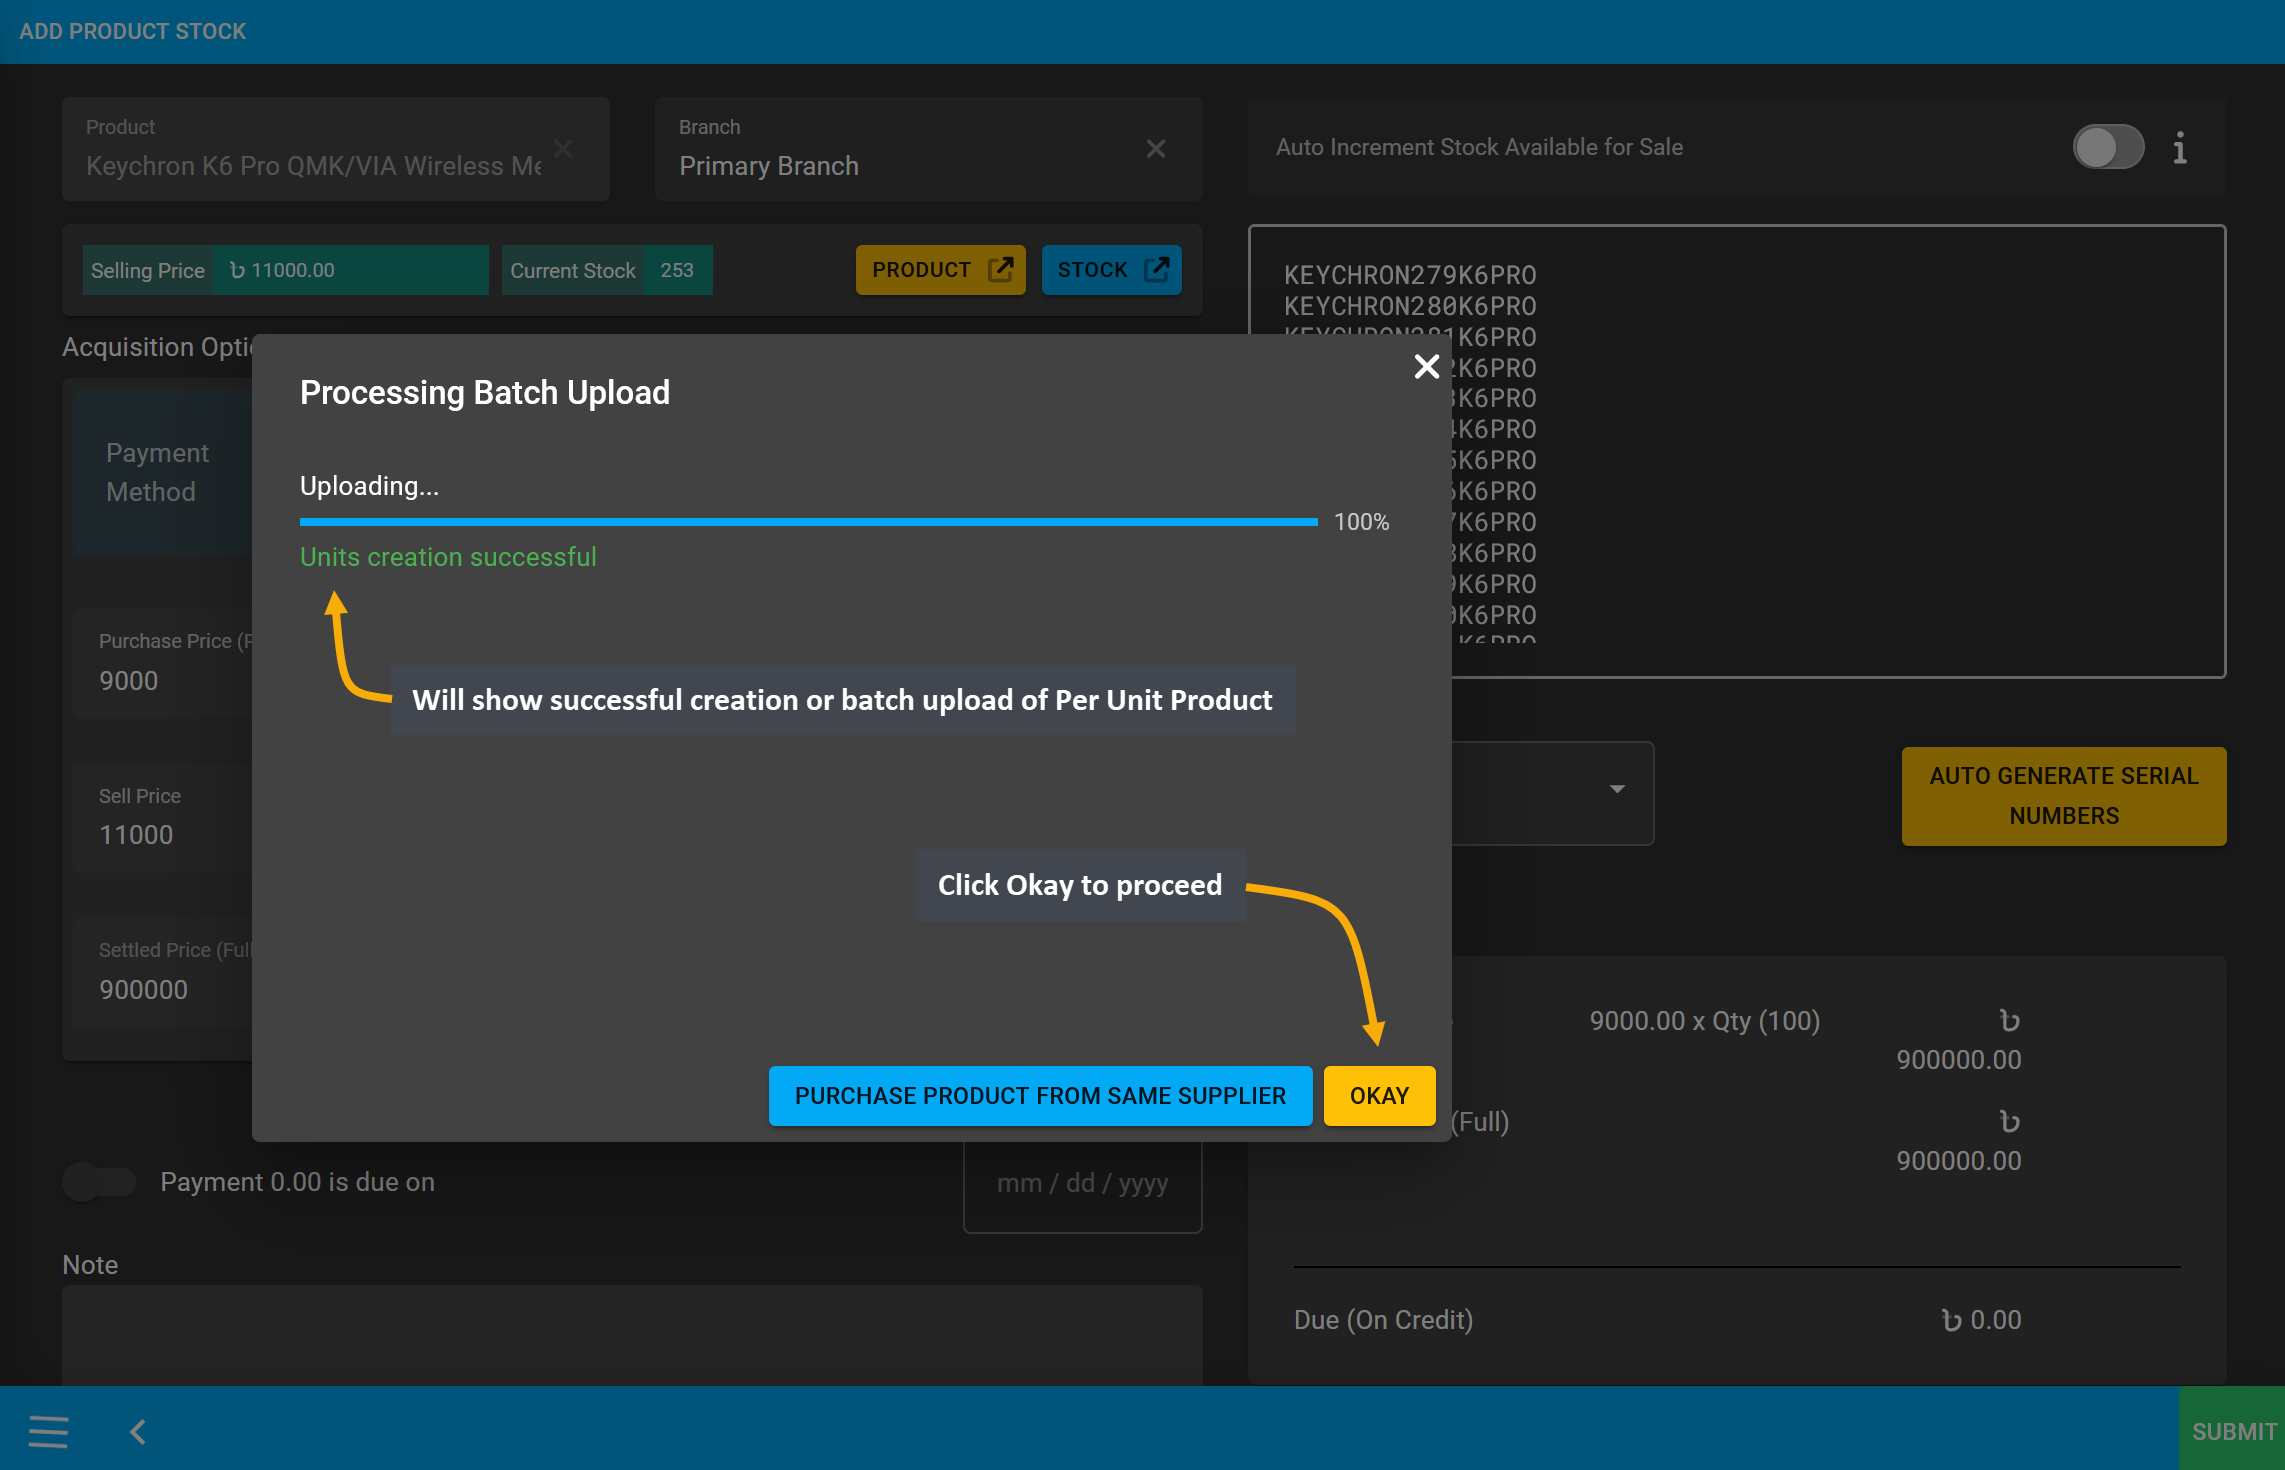
Image 5: Will show successful creation or batch upload of Per Unit Product, Click Okay to proceed.
Clicking on Okay will redirect to Unit Stock Management page where successfully created Batch of Per Unit Products will be displayed on the top of the list as marked in the example screenshot. All individual serial numbers will also be displayed as Product SKUs, through which stocks can be differentiated.
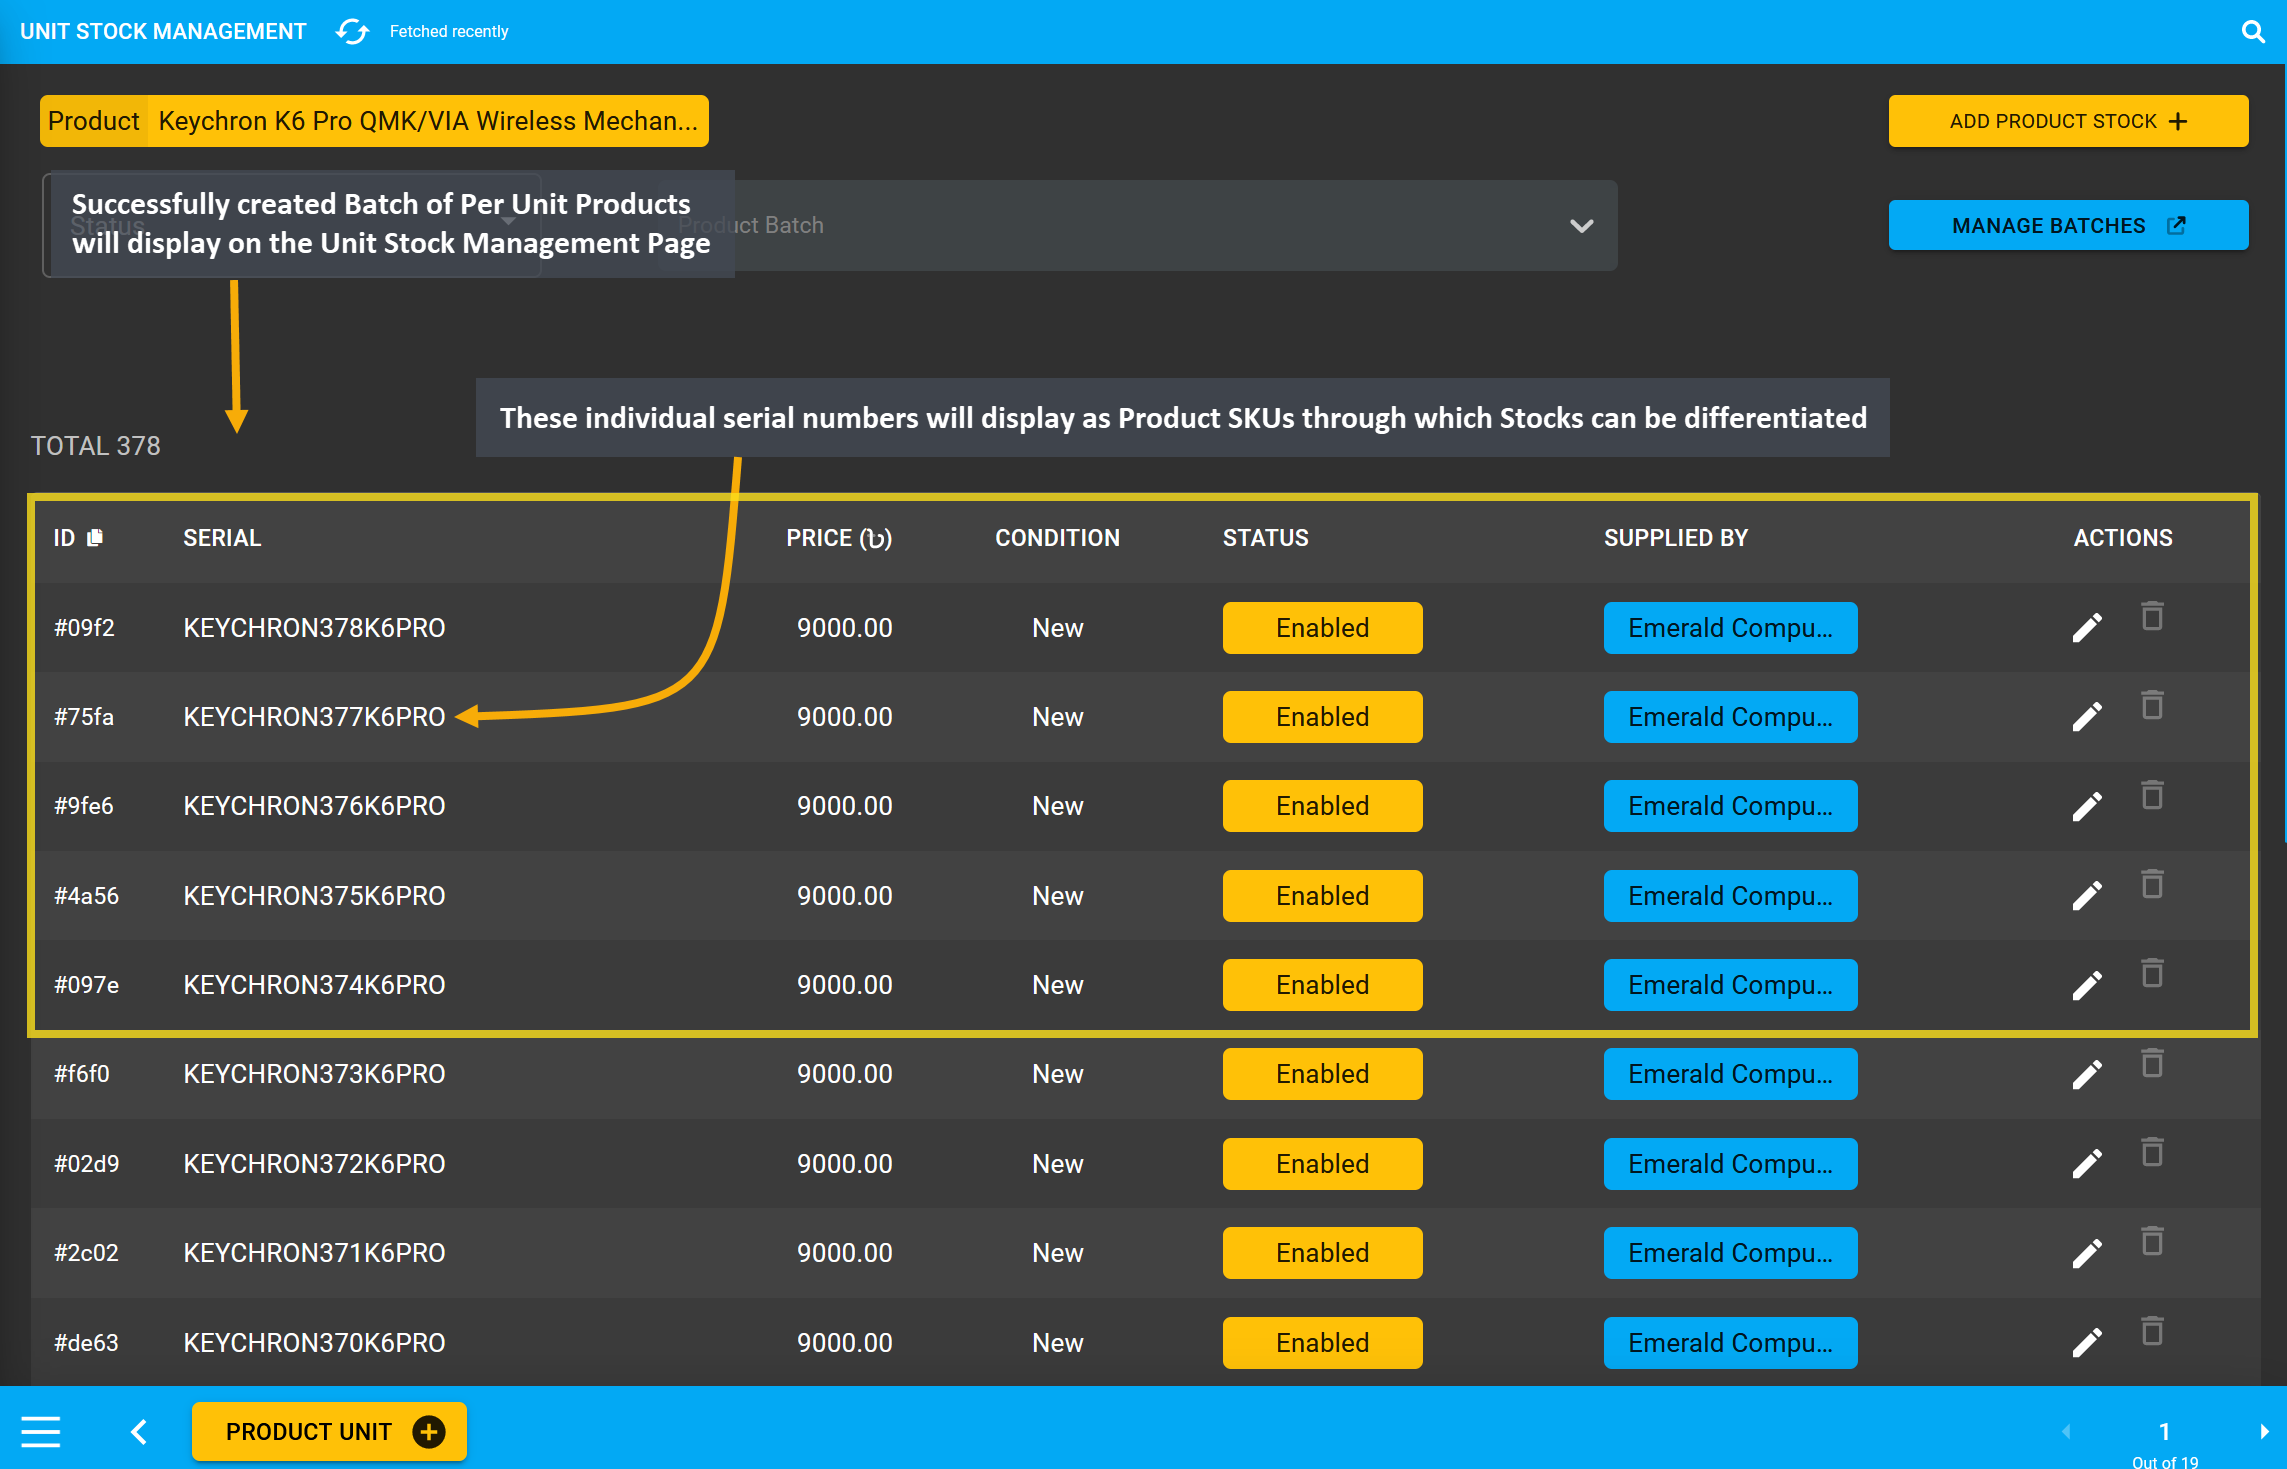
Image 6: Successfully created Batch of Per Unit Products will display on Unit Stock Management Page.
View Purchase History
Once Per Unit Product Stock has been purchased from the Supplier, the Shop Owner can check history of their purchase from Purchase History option under Reports section. It will redirect to Purchase History page.
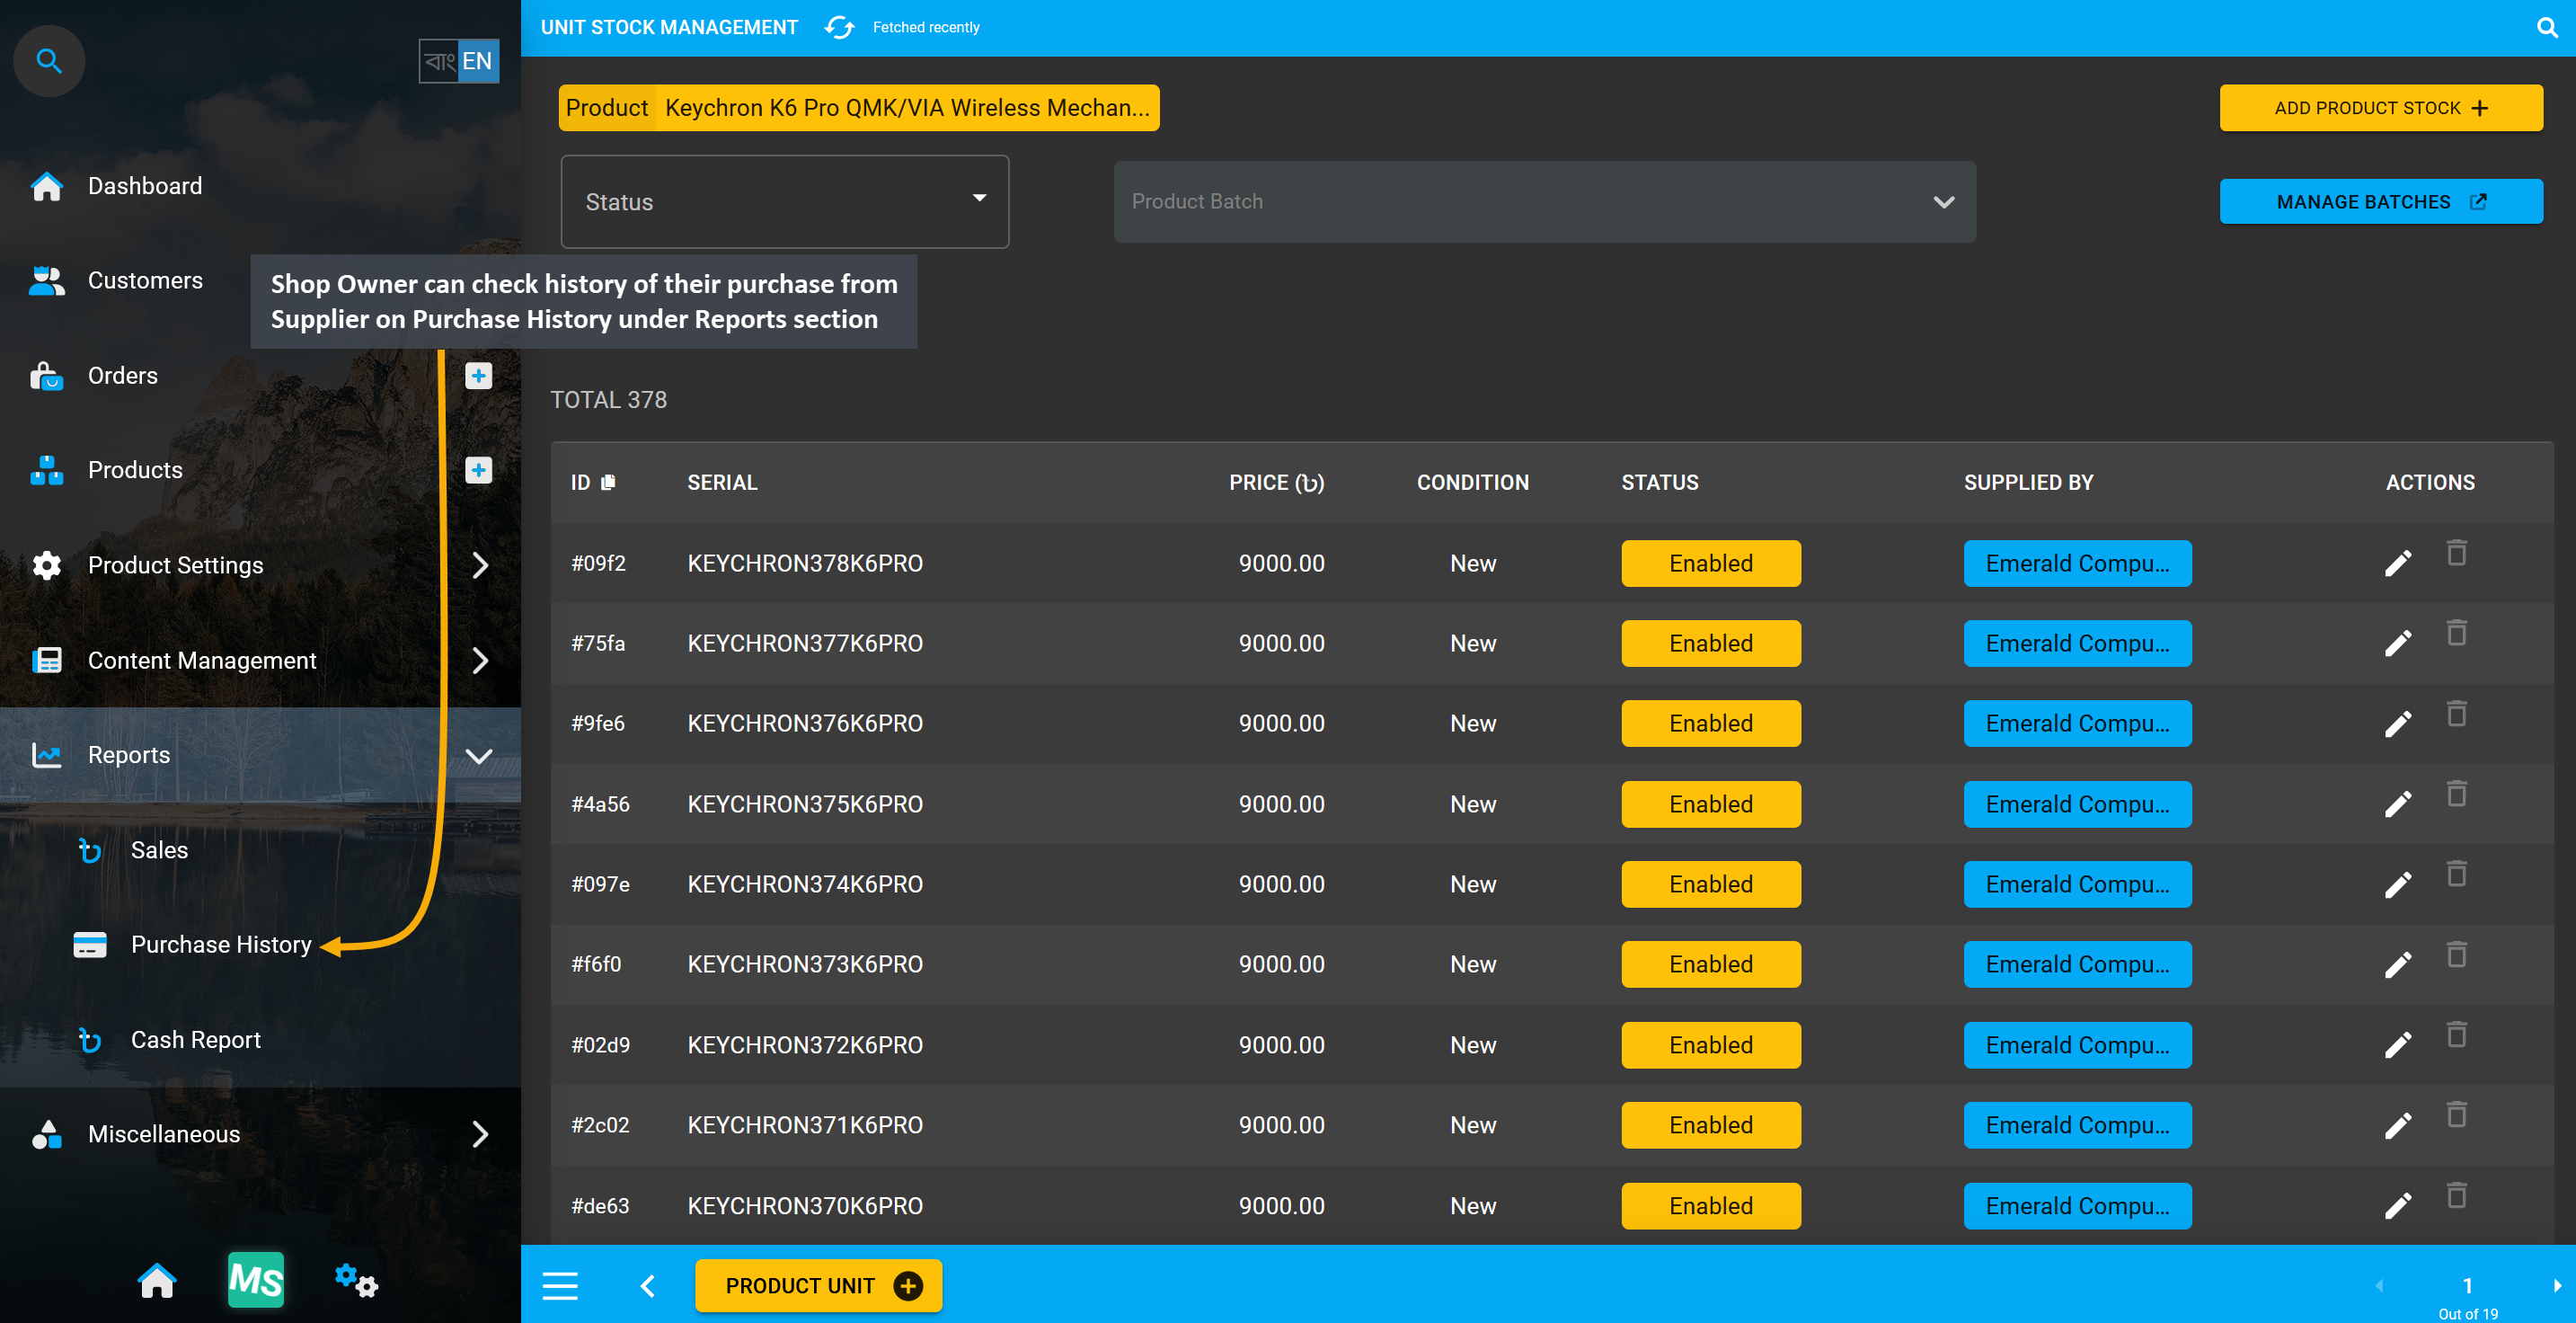
Image 7: Shop Owner can check history of their purchase from Supplier on the Purchase History page.
In the Purchase History page, Shop Owner can filter history by selecting Supplier and Product. Filtering can also be done with date range selection. Details will show Purchase Date, Order ID, Supplier Name, Product Name, Condition, Product Serial, Purchase Price, and Warranty. It can be printed to send to Supplier.
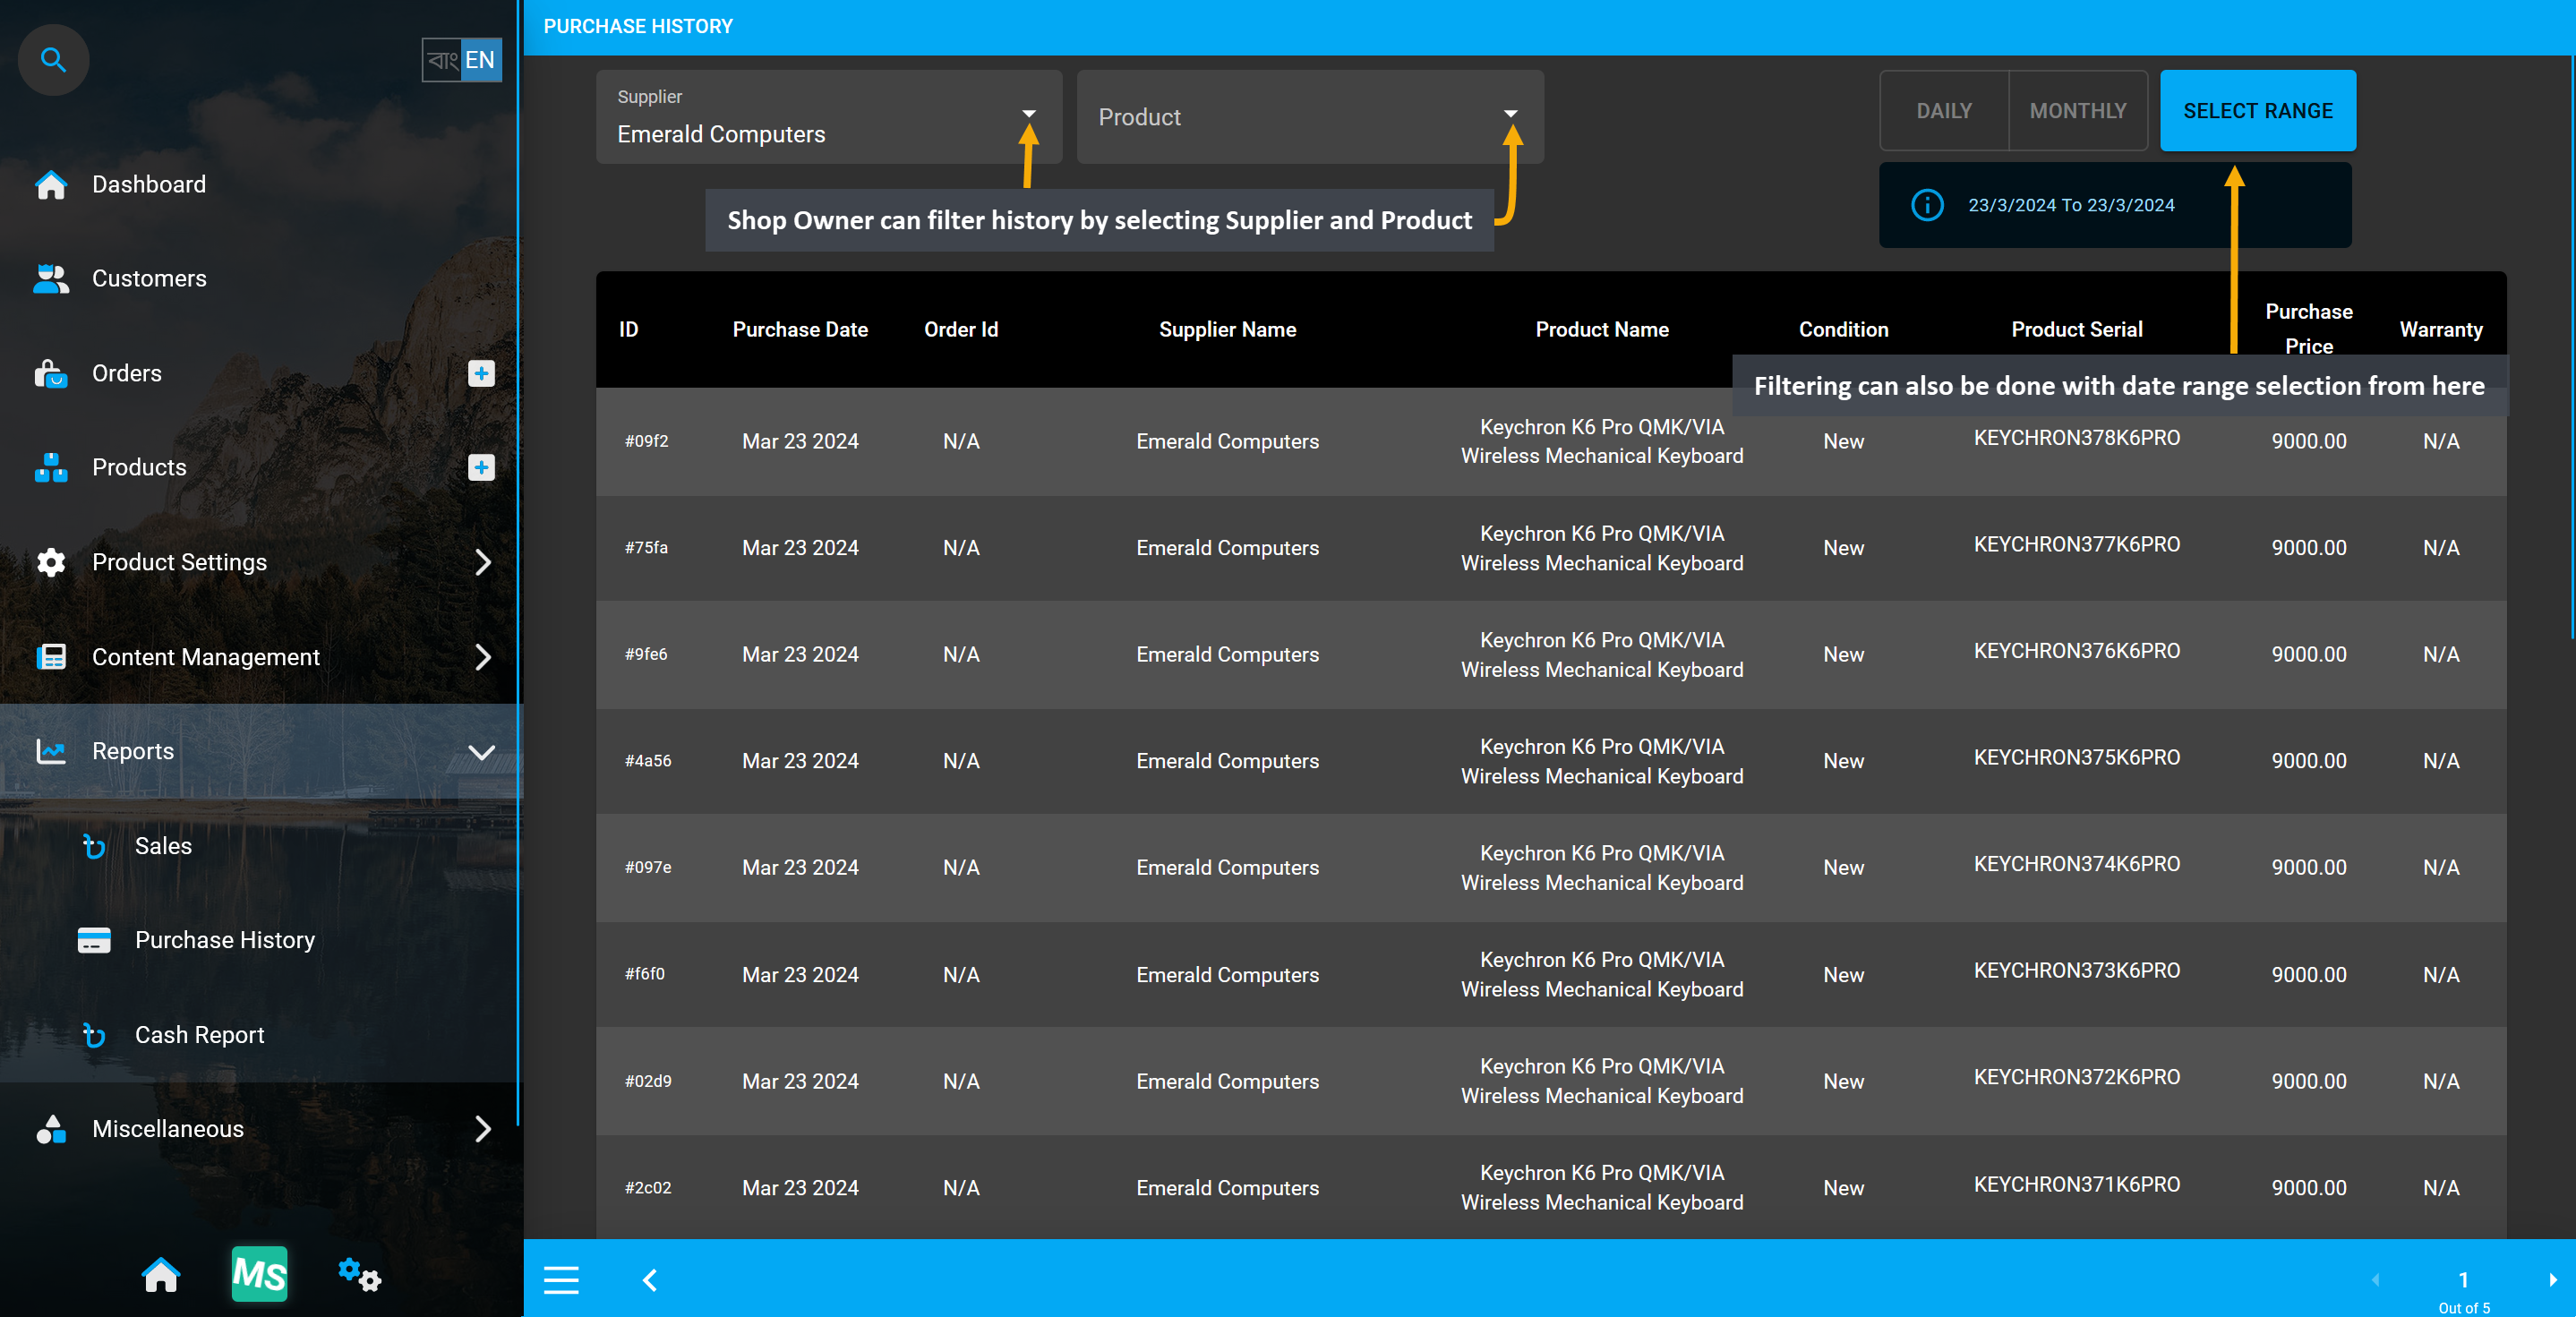
Image 8: Shop Owner can filter history by selecting Supplier and Product and also use date filter.
Purchase History can also be filtered with range selection. Click the Select Range button to find and view the purchase history of any week or month by clicking on the start and end range selector.

Image 9: Click the Select Range button to find and view the purchase history of any week or month.