To setup the Basic, Legal, and Social details of the Tenant, please follow these steps:
Setup Tenant Details
Tenant Details can be edited by clicking the Tenant Selector which will open the Tenant Selection menu. There, from the list of Tenants, choose the Tenant to edit by clicking the Edit button beside the Tenant name.
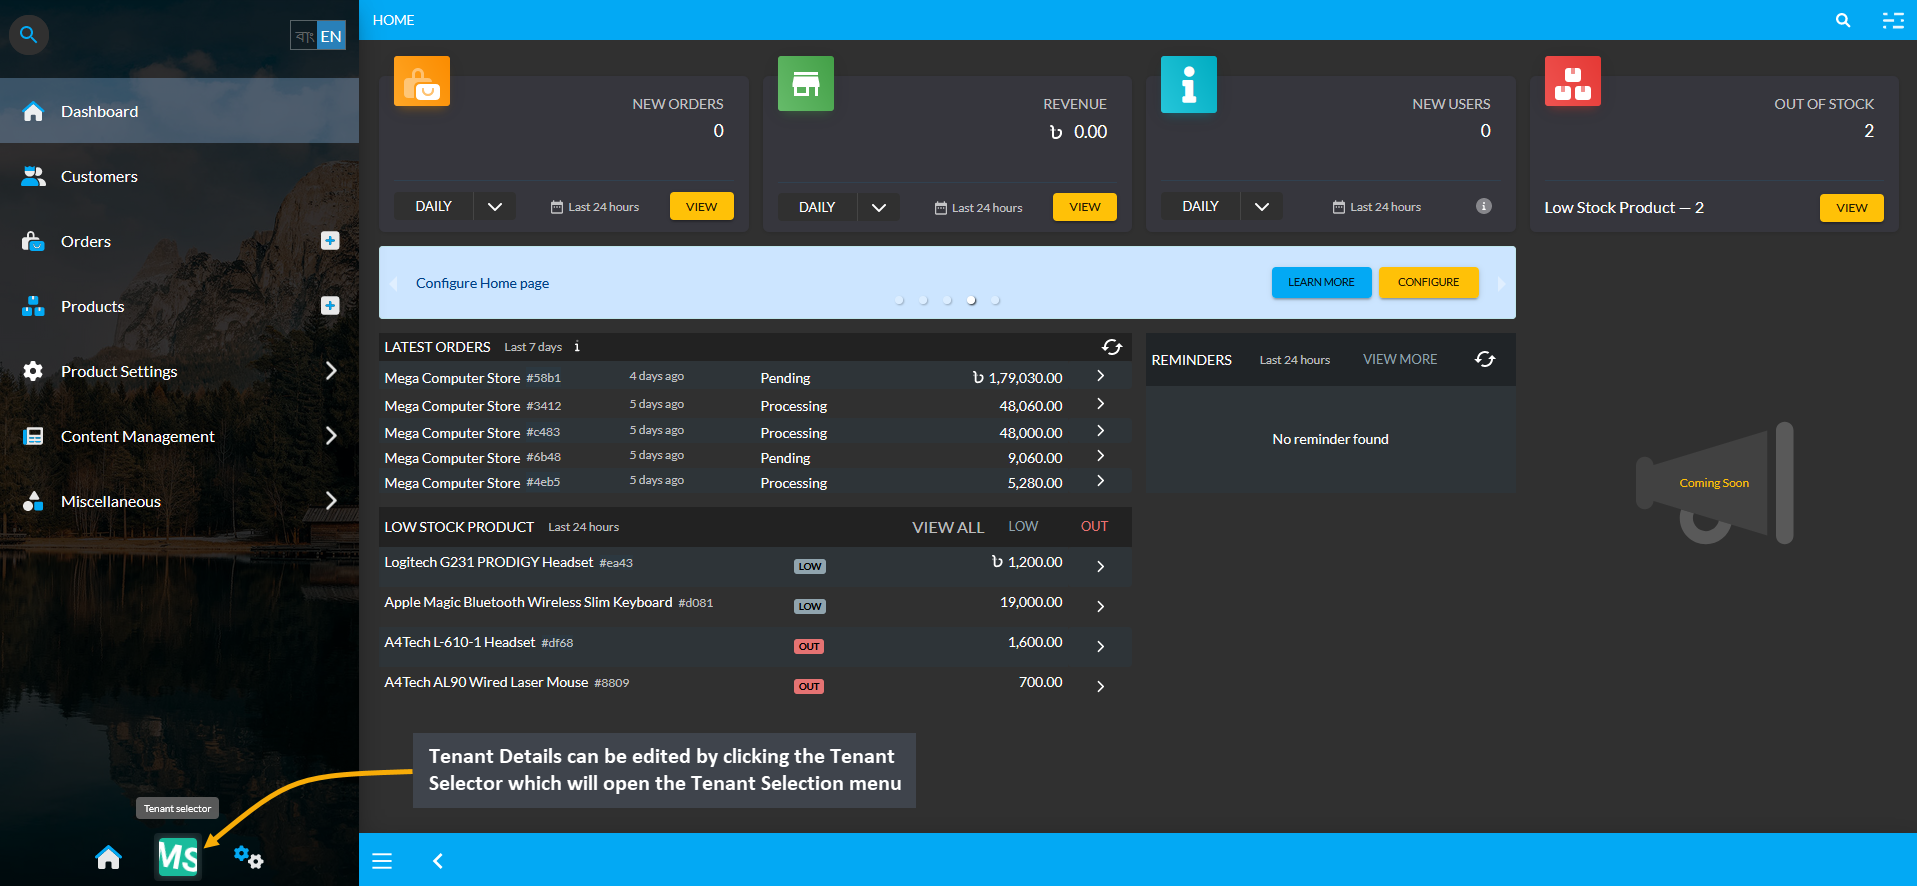
Image 1: Tenant Details can be edited by clicking the Tenant Selector to open Tenant Selection menu.
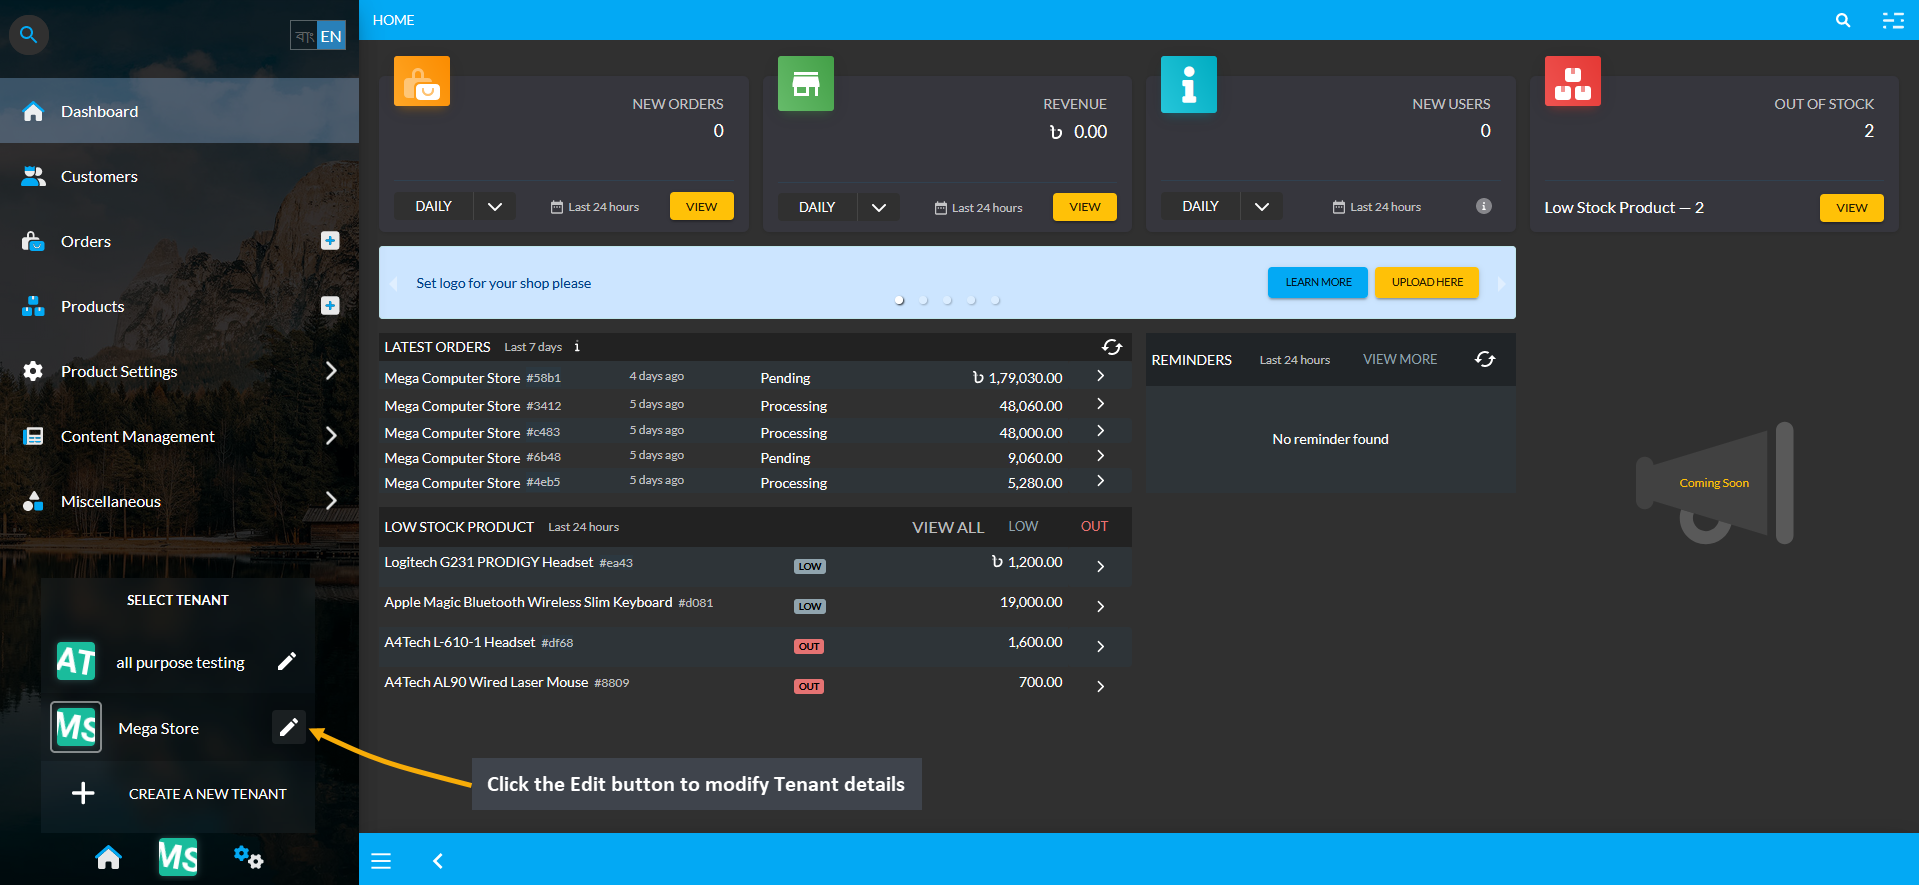
Image 2: Click the Edit button to modify Tenant details from the Tenant Selection menu.
Basic Information
Setting up the basic information includes uploading a Shop Logo, Banner, and creating a Shop Name, Slogan, and Description. Click Next to proceed to subsequent steps for setting up business information for the Shop.
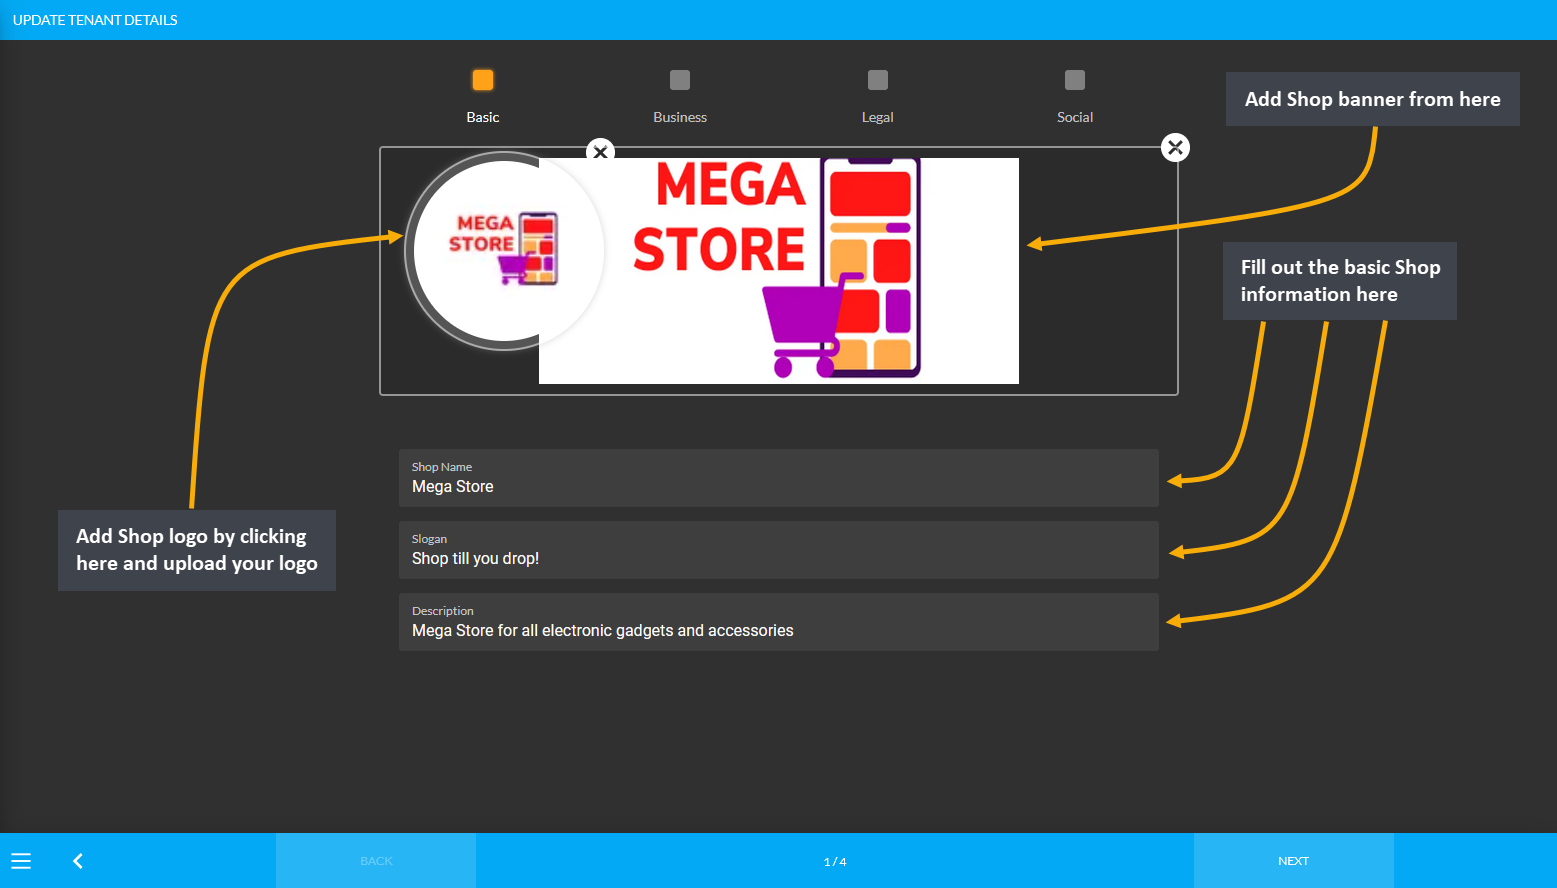
Image 1: Setup Basic Shop information with Logo, Banner, Shop Name, Slogan, and Description.
The second part of completing the basic information includes setting up Business Name and Shop Type. Based on the type of the Shop, select - Sole Proprietorship, Partnership, Limited Private Company, or Limited Public Company.
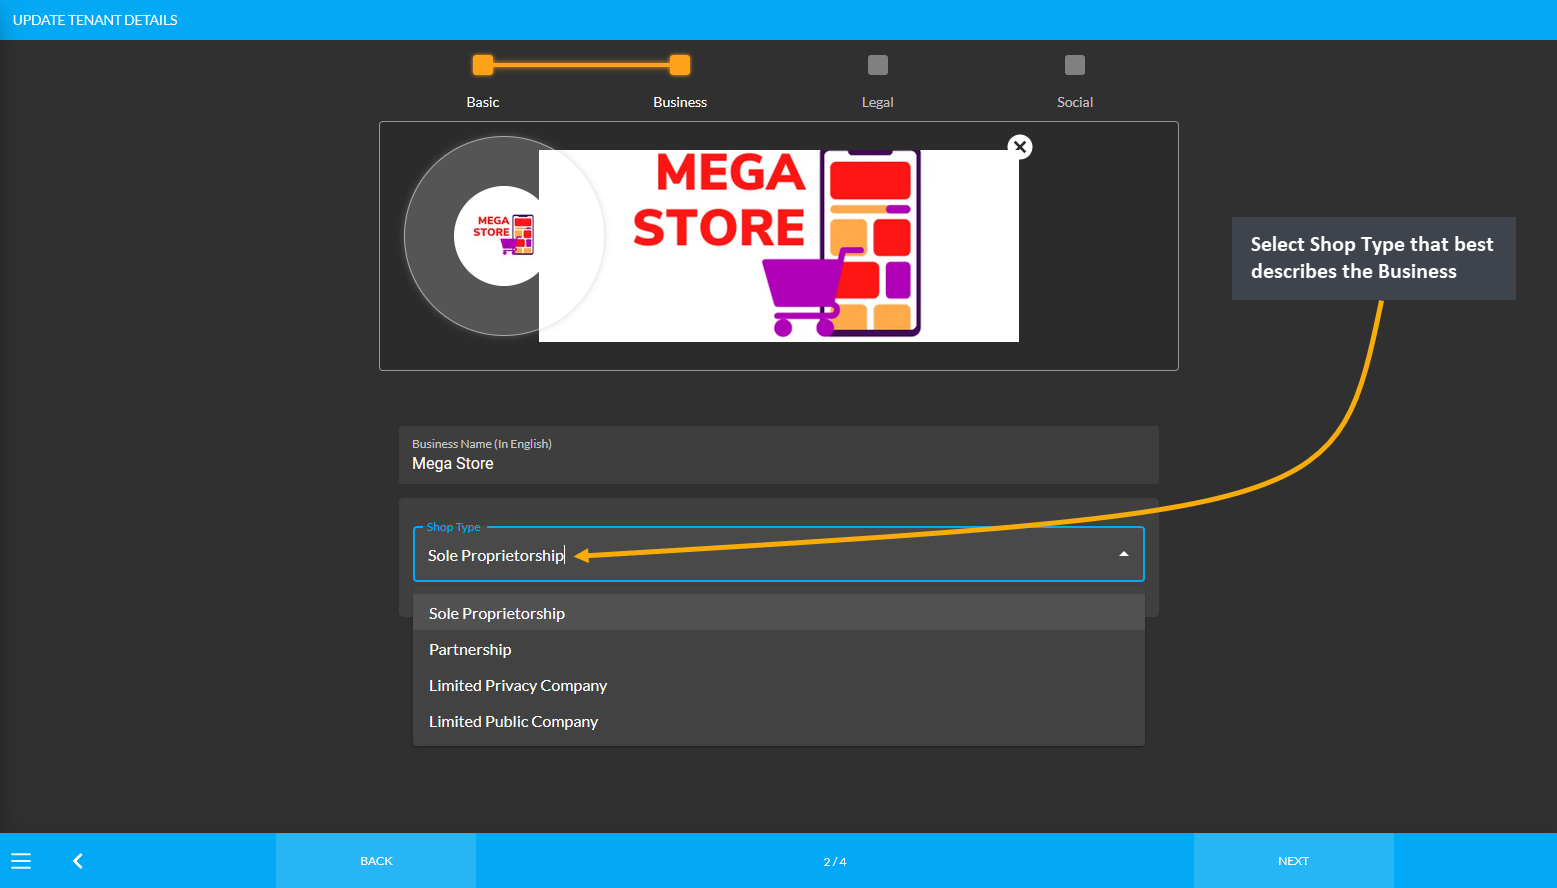
Image 2: Complete Basic Shop information by setting up Business Name and Shop Type from options.
Legal Information
Setup legal information by adding Tax Identification Number (TIN), Business Identification Number (BIN), Trade License Number and uploading a TIN Certificate, BIN Certificate, and Trade License according to the government law. These Certificates need to be uploaded in PDF format and after they are successfully uploaded, a Success button will be visible which will indicate that the TIN, BIN, and Trade License Numbers were added to the Shop.
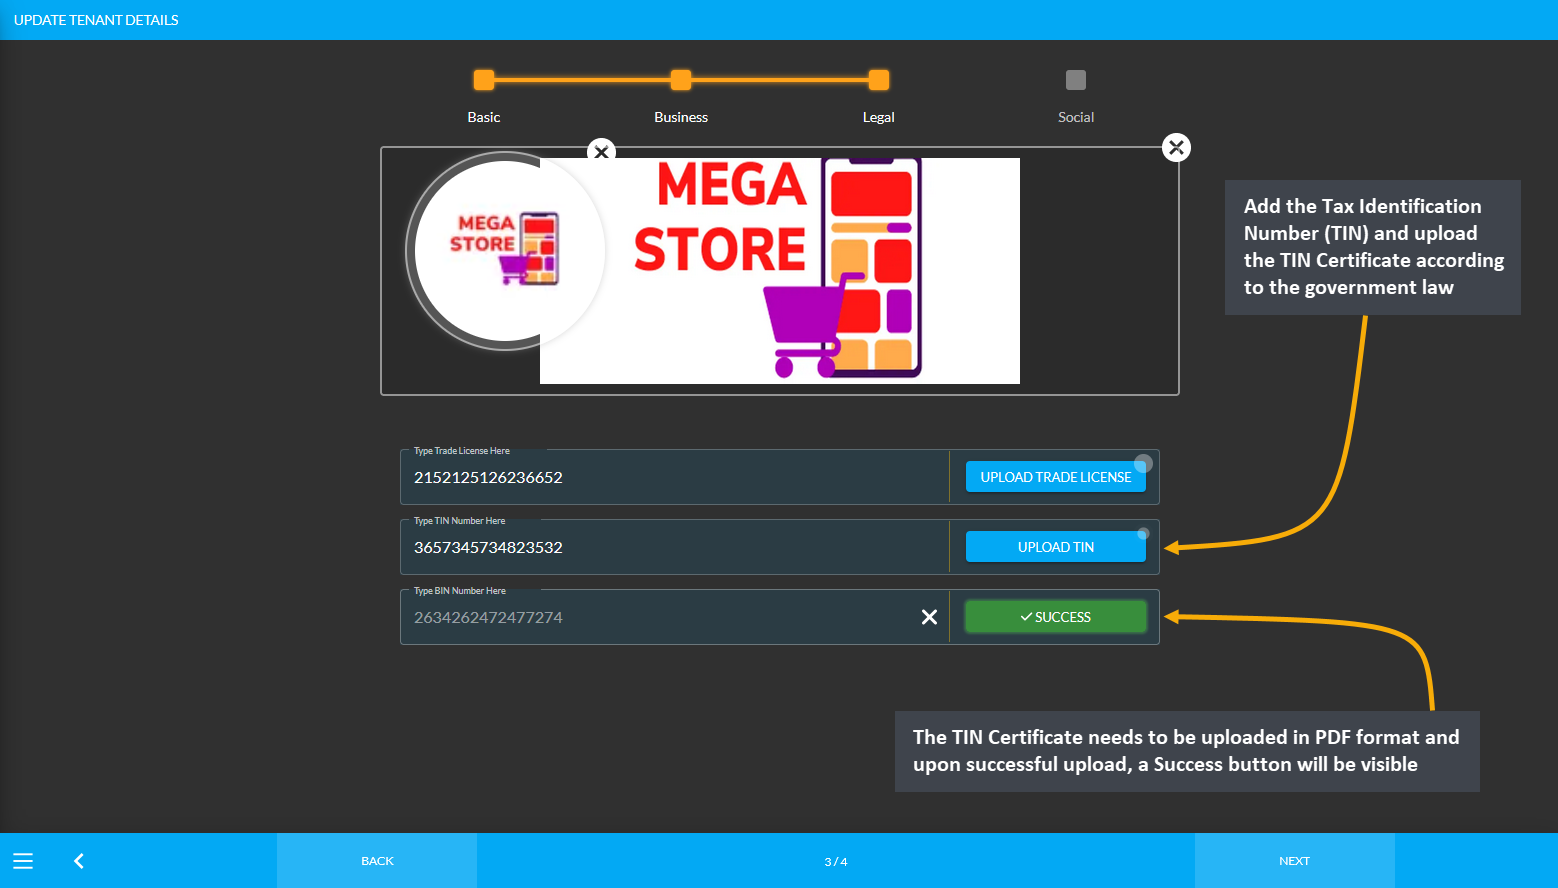
Image 1: Setup Tax Identification Number (TIN), Business Identification Number (BIN), Trade License Number.
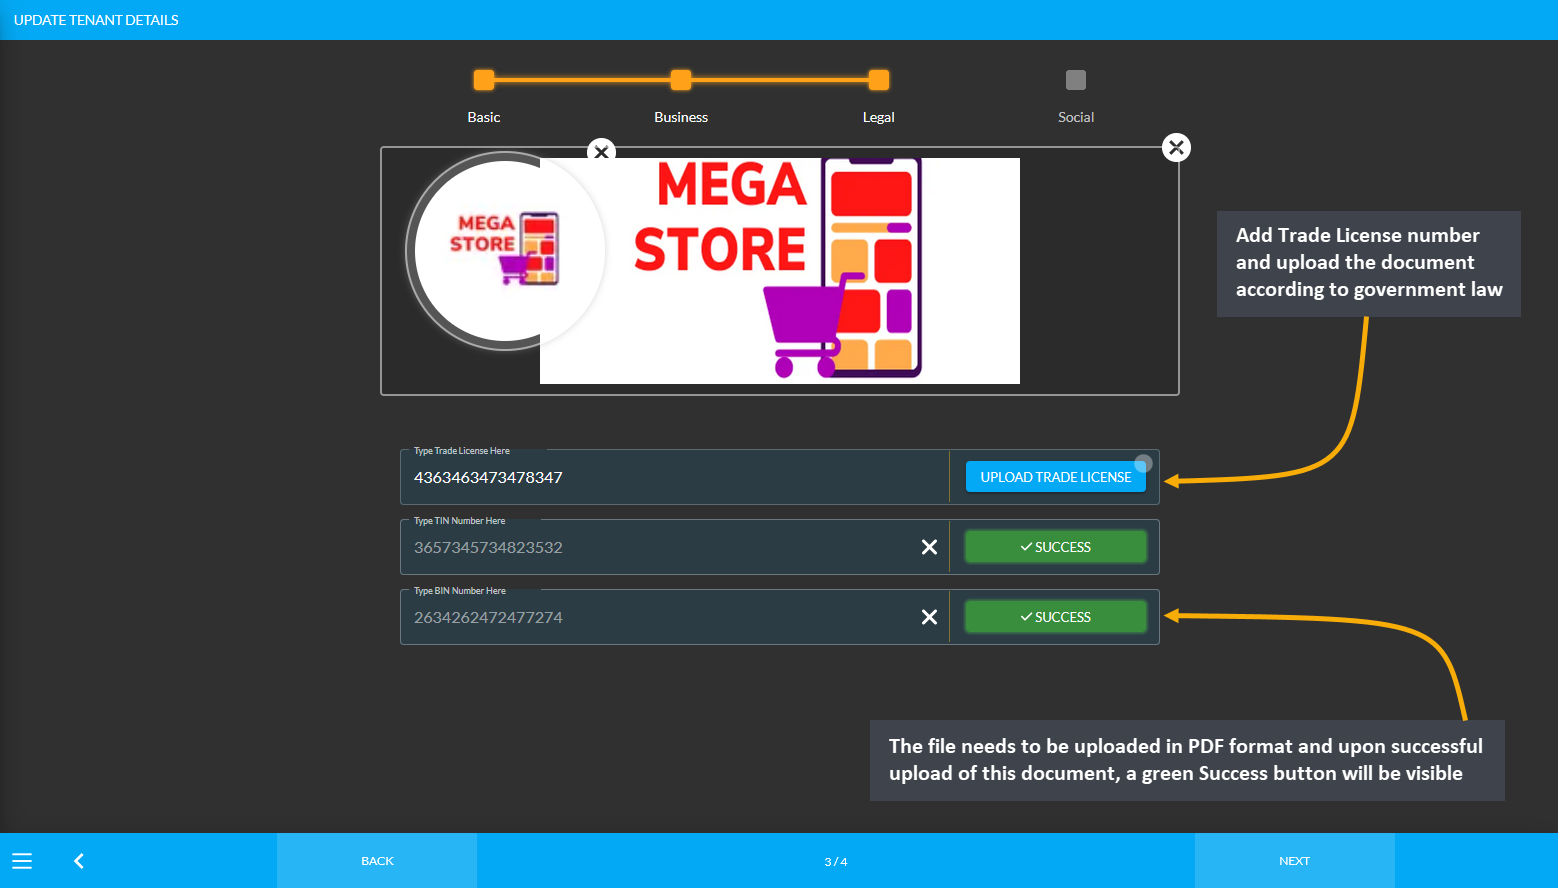
Image 2: The TIN Certificate, BIN Certificate, and Trade License need to be uploaded in the PDF format.
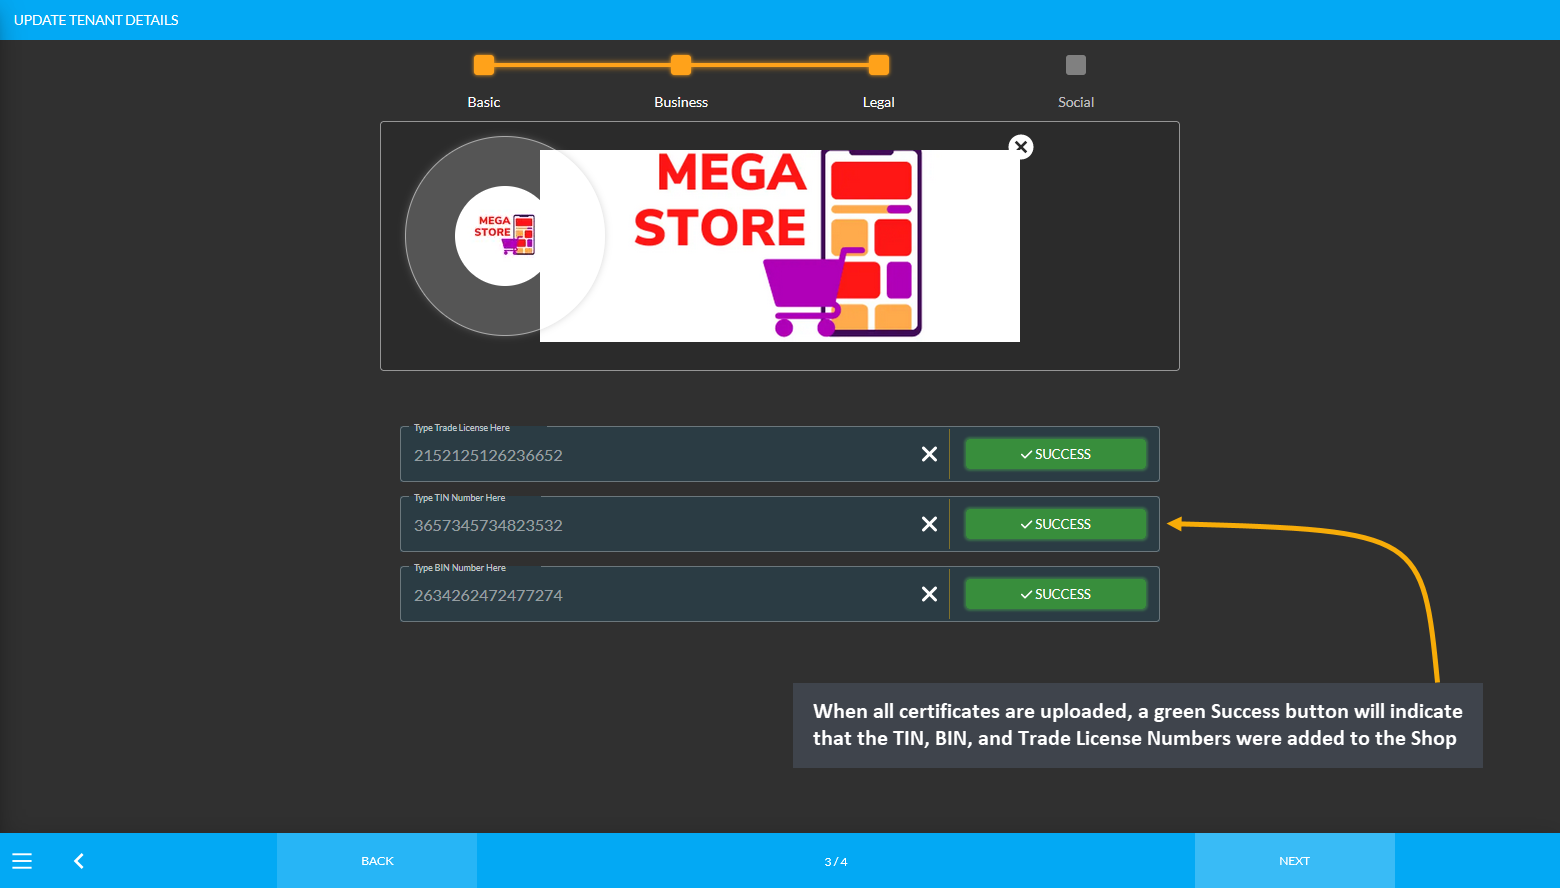
Image 3: A Success button will show indicating that the TIN, BIN, and Trade License Numbers were added.
Social Information
Another important step towards setting up the Tenant Account is filling out the social information of the Shop. To complete this step, add email address, support phone number, and other social media accounts as needed. Add a valid phone number to setup the Support Phone Number. Click Submit to save all the information successfully.
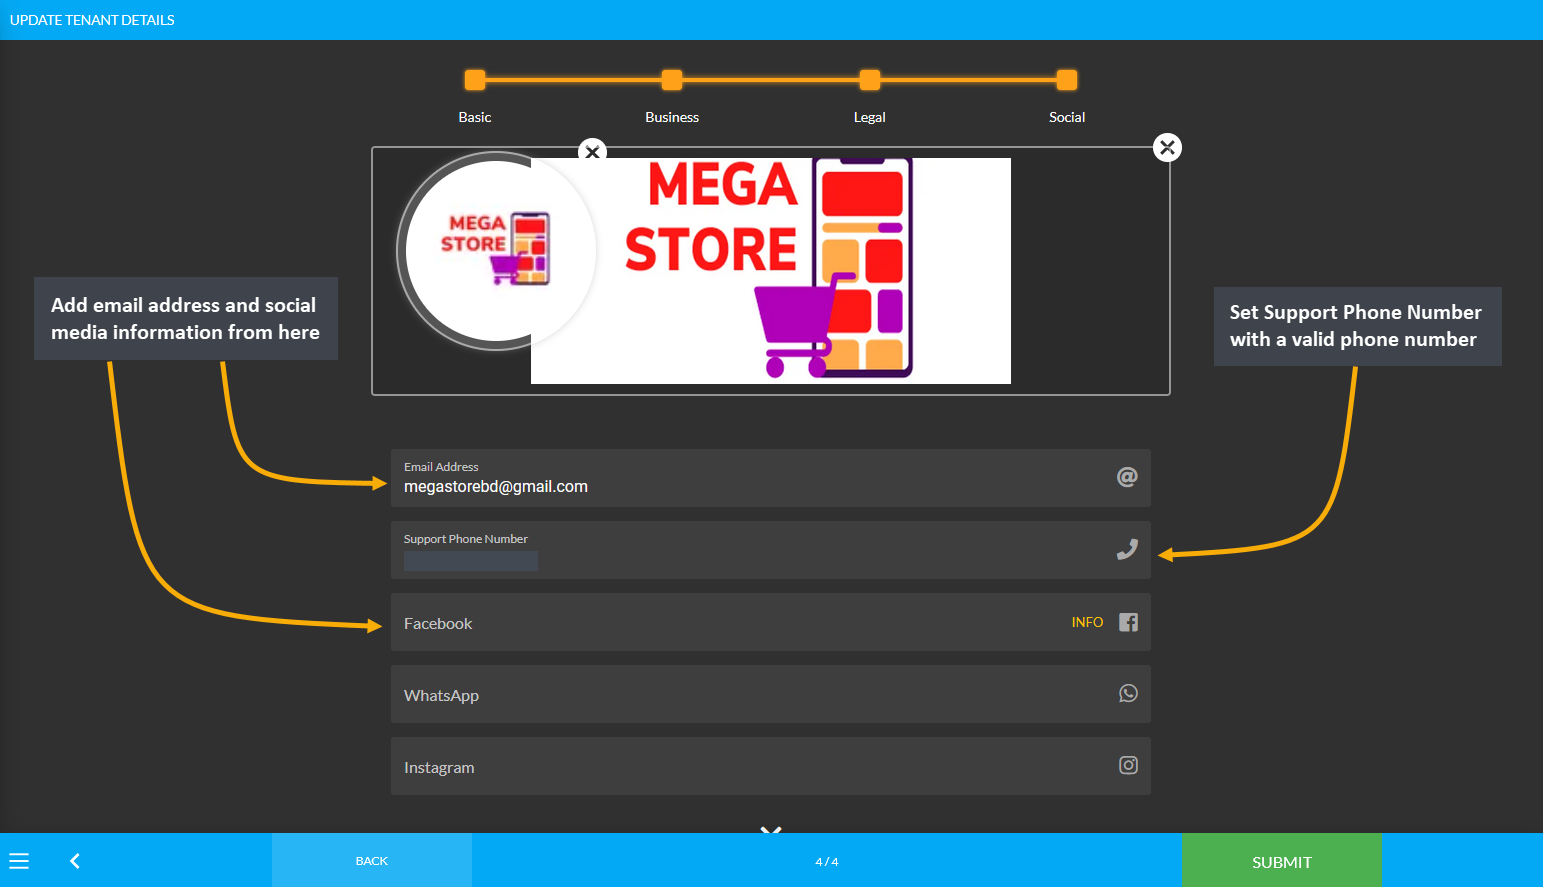
Image 1: Setup Shop Social information with email address, support phone number, and social media accounts.