Create and Manage Tags
This section discusses on how to create, edit, view, and delete Tags from Product Settings.
Create and Manage Tags
Options to create tags can be found under Product Settings. Choose Tags from there and click on the + icon to create new tags for the shop. On the Create Tag page, there are options to select Tag Type. Also, set Tag Name and Tag Description below which are two boxes to upload logo and banner for tags. There is a toggle button to activate and deactivate tags. Click Submit to save all the changes as shown in the example screenshot.
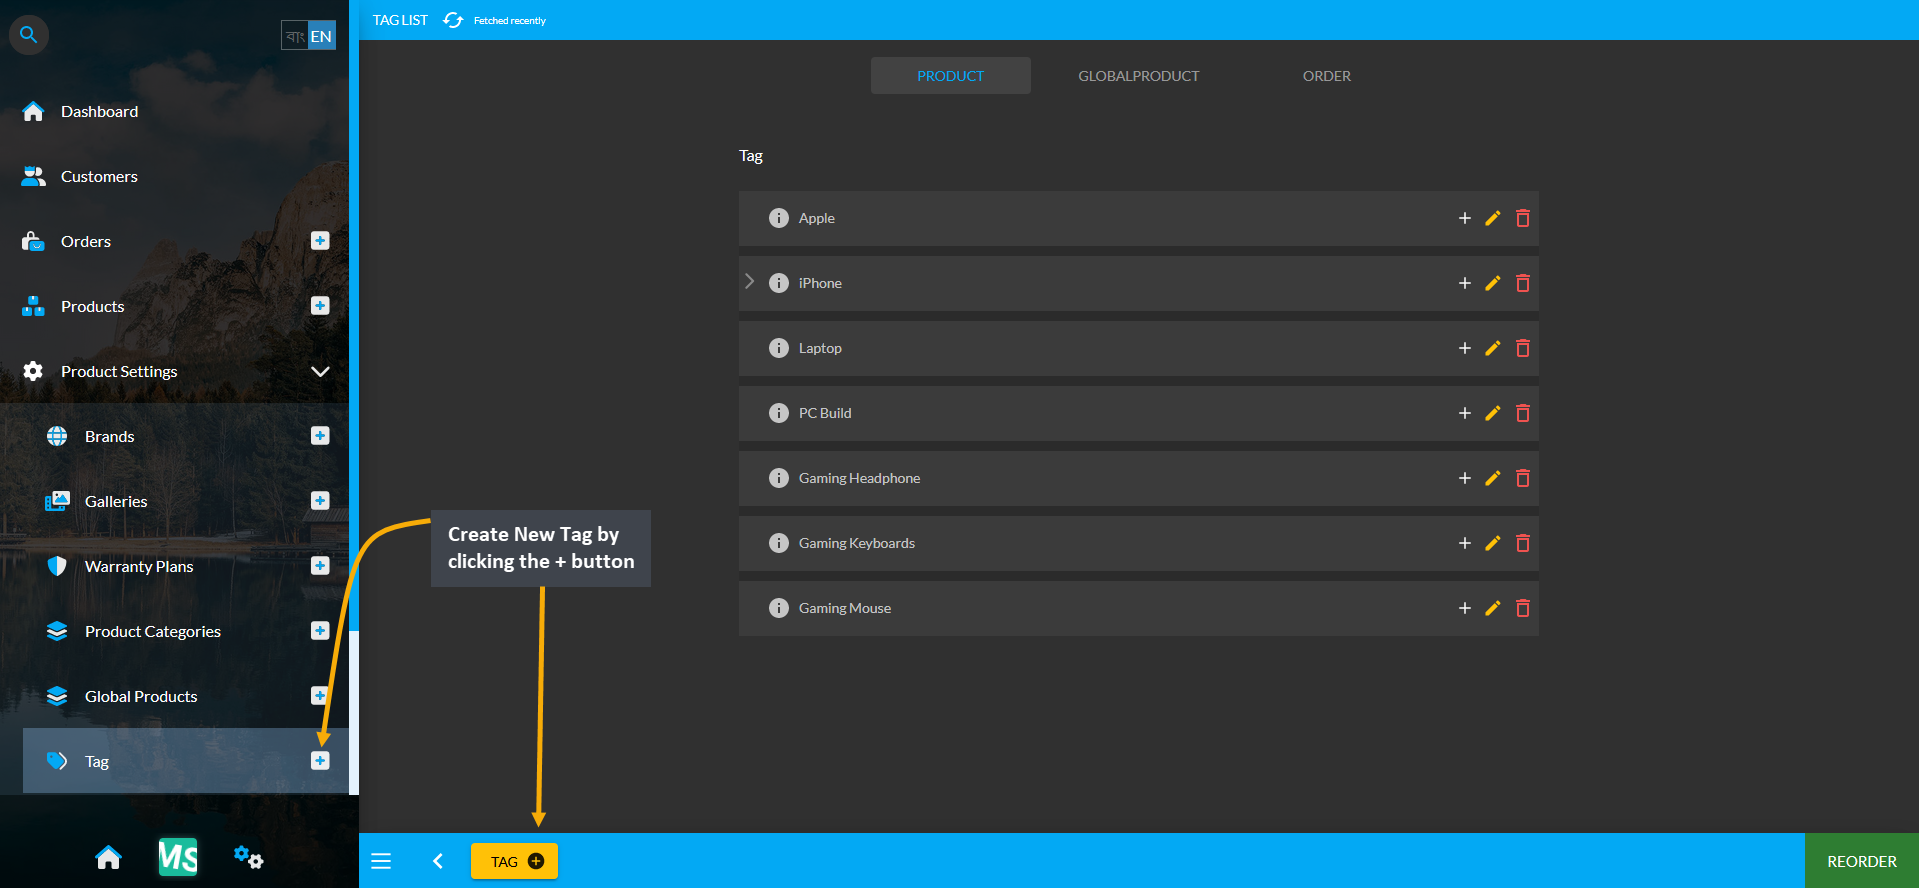
Image 1: Click the + button to create New Tags for the Shop filter from Tags tab under Product Settings.
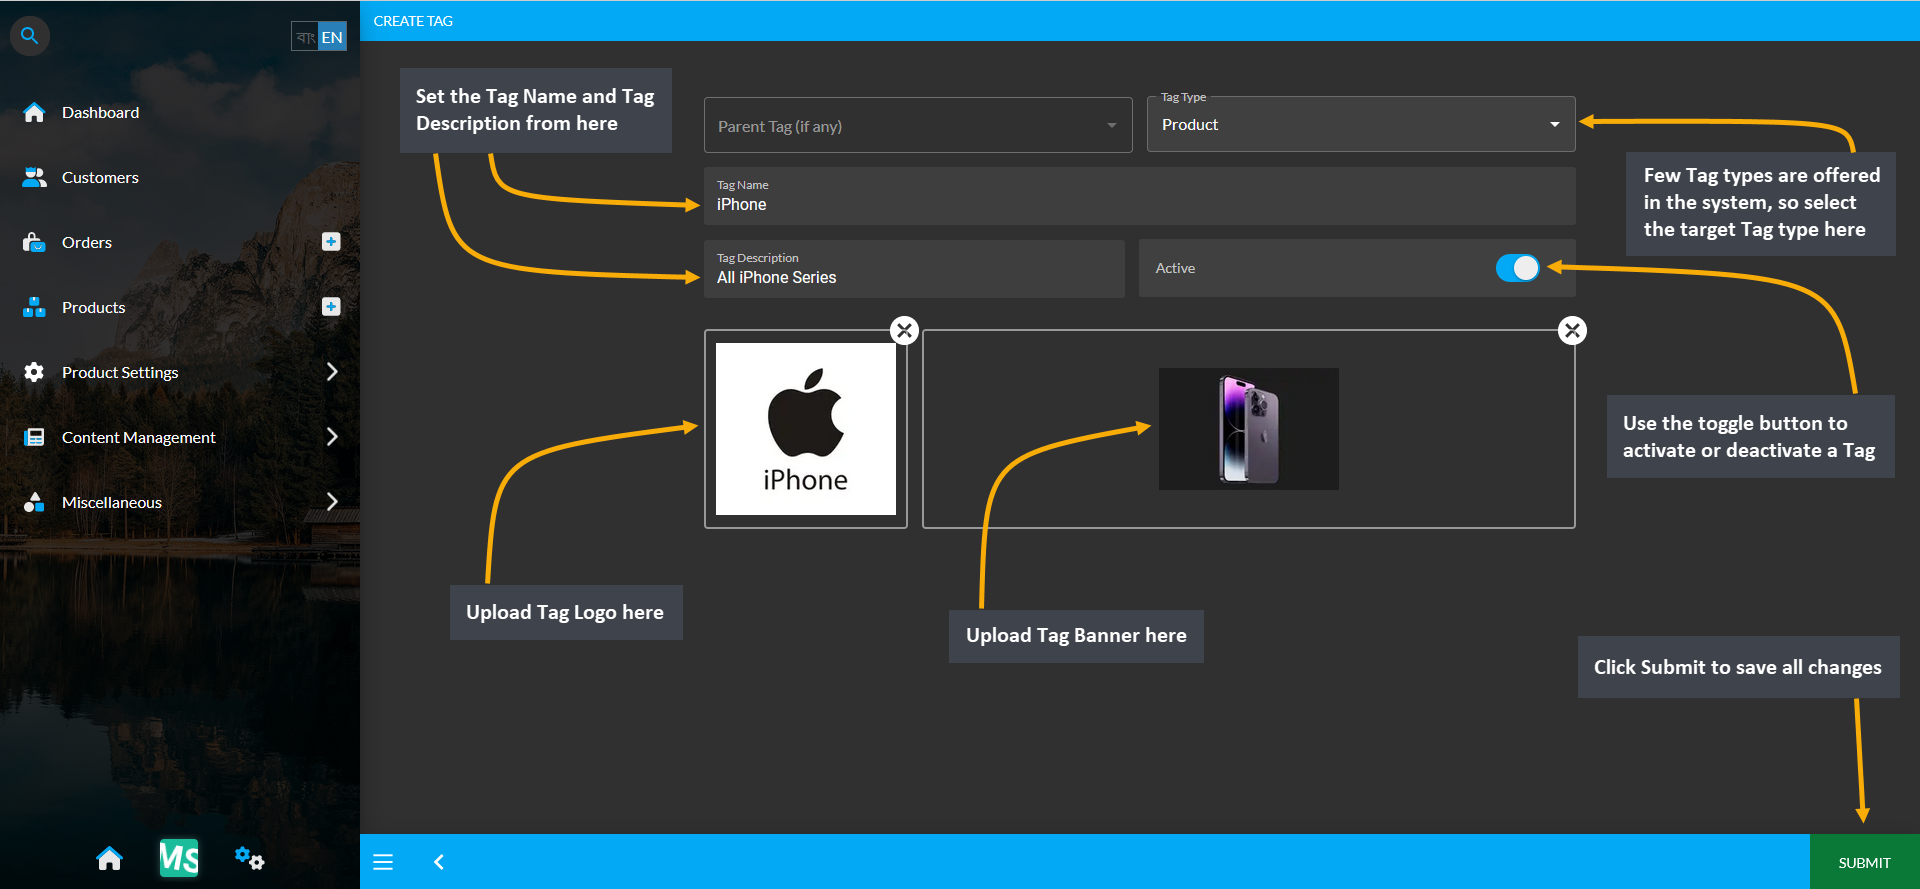
Image 2: Select Tag Type, set Tag Name, Description and upload Logo and Banner to create Parent Tag.
Tags on the Website
The Tags created in the system will display on The Website. For instance, if Apple Tag is selected, it will bring the search results of all the Product(s) with Apple tags in The Website as shown in the screenshot below.
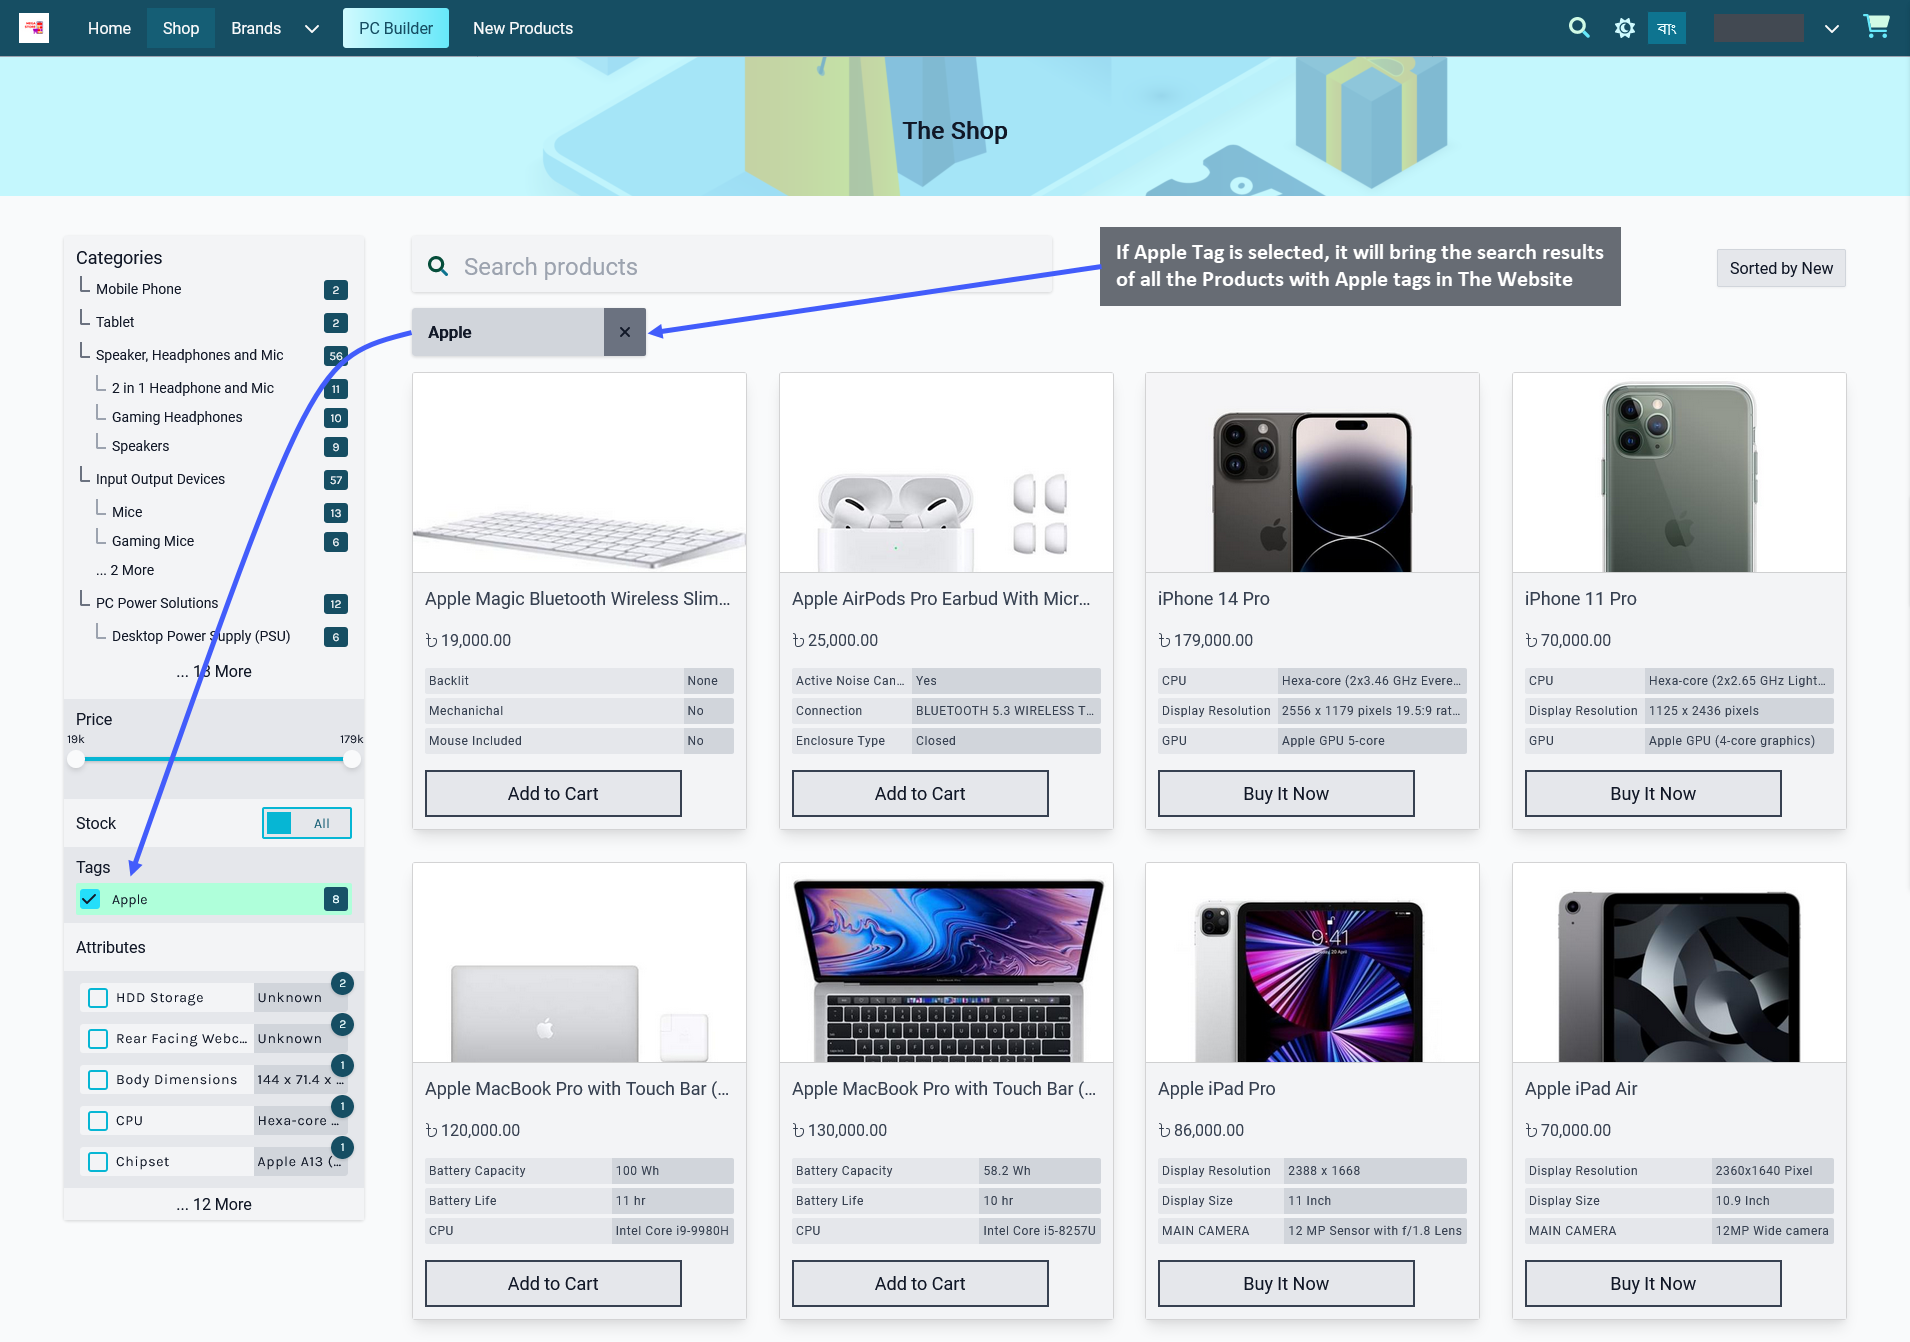
Image 3: If a Tag is selected, it will bring search results of all Products with that Tag in The Website.
View Tags List
View the list of existing tags by clicking on the Tags module from the left side panel. The page will display the list of Tags created. To delete any tag individually, click the Delete Button to immediately delete the tag. There is an Edit Button beside the Delete Button through which details for Tags can be edited and updated.
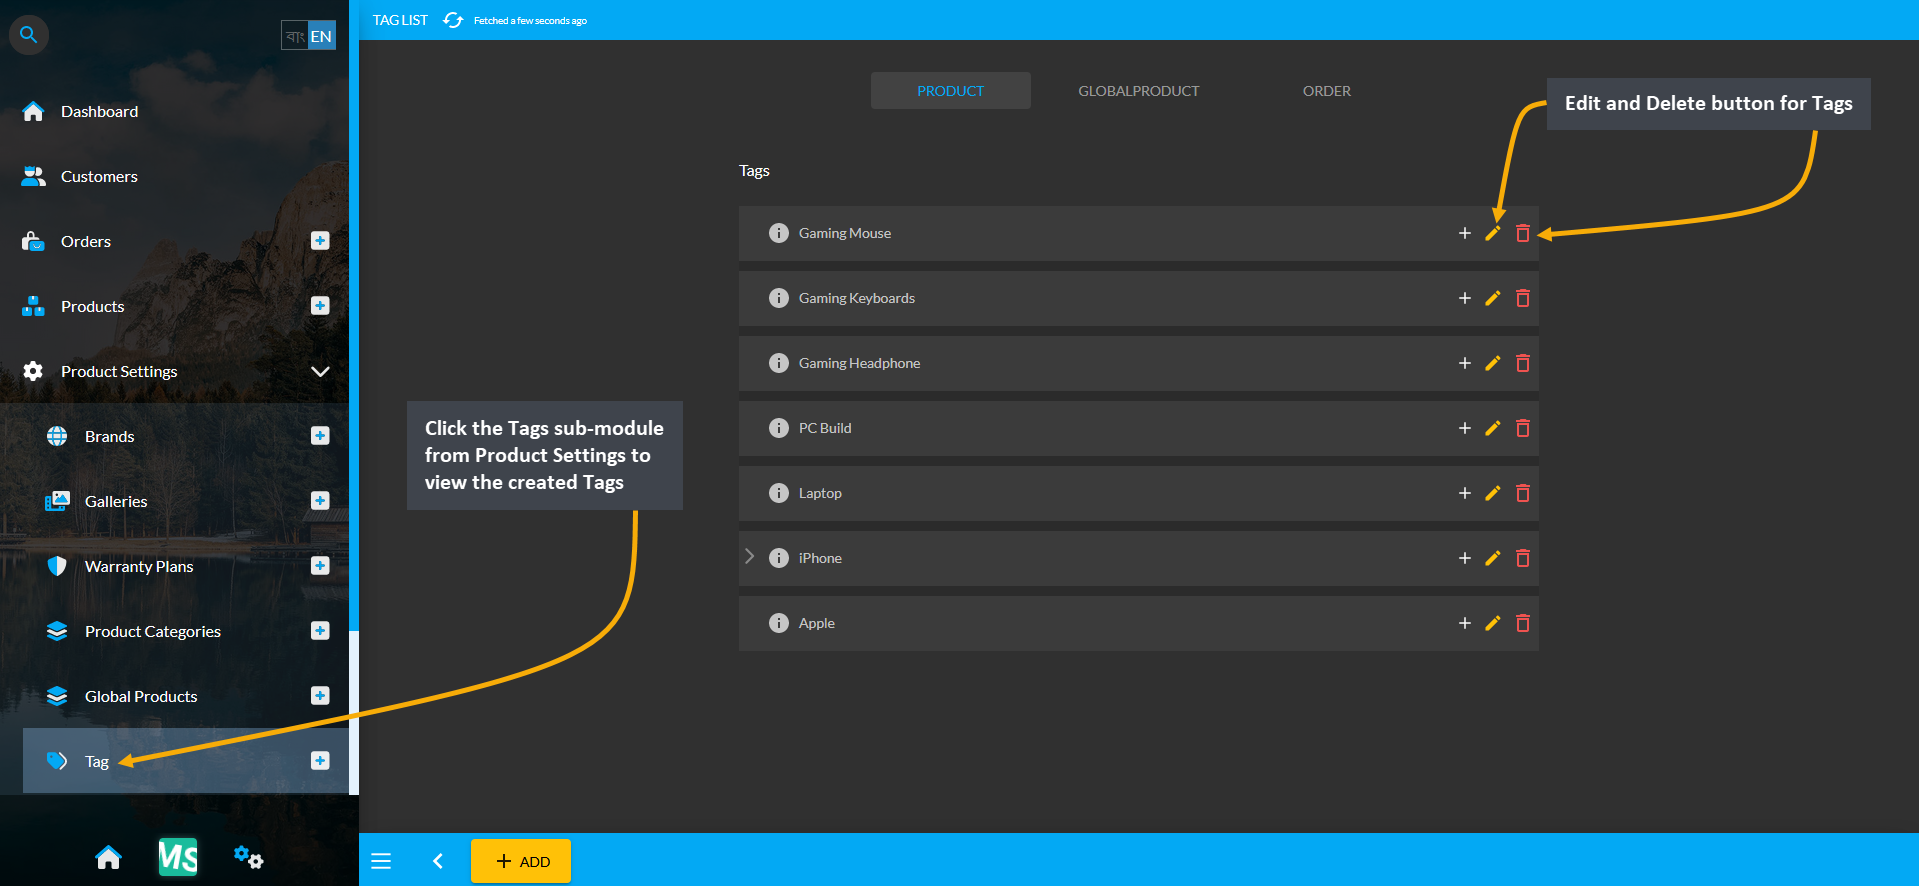
Image 4: View the list of already created Tags from Tags module under Product Settings.
Clicking on the Edit Button will redirect to this page where details for any Tags can be edited and updated.
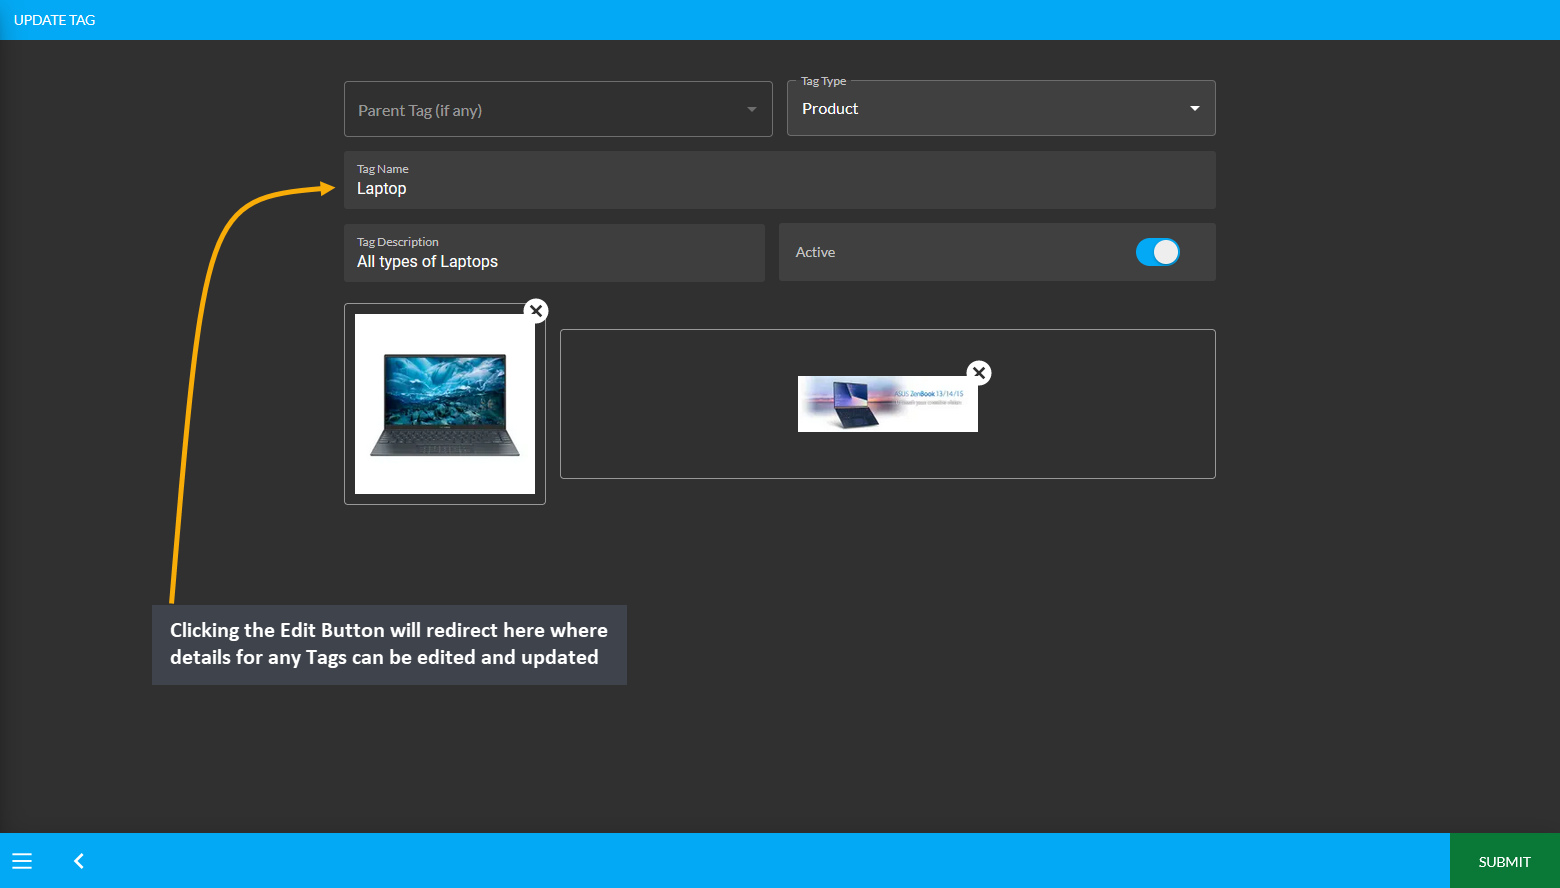
Image 5: Clicking the Edit Button will redirect here where details for any Tags can be edited and updated.